Our site contains ads and uses Amazon affiliate links. We may earn a small commission at no extra cost to you. We know ads can be distracting, and we’re sorry for any inconvenience they cause. It helps us keep the site running. Thanks for your understanding and supporting us!
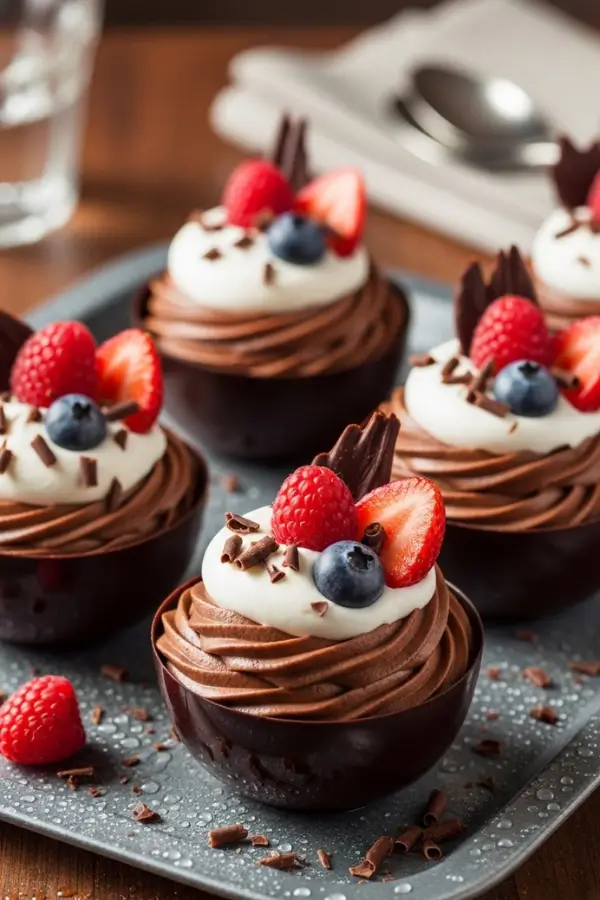
If you can’t get enough of hot chocolate during the winter, you’ll love these hot chocolate mousse cups.
They’re light, creamy, and packed with rich chocolate flavor. Each spoonful feels like a cozy sip of hot cocoa, only more indulgent.
You’ll love how simple they are to make. No fancy tools, just a few ingredients and a little chilling time.
They look beautiful in small cups and are perfect for parties, holidays, or a special night in.
Top them with whipped cream or mini marshmallows, and you’ve got a dessert that’s as comforting as it is delicious.
Why This Recipe Stands Out
- Completely Edible Experience: No dishes to wash since the chocolate cup is part of the dessert, making cleanup effortless.
- Make-Ahead Friendly: Prepare both mousse and cups up to 2 days in advance, leaving you stress-free before entertaining.
- Customizable Portions: Individual servings ensure perfect portion control and elegant plating for every guest.
- Rich Yet Light Texture: Whipped cream creates an airy mousse that feels luxurious without being heavy.
- Minimal Ingredients Needed: Despite looking fancy, this recipe requires just a handful of simple ingredients.
- Perfect for Special Occasions: Ideal for any celebration deserving of chocolate.
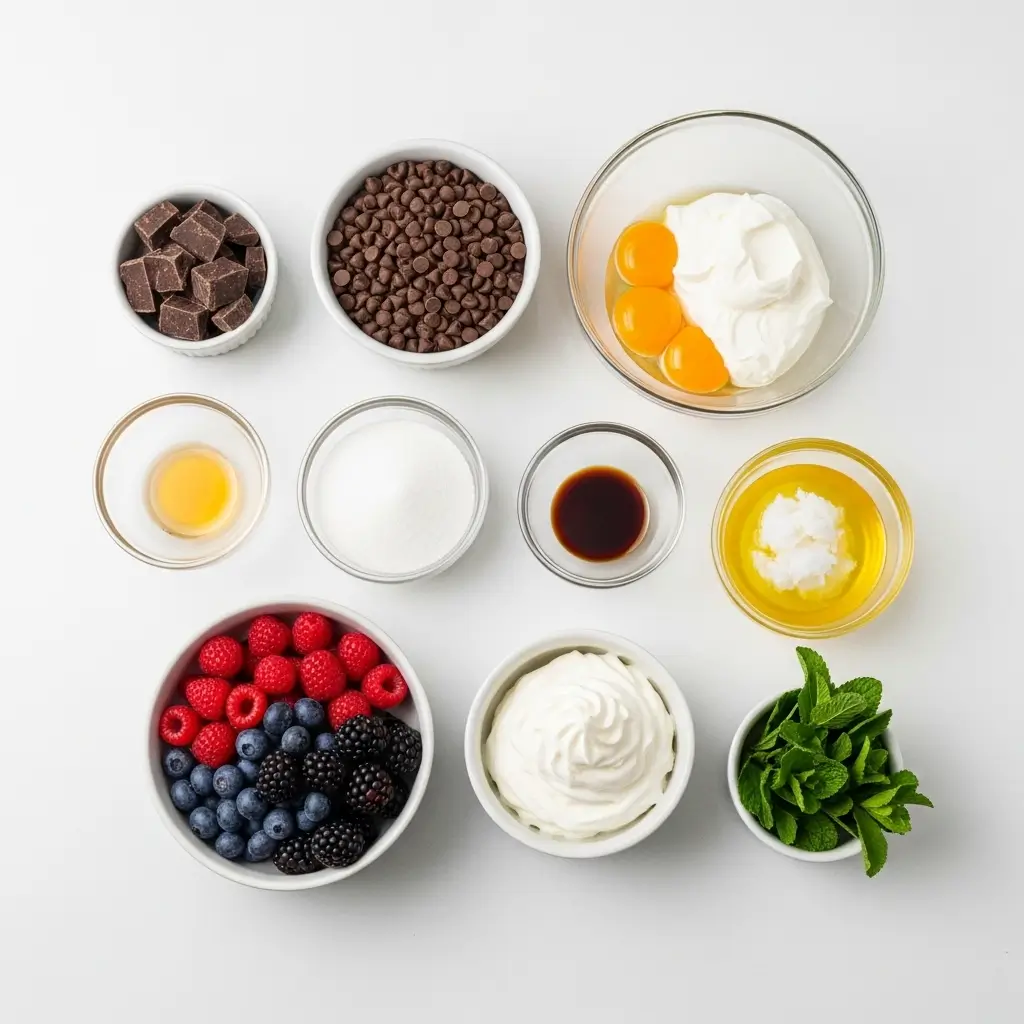
Ingredients You’ll Need
For the Chocolate Cups
- 12 oz semi-sweet chocolate chips
- 1 tablespoon coconut oil or vegetable oil
For the Chocolate Mousse
- 8 oz dark chocolate, chopped (60-70% cacao)
- 2 cups heavy cream, divided
- 3 tablespoons granulated sugar
- 4 large egg yolks
- 1 teaspoon vanilla extract
- Pinch of salt
For Garnish
- Fresh raspberries or strawberries
- Whipped cream
- Chocolate shavings
- Mint leaves (optional)
Tools to Use
- Double boiler or microwave-safe bowl
- Silicone cupcake molds or paper cupcake liners
- Food-grade pastry brush
- Mixing bowls (various sizes)
- Electric hand mixer or stand mixer
- Whisk
- Rubber spatula
- Piping bag with star tip
- Baking sheet
- Plastic wrap
How to Make the Hot Chocolate Mousse Cups
Step-1: Prepare Your Workspace
Line a baking sheet with parchment paper. Set out your silicone molds or paper cupcake liners on the tray.
Having everything organized before you start will make the process smoother.
Ensure all bowls and utensils are completely dry, as water can seize chocolate.
Step-2: Melt the Chocolate for Cups
Combine chocolate chips and coconut oil in a microwave-safe bowl.
Microwave in 30-second intervals, stirring between each burst until smooth and glossy.
The chocolate should be warm, not hot, to prevent burning.
Alternatively, melt over a double boiler, stirring constantly. The oil helps create a thinner coating that’s easier to work with.
Step-3: Create the Chocolate Shells
Spoon 2 tablespoons of melted chocolate into each mold.
Use your pastry brush to paint the chocolate up the sides, creating an even layer about 1/8 inch thick.
Work quickly before the chocolate begins to set. Make sure there are no thin spots that could crack later.
Rotate the mold as you brush to ensure complete coverage.
Step-4: Chill the Cups
Place the baking sheet with molds in the refrigerator for 15-20 minutes. The cups should feel firm to the touch when ready.
Don’t rush this step, as insufficiently chilled cups will be too fragile to handle.
Once set, carefully peel away the silicone or paper liner. Handle gently to avoid fingerprints or cracks.
Step-5: Make the Mousse Base
Heat 1 cup of heavy cream in a saucepan over medium heat until small bubbles form around the edges.
Don’t let it boil. Meanwhile, whisk egg yolks with sugar and salt in a bowl until pale yellow and slightly thickened.
This takes about 2 minutes of vigorous whisking.
Step-6: Temper the Egg Mixture
Slowly drizzle the hot cream into the egg yolk mixture while whisking constantly.
This process, called tempering, prevents the eggs from scrambling. Add the cream in a thin, steady stream.
Pour the mixture back into the saucepan.
Cook over low heat, stirring continuously until it thickens enough to coat the back of a spoon.
Step-7: Add the Chocolate
Remove from heat and add chopped dark chocolate to the warm custard.
Let it sit for 2 minutes to soften. Add vanilla extract. Stir until completely smooth and glossy.
The residual heat will melt the chocolate perfectly. Transfer to a clean bowl.
Cover with plastic wrap, pressing it directly onto the surface to prevent skin formation.
Refrigerate for 2-3 hours until completely cold.
Step-8: Whip the Cream
Pour the remaining 1 cup of cold heavy cream into a chilled bowl.
Beat with an electric mixer on medium-high speed until soft peaks form.
The cream should hold its shape but still have a slight droop when you lift the beaters.
Be careful not to overbeat, as it can become grainy.
Step-9: Fold the Mousse Together
Remove the chilled chocolate mixture from the refrigerator. Whisk it briefly to loosen.
Add one-third of the whipped cream and gently fold using a rubber spatula.
Use broad, sweeping motions from the bottom of the bowl up and over.
Once mostly combined, add the remaining whipped cream. Fold until no white streaks remain, but don’t overmix or you’ll deflate the mousse.
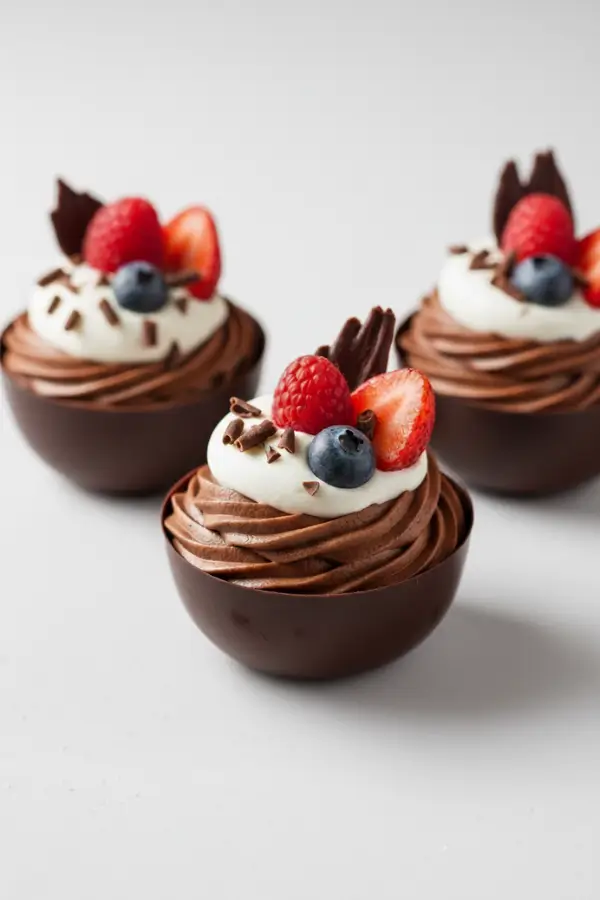
Step-10: Fill and Garnish
Transfer mousse to a piping bag fitted with a large star tip.
Pipe generous swirls into each chocolate cup, starting from the center and spiraling outward.
Alternatively, spoon the mousse in for a more rustic look.
Top with fresh berries, a dollop of whipped cream, chocolate shavings, or a mint leaf.
Refrigerate until ready to serve, at least 30 minutes.
Related Recipes You’ll Love to Try
- Best Eggnog Snickerdoodles: Cozy Twist on a Classic
- Cranberry Goat Cheese Mini Tarts for Holiday Appetizers
- Easy Gingerbread Pudding Cups: No-Bake Dessert
- White Chocolate Peppermint Fudge: Quick & Festive Dessert
Nutritional Information
Per serving (1 mousse cup):
- Calories: 385
- Protein: 5g
- Fat: 28g
- Carbohydrates: 32g
- Sodium: 45mg
Note: Nutritional values are approximate and may vary based on specific ingredients used.
Tips for Success
- Use Quality Chocolate: The chocolate is the star here, so choose brands you love eating on their own for best flavor.
- Keep Everything Cold: Chill your mixing bowl and beaters before whipping cream for better volume and stability.
- Don’t Skip Tempering: Taking time to properly temper eggs prevents curdling and creates silky-smooth mousse.
- Work Quickly with Melted Chocolate: Chocolate sets fast, so have your brush and molds ready before melting.
- Test Cup Thickness: If cups are too thin, add a second coat of chocolate after the first layer sets.
- Fold Gently: Overmixing deflates the mousse, so use light, confident strokes when incorporating whipped cream.
- Allow Time to Set: Both cups and mousse need adequate chilling time for proper texture and easy handling.
- Serve at Right Temperature: Let mousse sit at room temperature for 10 minutes before serving for optimal creaminess.
Common Mistakes to Avoid
- Using Hot Chocolate: Make sure melted chocolate cools to warm (not hot) before creating cups to prevent melting the molds.
- Rushing the Chilling Process: Insufficiently chilled cups will crack when you remove them from molds.
- Overbeating Whipped Cream: Stop at soft peaks; overbeaten cream becomes grainy and won’t fold smoothly.
- Adding Hot Custard to Chocolate: Let the egg custard cool slightly before folding in whipped cream to prevent deflation.
- Skipping the Plastic Wrap: Exposed mousse develops an unappetizing skin during refrigeration.
- Using Water-Contaminated Tools: Even tiny drops of water will cause chocolate to seize and become grainy.
- Filling Cups Too Early: Fill chocolate cups just before serving or within a few hours to keep them crisp.
Creative Serving Ideas
- Berry Medley Topping: Arrange fresh raspberries, blueberries, and blackberries on top for a colorful, antioxidant-rich finish.
- Espresso Enhancement: Dust with cocoa powder mixed with instant espresso for a sophisticated mocha flavor.
- Caramel Drizzle: Add homemade or store-bought salted caramel sauce in a decorative pattern across the mousse.
- Crushed Cookie Garnish: Sprinkle crumbled Oreos, biscotti, or amaretti cookies for added crunch and flavor.
- White Chocolate Contrast: Create white chocolate cups using the same method for an elegant color variation.
- Festive Presentation: Place cups on individual dessert plates with raspberry coulis and mint for restaurant-style plating.
- Ice Cream Pairing: Serve alongside a small scoop of vanilla bean or coffee ice cream for temperature contrast.
Frequently Asked Questions
Can I Make These Mousse Cups Ahead of Time?
Yes, both components can be prepared in advance. Make chocolate cups up to 3 days ahead and store in an airtight container in the refrigerator.
Prepare mousse up to 2 days before serving. Fill cups no more than 4 hours before serving to maintain cup crispness.
What Type of Chocolate Works Best for the Cups?
Semi-sweet or dark chocolate chips work perfectly for cups because they contain stabilizers that help them set firmly.
Avoid using chocolate bars alone as they can be too soft.
Adding a small amount of coconut oil or shortening helps create a thinner, more workable coating.
Can I Use Store-Bought Chocolate Cups Instead?
Absolutely, store-bought chocolate dessert cups are a convenient time-saver available in most baking aisles or online.
They work perfectly if you want to focus your effort on making amazing mousse.
Just ensure they’re food-grade quality chocolate.
How Do I Prevent Chocolate Cups from Cracking?
Ensure your chocolate coating is thick enough (about 1/8 inch) and completely set before unmolding.
Let cups come to room temperature for 5 minutes before handling.
Warm hands can crack cold chocolate, so work quickly and gently.
Can I Make This Recipe Without Eggs?
Yes, you can make eggless mousse by melting chocolate with 1/4 cup hot cream, cooling completely, then folding in 2 cups whipped cream.
The texture will be lighter and less custard-like but still delicious. This version requires at least 4 hours of refrigeration.
How Long Will Filled Mousse Cups Last?
Filled mousse cups are best enjoyed within 24 hours for optimal texture.
The mousse remains food-safe for 2-3 days refrigerated, but the chocolate cups may soften from moisture.
Store covered loosely with plastic wrap to prevent absorbing refrigerator odors.
What Can I Use Instead of Heavy Cream?
Heavy cream provides the best texture and stability for mousse.
However, you can substitute whipping cream (30% fat) with slightly less voluminous results.
Avoid half-and-half or milk as they won’t whip properly. Non-dairy options like coconut cream work for vegan versions.
Why Did My Chocolate Seize When Melting?
Chocolate seizes when it comes in contact with even small amounts of water or overheats.
Ensure all bowls and utensils are completely dry.
If using a double boiler, don’t let water touch the chocolate bowl. Melt at low heat or short microwave intervals.