Our site contains ads and uses Amazon affiliate links. We may earn a small commission at no extra cost to you. We know ads can be distracting, and we’re sorry for any inconvenience they cause. It helps us keep the site running. Thanks for your understanding and supporting us!
📊Recipe at a Glance
- Prep Time: 5 minutes
- Cook Time: 0 minutes
- Total Time: 5 minutes
- Servings: 12 servings (frosts 12 cupcakes or one 9-inch layer cake)
- Diet Type: Vegetarian
- Cuisine: American
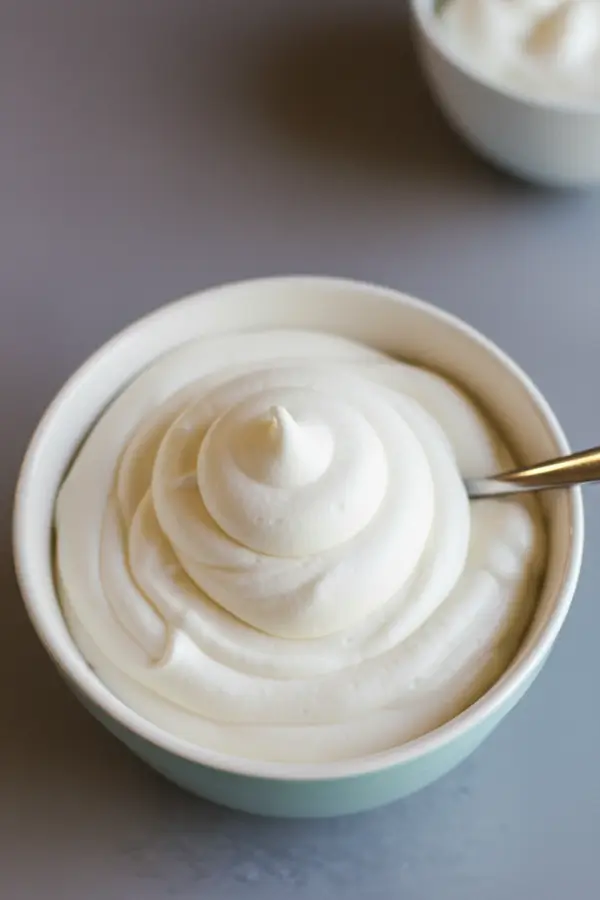
Marshmallow frosting is one of those toppings that instantly makes your desserts feel extra special, and you’re going to love how simple it is to make.
It’s fluffy, glossy, and sweet just like the inside of a toasted marshmallow. You can spread it, pipe it, or swirl it on cupcakes, cakes, brownies, or cookies.
It holds its shape beautifully and adds a fun, nostalgic touch to any treat. You’ll enjoy watching it whip up into soft peaks in just minutes.
Whether you’re baking for a party or just craving something sweet, this marshmallow frosting will take your desserts to the next level.
Why This Recipe Stands Out
- Requires only 4 basic ingredients that you likely already have in your pantry.
- No egg whites needed in the marshmallow fluff version, making it quick and beginner-friendly.
- Ready in just 5 minutes from start to finish with minimal effort.
- Perfect texture that’s fluffy yet stable enough for piping beautiful swirls.
- Less sweet than traditional buttercream with a delicate, balanced flavor.
- Versatile enough to frost cakes, cupcakes, cookies, or even brownies.
- Can be toasted with a kitchen torch for that campfire marshmallow experience.
- Stores well in the refrigerator for several days when kept in an airtight container.
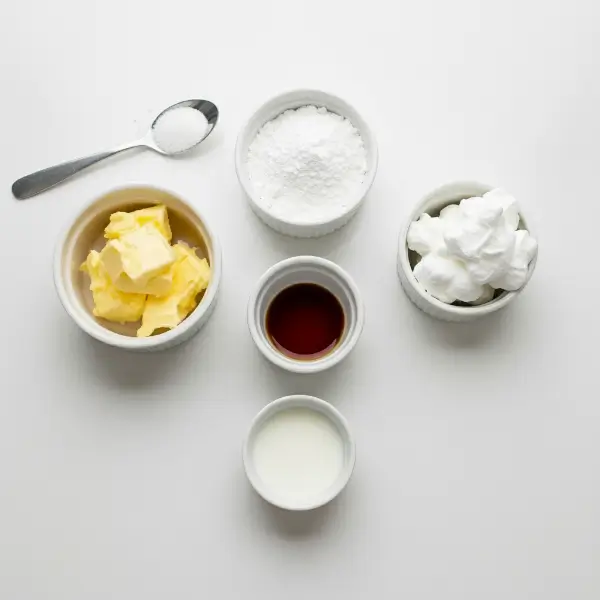
Ingredients You’ll Need
- 1/2 cup (1 stick) unsalted butter, softened to room temperature
- 1 cup powdered sugar
- 7 ounces marshmallow fluff (also called marshmallow creme)
- 1 teaspoon pure vanilla extract
- Pinch of salt (optional but recommended)
- 1-2 tablespoons milk or heavy cream (if needed for consistency)
Tools to Use
- Stand mixer or hand mixer
- Large mixing bowl
- Rubber spatula
- Measuring cups and spoons
- Piping bag and tips (optional)
- Kitchen torch (optional, for toasting)
How to Make the Easy Marshmallow Frosting
Step-1: Prepare Your Butter and Sugar Base
Start by placing your softened butter in a large mixing bowl. The butter should be soft enough to leave a fingerprint but not melted or greasy.
Add the powdered sugar to the bowl. Beat the mixture on low speed for 30 seconds to prevent a sugar cloud.
Gradually increase to medium speed. Continue beating for 2-3 minutes until the mixture becomes light, fluffy, and fully combined.
The texture should be smooth with no visible lumps of powdered sugar.
Scrape down the sides of the bowl with your rubber spatula. This ensures every bit gets incorporated evenly.
Step-2: Add the Marshmallow Fluff
Open your jar of marshmallow fluff. Measure out 7 ounces and add it directly to your butter mixture.
Use your rubber spatula to fold in the fluff by hand first. This prevents the sticky fluff from flying everywhere.
Once partially mixed, use your mixer on low speed. Beat for 1-2 minutes until the fluff is completely incorporated.
The frosting will transform into a cloud-like texture. You’ll notice it becoming lighter and fluffier with each passing second.
Step-3: Mix in Vanilla and Salt
Pour in the vanilla extract. If using salt, add it now. The salt balances the sweetness beautifully.
Beat on medium speed for another minute. The frosting should be smooth, glossy, and perfectly combined.
Taste the frosting at this point. If you prefer it sweeter, add another 1/4 cup of powdered sugar.
If it’s too thick for your needs, add milk one tablespoon at a time. Beat well after each addition.
Step-4: Check Consistency and Adjust
Lift your beater or spatula from the frosting. The frosting should hold soft peaks.
For piping cupcakes, you want it thick enough to maintain shape. For spreading on cookies, a slightly thinner consistency works better.
If too runny, beat in more powdered sugar gradually. If too stiff, thin with a splash of milk.
The perfect consistency feels smooth and spreadable.
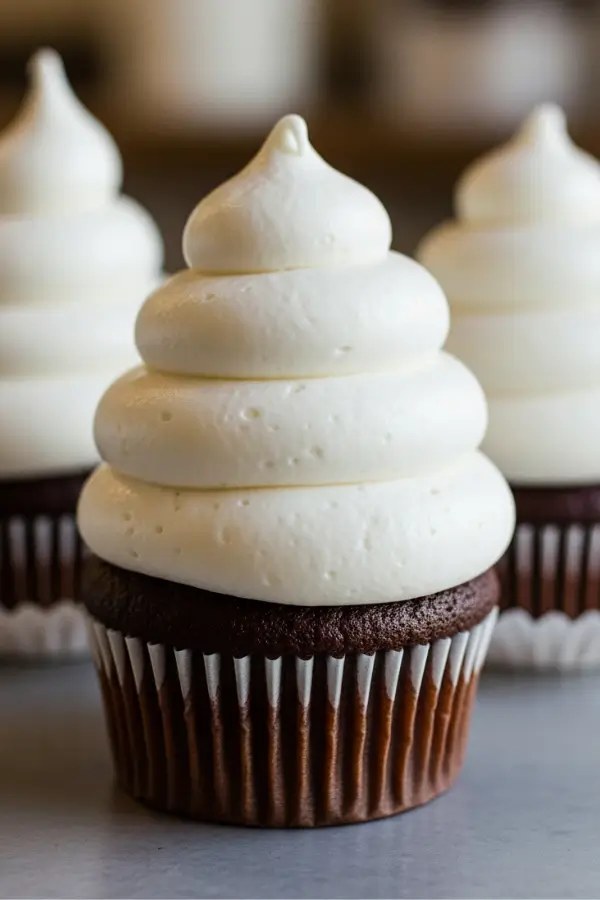
Step-5: Frost Your Desserts
Transfer the frosting to a piping bag fitted with your desired tip.
Alternatively, use a knife or offset spatula for spreading. Frost completely cooled cupcakes or cakes immediately.
The frosting sets slightly as it sits. If piping, work quickly for the best results.
For a toasted effect, use a kitchen torch on high heat close to the frosting.
Move quickly to brown without melting. The frosting develops a golden, caramelized exterior.
Related Recipes You’ll Love to Try
- Best Eggnog Snickerdoodles: Cozy Twist on a Classic
- Cranberry Goat Cheese Mini Tarts for Holiday Appetizers
- Blueberry Overnight Oats: Ultimate Make-Ahead Breakfast
- White Chocolate Peppermint Fudge: Quick & Festive Dessert
Nutritional Information
Per serving (based on 12 servings):
- Calories: 89
- Protein: 0g
- Fat: 4g
- Carbohydrates: 14g
- Sodium: 34mg
Note: Nutritional values are estimates and may vary based on specific ingredients used.
Tips for Success
- Use room temperature butter to ensure smooth mixing and prevent lumps in your frosting.
- Beat the butter and sugar completely before adding marshmallow fluff for the best texture.
- Mix the fluff by hand first with a spatula to prevent it from splattering everywhere.
- Add liquid sparingly when adjusting consistency since a little goes a long way.
- Chill the frosting for 30 minutes if you need it firmer for intricate piping designs.
- Work with cooled baked goods to prevent the frosting from melting or sliding off.
- Store in the refrigerator in an airtight container for up to one week.
- Bring to room temperature before using if refrigerated, and re-whip briefly to restore texture.
- Use pure vanilla extract rather than imitation for the best flavor.
- Toast carefully if desired by holding the torch close with high heat and moving quickly.
Common Mistakes to Avoid
- Using melted or too-soft butter creates a runny frosting that won’t hold its shape.
- Not beating the butter and sugar long enough leaves lumps and creates poor texture.
- Adding marshmallow fluff too quickly makes it difficult to incorporate smoothly.
- Over-mixing after adding fluff can deflate the frosting and make it lose its fluffy texture.
- Frosting warm cakes or cupcakes causes the frosting to melt and slide off completely.
- Skipping the salt results in frosting that tastes one-dimensionally sweet.
- Using coarse salt instead of fine means it won’t dissolve properly in the frosting.
- Not adjusting consistency for your specific needs leads to frustrating piping or spreading.
- Storing at room temperature too long in warm conditions causes the frosting to soften excessively.
- Using old marshmallow fluff that’s dried out or crystallized affects texture and taste.
Creative Serving Ideas
- Top chocolate cupcakes and add crushed graham crackers for instant s’mores cupcakes.
- Frost a vanilla layer cake and decorate with fresh berries for a light summer dessert.
- Sandwich between cookies like sugar cookies or chocolate wafers for homemade cream pies.
- Spread on brownies while slightly warm and let it melt into the crevices.
- Pipe onto hot chocolate for a fancy coffee shop experience at home.
- Use as filling for whoopie pies or macarons for a marshmallow twist.
- Frost carrot cake for an Easter celebration that guests will remember.
- Top banana cupcakes and garnish with mini chocolate chips for extra indulgence.
- Spread on graham crackers and stack for quick no-bake treats.
- Fill cream puffs or eclairs for an elegant dessert with minimal effort.
- Frost red velvet cake for a classic color combination that never fails.
- Toast with a kitchen torch and serve immediately for that campfire marshmallow experience.
Frequently Asked Questions
Can I Make This Frosting without Marshmallow Fluff?
Yes, you can make a Swiss meringue version using egg whites and sugar heated over simmering water.
This traditional method involves whisking egg whites with sugar over a double boiler until the mixture reaches 120-130°F.
Then whipping until stiff peaks form. The result is lighter and can be toasted beautifully.
How Long Does Marshmallow Frosting Last?
Store the frosting in an airtight container in the refrigerator for up to 7 days.
Because this recipe uses butter and doesn’t contain egg whites, you can easily make it in advance and refrigerate until needed.
Bring it to room temperature and re-whip briefly before using.
Can I Freeze Marshmallow Frosting?
Freezing is not recommended for marshmallow frosting. The texture from the marshmallow fluff changes significantly when thawing, resulting in a watery or separated consistency.
It’s best made fresh or stored refrigerated for short-term use.
Why Is My Frosting too Runny?
If your frosting is too runny, add more powdered sugar a couple tablespoons at a time and mix well to stiffen it up.
Warm or humid conditions can also affect consistency. Refrigerate the frosting for 30 minutes to help it firm up before using.
Can I Toast This Frosting?
You can use a kitchen torch to brown this frosting if you use really high heat up close, working quickly so the frosting browns before it melts.
This creates a delicious toasted marshmallow flavor perfect for s’mores-inspired desserts.
What’s the Difference Between Marshmallow Fluff and Marshmallows?
Marshmallow fluff (or marshmallow creme) is a spreadable marshmallow product sold in jars.
Regular marshmallows are solid and won’t work in this recipe. You can find jars of marshmallow fluff at most local grocery stores, often labeled as Jet Puffed Marshmallow Creme.
Can I Use This Frosting for Piping?
Yes, this frosting pipes beautifully when at the right consistency.
If you want to pipe it and have it hold its shape, chill it in the refrigerator for 30 minutes first.
The frosting should hold soft peaks and maintain defined swirls and rosettes.
Do I Need Cream of Tartar?
For the marshmallow fluff version, cream of tartar is not necessary.
If making the meringue version without store-bought marshmallow fluff, you can replace it with 1/4 teaspoon of cream of tartar to help stabilize the egg whites.