Our site contains ads and uses Amazon affiliate links. We may earn a small commission at no extra cost to you. We know ads can be distracting, and we’re sorry for any inconvenience they cause. It helps us keep the site running. Thanks for your understanding and supporting us!
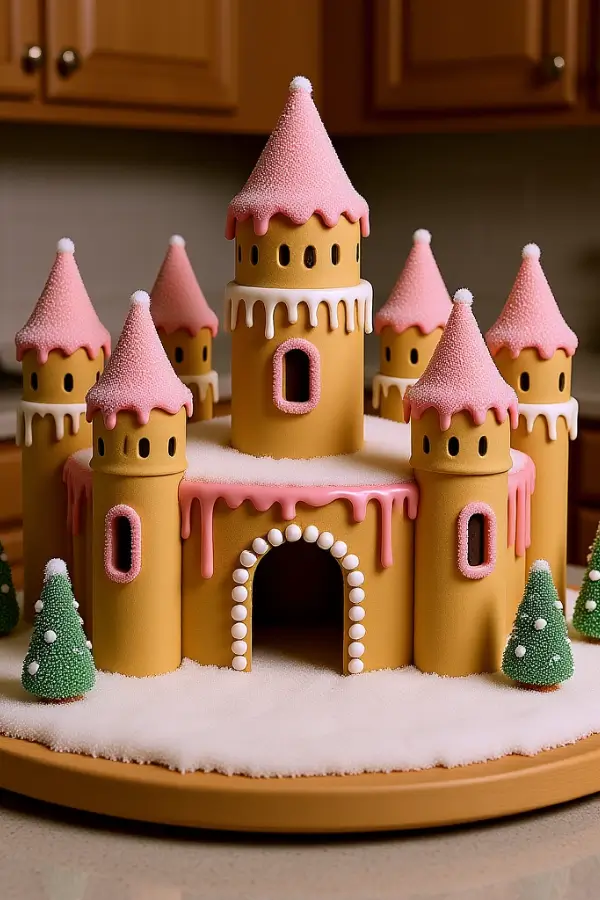
Imagine walking into your kitchen and seeing a towering gingerbread castle glittering with sugar snow, candy windows glowing with light, and turrets crowned with sweet icing.
A centerpiece so magical, it feels like it came straight out of a fairy tale.
And the best part? You built it yourself!
Yes, a gingerbread castle is more ambitious than the classic gingerbread house. More peaks, more towers, and definitely more opportunities for things to wobble or collapse.
But don’t let that scare you. With the right recipe, templates, and step-by-step strategy, you can transform simple dough and candy into an edible showstopper that impresses guests and delights kids (and adults) alike.
This guide will walk you through everything:
- How to bake sturdy, castle-ready gingerbread dough
- Step-by-step assembly for walls, turrets, and battlements
- Royal icing “mortar” that actually holds
- Creative candy decorations for a fairy-tale finish
- Troubleshooting tips, and shortcuts
By the end, you’ll have your very own edible fortress whether you want a simple one-tower castle or a grand multi-turret masterpiece.
Ready to roll up your sleeves and start your gingerbread kingdom? Let’s begin!
Planning & Design
Before mixing a single bowl of dough, it’s worth pausing to plan your gingerbread castle.
Castles aren’t just houses with a few extra walls. They’re taller, heavier, and often more complex in shape. The difference between a collapsed tower and a show-stopping fortress often comes down to planning.
Why a Castle is Different from a House
A gingerbread house usually has four walls and a roof. A castle? Expect multiple peaks, towers, battlements, and possibly bridges or arches.
Each of these adds weight and stress to your structure. That means you’ll need:
- Thicker walls and sturdier gingerbread dough than you’d use for cookies.
- Stronger icing “mortar” to keep pieces in place.
- Support strategy sometimes using cans, skewers, or internal bracing during drying.
Think of yourself as both a baker and an architect.
Choose Your Style and Scale
Not every castle needs to look like Hogwarts or Neuschwanstein. Decide early:
- Beginner-Friendly Castle → A square base with one tall tower or turret.
- Intermediate Castle → Four walls with attached towers, battlements, and a peaked roof.
- Showpiece Castle → Multi-turret, archways, candy-glass windows, multiple levels.
Tip: Start smaller than you think. Even a simple castle can look spectacular once decorated with candy, snow effects, and lights.
Templates & Blueprinting
Just like a real castle needs blueprints, your gingerbread castle benefits from templates:
- Hand-drawn templates: Use graph paper or cardboard to sketch out walls, towers, and roofs. Keep shapes geometric (squares, rectangles, cones) to make cutting and assembly easier.
- Printable templates: Many bakers share ready-to-use gingerbread templates online. (Pro tip: choose one labeled “structural” or “no-spread” to avoid mismatched pieces.)
- Dry run: Cut your shapes out of cardboard and tape them together before baking. This mock-up helps you spot weak points and visualize the finished size.
Pro Planning Tips
- Label each piece (“front wall,” “tower side”) on your template so you won’t get lost mid-assembly.
- Keep doors and windows simple or wait until decoration to add faux windows with icing.
- Decide on a sturdy base now (wooden board or foam core covered in foil). It’s much easier to build directly onto your display base than to move the castle later.
Related Recipes You’ll Love to Try
- Low-Carb & Creamy Garlic Parmesan Cauliflower Mashed Potatoes
- Gluten-Free Pumpkin S’mores Cookies: Fall’s Campfire Treat
- Chocolate Chip Cookies with Pumpkin Pie Filling
- Vegan Chickpea Tofu Curry with Coconut Milk
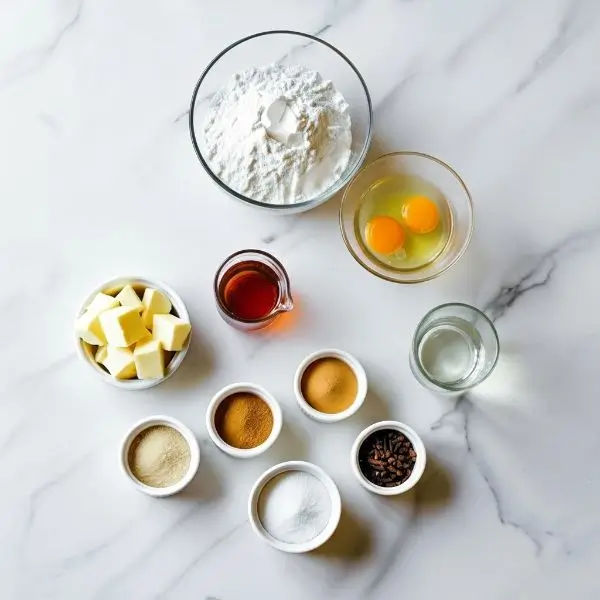
Ingredients You’ll Need
Before we start mixing, baking, and building, let’s gather our supplies. A gingerbread castle needs sturdier walls than a cookie or a soft loaf, so we’ll use a dough designed for structure.
You’ll also need the right “mortar” (royal icing) and a few handy tools to make assembly smooth and stress-free.
1. Gingerbread Dough (Construction-Grade)
This recipe is designed for strength first, taste second. Though it’s still spiced and delicious if you sneak a piece!
Ingredients (for one large castle batch):
- 6 cups all-purpose flour (plus extra for rolling)
- 1 tablespoon ground ginger
- 2 teaspoons cinnamon
- 1 teaspoon ground cloves
- ½ teaspoon salt
- 1 cup unsalted butter (softened)
- 1 cup packed dark brown sugar
- 1 ¼ cups molasses
- 2 large eggs
Note: This dough bakes hard and sturdy. For cookies or edible extras, you can make a softer gingerbread with more butter and less molasses.
2. Royal Icing “Mortar”
Royal icing is your glue. When made correctly, it dries rock-hard and holds walls, roofs, and towers in place.
Ingredients:
- 4 cups powdered sugar
- 3 tablespoons meringue powder or 2 pasteurized egg whites
- 6 tablespoons water (add more for thinner consistency)
- ½ teaspoon cream of tartar (for stability)
Tip:
- For construction, keep icing thick (think peanut butter texture).
- For decorating, thin with a little more water until it flows smoothly.
3. Candy & Decoration Basics
You can go as simple or elaborate as you like, but here are popular choices:
- Candy Canes: great for turrets or fencing
- Gumdrops & Peppermints: tower tops and battlements
- Chocolate Bars: mimic brick or stone walls
- Hard Candies / Isomalt: melted into window cutouts for “stained glass”
- Shredded Coconut or Powdered Sugar: snow effects
Tools to Use
Having the right tools makes a huge difference:
- Rolling pin, a heavy one works best for even sheets
- Parchment paper or silicone mats prevents sticking
- Sharp knife or pizza cutter for cutting along templates
- Cardboard or cardstock templates to trace castle walls, roofs, and towers
- Large baking sheets, so pieces bake flat and evenly
- Piping bags with small tips for precision icing
- Cans, jars, or boxes to prop walls while icing sets
- Sturdy display base like wooden board, foam core, or even a cake drum


Crock-Pot 7 Quart Oval Manual Slow Cooker, Stainless Steel (SCV700-S-BR), Versat...
20% Off

BrüMate Era 40 oz Tumbler with Handle and Straw | 100% Leakproof Insulated Water...
$44.99 (as of November 11, 2025 18:09 GMT +00:00 - More infoProduct prices and availability are accurate as of the date/time indicated and are subject to change. Any price and availability information displayed on [relevant Amazon Site(s), as applicable] at the time of purchase will apply to the purchase of this product.)


Astercook Sourdough Starter Kit with Round & Oval Banneton Bread Proofing Basket...
$59.99 (as of November 11, 2025 23:30 GMT +00:00 - More infoProduct prices and availability are accurate as of the date/time indicated and are subject to change. Any price and availability information displayed on [relevant Amazon Site(s), as applicable] at the time of purchase will apply to the purchase of this product.)Effective Prep Advice
- Make the dough at least a day ahead so it chills and firms up.
- Bake extra pieces for backup (especially small, fragile shapes like battlements).
- Always cool pieces completely before assembly. Warm gingerbread is bendy and breaks easily.
Dough, Cutting & Baking
Now that we have our ingredients and templates ready, it’s time to make the gingerbread walls and towers for our castle. Follow these steps carefully to ensure strong, even pieces that fit together well.
Step-1: Make the Dough
- In a large bowl, whisk together:
- 6 cups flour
- 1 tablespoon ginger
- 2 teaspoons cinnamon
- 1 teaspoon cloves
- ½ teaspoon salt
- In a stand mixer (or another large bowl), cream together:
- 1 cup butter
- 1 cup dark brown sugar
until fluffy.
- Add:
- 1 ¼ cups molasses
- 2 eggs
Mix until smooth.
- Slowly add dry ingredients to wet, mixing until a stiff dough forms.
If dough is sticky, add a little more flour.
Step-2: Chill the Dough
- Divide dough into 3–4 discs, wrap in plastic wrap, and refrigerate for at least 2 hours (or overnight).
- Cold dough is easier to roll and will spread less in the oven.
Step-3: Roll & Cut Pieces
- Preheat oven to 350°F (175°C).
- Roll dough out between two sheets of parchment paper to about ¼-inch thickness.
- Place templates on top and cut around them with a sharp knife or pizza cutter.
- Label each piece (front wall, side tower, roof) on the parchment to avoid confusion.
- Transfer cutouts (still on parchment) onto baking sheets.
Step-4: Bake the Pieces
- Bake for 12–15 minutes or until edges are firm and centers are set.
- Larger pieces may need an extra few minutes.
- Keep an eye out for over-browning (especially on thinner battlements).
Step-5: Trim & Cool
- While pieces are still warm, place templates back on top and trim edges with a sharp knife if they’ve spread slightly.
- This ensures the walls will fit together neatly.
- Allow pieces to cool completely on wire racks. Warm pieces may bend or crack if moved too soon.
Step-6: Prepare for Assembly
- Lay all pieces out flat and group them by section (front, back, towers, roof, battlements).
- If desired, bake extra battlements or turrets in case some break later.
- Store cooled pieces in an airtight container until you’re ready to assemble.
Assembly & Structural Tips
This is where your gingerbread castle starts to come alive. Work slowly, let icing dry fully, and use supports where needed.
Step-1: Prepare the Base
- Place your sturdy display board (wood, foam core, or cake drum) on a flat surface.
- Cover with foil or decorative paper, if desired.
- Pipe an outline of thick royal icing where the first walls will sit.
Step-2: Build the Foundation Walls
- Begin with two opposite walls (front and back).
- Pipe icing along the bottom edges.
- Press into place on the base.
- Add the side walls, one at a time.
- Pipe icing on both the base and adjoining edges.
- Hold in place for 1–2 minutes until icing starts to set.
- Use cans or jars as supports to keep walls upright while drying.
- Allow the base structure to dry at least 30 minutes before moving on.
Step-3: Attach Towers and Turrets
- Pipe icing along the base and edge of each tower piece.
- Press towers against corners or sides of the main castle walls.
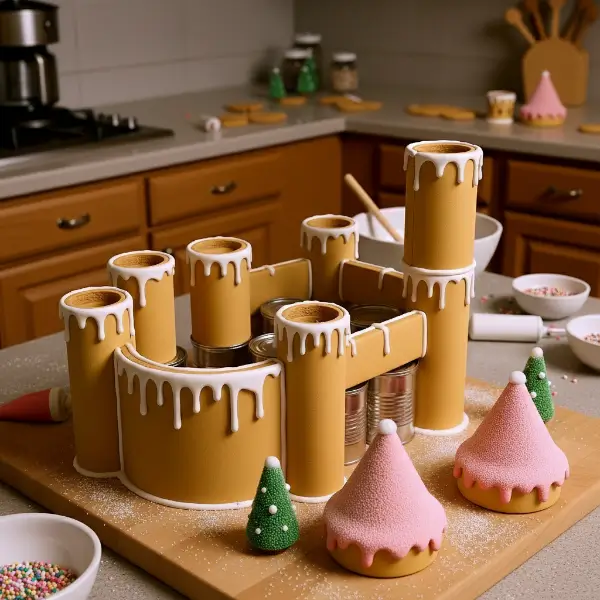
- For round turrets (if using rolled cones or cylinders):
- Wrap gingerbread around a can while still warm to create the curve.
- Once hardened, attach with thick icing.
- Let towers dry in place with support for at least 30 minutes.
Step-4: Reinforce Seams
- Pipe a thick line of icing along all interior wall seams (like caulking).
- Smooth with a small spatula or the back of a spoon.
- This adds strength and stability.
Step-5: Add the Roof
- Pipe icing along the top edges of the walls.
- Place roof panels carefully, one at a time.
- Hold in place until the icing begins to set.
- Use supports underneath if needed.
- If adding battlements (small square blocks along the roofline):
- Pipe icing along the roof edge.
- Attach battlement pieces one by one.
Step-6: Secure Decorative Structures
- Attach cones or candy canes to serve as spires.
- Add drawbridges, arches, or candy fences with icing “hinges.”
- For fragile details (like sugar-glass windows), add them last to avoid breakage.
Step-7: Let the Castle Set
- Leave the assembled castle undisturbed for at least 4–6 hours, or overnight if possible.
- Once the icing is completely hardened, the castle is ready for decorating.
Decoration & Finishing Touches
Now comes the most exciting part, transforming your sturdy gingerbread structure into a fairy-tale castle. Work in stages, letting icing dry between layers, and start with the largest design elements before adding the fine details.
Step-1: Prepare Your Icing for Decorating
- Divide royal icing into separate bowls.
- Tint with food coloring if desired (e.g., gray for stone walls, blue for icy accents).
- Adjust consistency:
- Thick icing for attaching candy.
- Thinner icing for piping lines, flooding, or creating icicles.
Step-2: Add Windows and Doors
- Outline windows and doors with icing using a small piping tip.
- Flood the inside with thinner icing for a smooth surface.
- Optional: insert melted hard candies or isomalt into window cutouts before assembly for a stained-glass effect.
Step-3: Decorate Towers and Roofs
- Pipe icing around turret tops and attach gumdrops, peppermints, or candy canes.
- Outline roof shingles with icing or attach chocolate squares for a “tile” effect.
- Add sugar cones (dipped in icing and sprinkles) to serve as pointed spires.
Step-4: Create Snow and Icicles
- Pipe thick white icing along roof edges, then pull downward with the tip to create icicle drips.
- Dust the roof and base with powdered sugar for a snowy effect.
- Sprinkle shredded coconut around the castle to mimic snowbanks.
Step-5: Add Battlements and Details
- Pipe icing along the roofline and attach small square cookies or extra gingerbread blocks as battlements.
- Add stone effects by piping dots or dashes of gray icing along the walls.
- Use chocolate sticks or pretzels for drawbridges, ladders, or beams.
Step-6: Landscape the Castle Grounds
- Pipe a winding path with icing and coat with crushed cookies or sprinkles.
- Plant candy “trees” (upside-down ice cream cones decorated with green icing).
- Add figurines (gingerbread people, toy knights, or animals) to bring the scene to life.
Step-7: Finishing Touches
- Place gumdrops, peppermints, or candy jewels along towers for a magical look.
- Dust with edible glitter or luster dust for sparkle.
- Insert small LED tea lights inside the castle to make windows glow at night.
Make-Ahead, Storage & Display
A gingerbread castle isn’t just dessert, it’s a centerpiece. With the right care, your creation can last for weeks as a festive display. Here’s how to plan ahead, preserve your work, and show it off in style.
Make Ahead in Stages
- Dough: Prepare and refrigerate up to 3 days in advance.
- Baked Pieces: Store baked (undecorated) walls and towers in an airtight container at room temperature for up to 2 weeks. Layer with parchment paper to prevent sticking.
- Royal Icing: Store in an airtight container in the fridge for 1 week. Re-whip before use.
- Assembly: Build the structure at least 1–2 days before decorating so the icing has time to fully harden.
Storing Your Castle
- Room Temperature Only: Never refrigerate your castle. Humidity softens gingerbread and melts decorations.
- Dry Environment: Keep the castle in a cool, dry place, away from heat sources, stoves, or direct sunlight.
- Cover at Night: Lightly drape with plastic wrap or a large cardboard box overnight to protect from dust and curious pets.
- Longevity: If made with “construction-grade” gingerbread (hard and less buttery), your castle can last 3–4 weeks as a display.
Display Ideas for the Holidays
- Dining Table Centerpiece: Place on a decorated cake drum or wooden board, surrounded by evergreen sprigs, fairy lights, or mini ornaments.
- Mantel Display: Elevate your castle on a shelf with snowy cotton batting underneath for a wintry look.
- Holiday Village: Pair your castle with smaller gingerbread houses, sugar cookie trees, and figurines to create a full edible landscape.
- Light It Up: Place LED tea lights or fairy lights inside to make windows glow through sugar glass. Avoid real candles (heat + gingerbread = disaster).
Preservation Tricks for Longer Display
- Edible Spray Sealant: Some bakers use food-safe clear spray to “seal” the gingerbread and protect it from moisture.
- Glue Upgrade: If your castle is strictly for display (not eating), you can use hot glue for the inside seams instead of royal icing. This makes it stronger and longer-lasting.
- Freezing Extra Pieces: Bake extra walls and battlements and freeze them. If something breaks mid-season, you’ll have a replacement ready.
Transporting Your Castle
- Build directly on a sturdy base that can be lifted and carried.
- Place the base inside a large box with padding around the sides to prevent sliding.
- Transport in a cool car interior (not the trunk) to avoid heat damage.
- Assemble the most delicate decorations (icicles, glass windows) after arriving if you’re taking it to a party or contest.
Variations, Scaling & Alternatives
Not every gingerbread castle has to be a towering fortress. Here are some quick ways to adapt the project to your needs:
Size & Scale
- Mini Castle: Use cupcake-sized towers and small cookie panels. Perfect for kids or quick projects.
- Tabletop Display: One main tower with battlements. Less work, still impressive.
- Showpiece Castle: Multi-turret, tall spires, sugar-glass windows. Ideal for competitions or holiday centerpieces.
Shortcuts & Hybrids
- Kit Upgrade: Start with a gingerbread house kit and add towers, battlements, and candy decorations for a castle effect.
- Cardboard Reinforcement: For long-term displays, line the backs of large walls with cardboard before decorating.
- Store-Bought Cookies: Use sugar cones, wafer cookies, or graham crackers for quick spires and battlements.
Flavor & Ingredient Swaps
- Gluten-Free: Substitute a gluten-free flour blend for all-purpose flour.
- Vegan: Use dairy-free margarine and aquafaba (whipped chickpea liquid) instead of eggs.
- Spice Variations: Swap in nutmeg, allspice, or cardamom for different holiday flavor notes.
Kid-Friendly Versions
- No-Bake Castle: Build with graham crackers and frosting instead of baking gingerbread.
- Candy-Heavy Castle: Skip structural ambition. Let kids pile candies onto a simple house shape for fun.
- Pre-Baked Walls: Bake and cut pieces in advance; let children decorate and “build” without the stress of baking.
Troubleshooting with FAQs
My gingerbread walls cracked while baking. What happened?
Cracks usually come from rolling dough too thin or baking at too high a temperature.
Roll dough to about ¼-inch thickness and bake at 350°F (175°C). If cracks appear, you can “glue” pieces with royal icing and cover seams with candy or decorations.
My roof keeps sliding off. How do I fix it?
Roofs are heavy! Use extra-thick royal icing and let the walls dry completely before adding the roof.
Prop roof pieces with cans or skewers until icing is fully set. If the angle is steep, add hidden candy supports underneath.
My royal icing is too runny / too stiff. What’s the fix?
- Too runny: Add more powdered sugar until it holds peaks.
- Too stiff: Add water, a few drops at a time, until it pipes smoothly.
Consistency is key: peanut butter texture for glue, toothpaste texture for piping, syrup-like for flooding.
My castle keeps collapsing! What did I do wrong?
Usually it’s one of these issues:
- Not letting pieces cool completely before assembly.
- Not allowing icing to dry between steps.
- Using soft (cookie-style) gingerbread instead of construction dough.
Reinforce seams with extra icing inside, and always give at least 30 minutes of drying time between big steps.
The pieces spread in the oven and don’t fit together. Help!
This happens when dough warms too much before baking. Chill dough for at least 2 hours before rolling.
After baking, while pieces are still warm, trim them using the template as a guide for sharp edges.
My decorations keep falling off. What should I do?
Use thicker royal icing for heavy candies and hold each in place for 20–30 seconds before letting go.
For stubborn candies, add a hidden “anchor” like a toothpick or pretzel stick behind the piece.
How do I fix a broken turret or battlement?
Use royal icing like spackle: pipe a thick bead along the crack and press gently together. Reinforce from behind with extra icing.
If a piece shatters, swap it out with an extra you baked, or disguise the break with candy rocks or icing snow.
How long will my gingerbread castle last?
For display only, up to 3–4 weeks if stored in a cool, dry place. If you want to eat it, enjoy within 5–7 days for the best flavor and texture.