Our site contains ads and uses Amazon affiliate links. We may earn a small commission at no extra cost to you. We know ads can be distracting, and we’re sorry for any inconvenience they cause. It helps us keep the site running. Thanks for your understanding and supporting us!
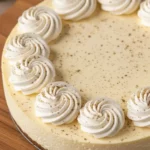
The secret to picture-perfect decorated cookies lies in mastering the art of royal icing.
This glossy, smooth icing transforms simple sugar cookies into edible masterpieces that look professionally crafted.
Whether you’re decorating holiday cookies, celebration treats, or creating intricate designs, this foolproof royal icing recipe delivers consistent results every single time.
Royal icing has been the gold standard for cookie decorators for generations.
Its unique ability to dry completely hard makes it perfect for stacking, packaging, and creating stunning dimensional decorations.
The pure white color serves as an ideal canvas for adding gel food colors, and the texture can be adjusted from thick piping consistency to smooth flooding consistency with just a splash of water.
This recipe uses meringue powder instead of raw egg whites, ensuring food safety while creating a stable icing that holds its shape beautifully.
The subtle vanilla flavor complements any cookie without overpowering it, and the crisp finish provides that satisfying snap when you bite into your decorated creation.
Why This Recipe Stands Out
• Foolproof Consistency Control: Easily adjust between stiff peaks for intricate piping work and fluid flooding consistency by simply adding water a teaspoon at a time.
• Safe And Stable: Uses meringue powder instead of raw eggs, eliminating food safety concerns while creating a more stable icing that won’t break down.
• Brilliant White Base: Produces a pure white icing that takes food coloring beautifully without any off-white tones that plague other recipes.
Most Shared: Pumpkin Square Bars with Cream Cheese Frosting
• Quick Drying Time: Sets within 2 hours for a smooth matte finish and fully hardens overnight, making it perfect for packaging and stacking.
• Long Shelf Life: Keeps fresh at room temperature for up to two weeks when stored in an airtight container.
• No Special Equipment: Requires only a stand mixer or hand mixer with basic ingredients found in most baking aisles.
• Versatile Application: Works perfectly for outlining, flooding, piping details, and creating dimensional decorations on cookies, gingerbread houses, and cakes.
Most Shared: Homemade Pumpkin Spice Latte: Better Than Starbucks!
Ingredients You’ll Need
For the Royal Icing:
- 4 cups (480g) powdered sugar, sifted
- 3 tablespoons (21g) meringue powder
- 6 tablespoons (90ml) warm water, plus more for thinning
- 1 teaspoon pure vanilla extract (or clear vanilla for pure white icing)
- Gel food coloring (optional)
Tools to Use
- Stand mixer or hand mixer
- Large mixing bowl
- Rubber spatula
- Fine mesh sieve
- Piping bags
- Piping tips (numbers 2, 3, and 4)
- Squeeze bottles
- Toothpicks
- Airtight containers
- Damp cloth or paper towels
Now retrieving an image set.
Fullstar The Original Pro Chopper - Vegetable Chopper and Spiralizer, Food Chopp...
$24.99 (as of November 23, 2025 23:45 GMT +00:00 - More infoProduct prices and availability are accurate as of the date/time indicated and are subject to change. Any price and availability information displayed on [relevant Amazon Site(s), as applicable] at the time of purchase will apply to the purchase of this product.)
Now retrieving an image set.
Lodge 6 Quart Enameled Cast Iron Dutch Oven with Lid – Dual Handles – Oven Safe ...
$74.99 (as of November 23, 2025 23:45 GMT +00:00 - More infoProduct prices and availability are accurate as of the date/time indicated and are subject to change. Any price and availability information displayed on [relevant Amazon Site(s), as applicable] at the time of purchase will apply to the purchase of this product.)
Now retrieving an image set.
Cutting Boards for Kitchen - Food Grade Double Sided Pure Titanium& Bamboo Chopp...
$25.99 (as of November 23, 2025 23:45 GMT +00:00 - More infoProduct prices and availability are accurate as of the date/time indicated and are subject to change. Any price and availability information displayed on [relevant Amazon Site(s), as applicable] at the time of purchase will apply to the purchase of this product.)Piping Bags And Bottles Yield
Piping Bags (Stiff Consistency for Outlining):
- 4 to 6 standard piping bags (12-inch size)
- Each bag should be filled only halfway (about 1/2 cup per bag) for optimal control
- This amount is perfect for outlining 4 to 5 dozen medium-sized cookies
Most Shared: Longhorn Brussels Sprouts Recipe: Sweet, Spicy & Crispy Delight
Squeeze Bottles (Flooding Consistency):
- 2 to 3 squeeze bottles (8-ounce size)
- Each bottle holds approximately 1 cup of thinned icing
- This amount can flood 3 to 4 dozen medium-sized cookies depending on design complexity
Total Coverage:
- This single batch decorates approximately 4 to 5 dozen (48 to 60) medium-sized cookies with both outlining and flooding
- For multi-colored designs, divide the icing into smaller portions (1/2 cup to 1 cup per color)
- You’ll need 1 piping bag and 1 squeeze bottle per color used
Tip: If decorating with multiple colors, make a double batch to ensure you have enough icing in each color for both outlining and flooding without running short mid-project.
Read More: 17 Five-Ingredient Lazy Dinner Ideas to Save the Day
How to Make Cookies Decorating Royal Icing
Step-1: Prepare Your Workspace
Clear a clean, dry workspace for mixing and decorating. Gather all ingredients and equipment before starting.
Sift the powdered sugar through a fine mesh sieve into a bowl to eliminate any lumps that could clog piping tips.
Even the smallest lump can ruin a perfectly smooth line of icing, so this step cannot be skipped.
The sound of sugar cascading through the sieve signals the beginning of your decorating adventure.
Read More: 19 Easy Pumpkin Cake Recipes for Thanksgiving Desserts
Step-2: Combine Dry Ingredients
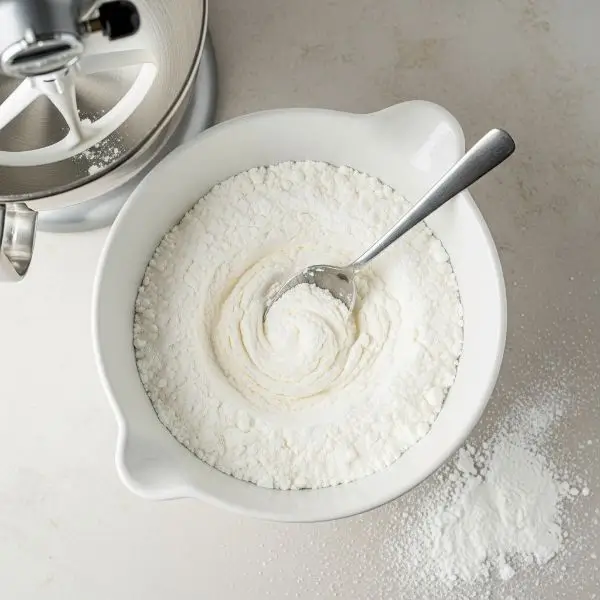
Add the sifted powdered sugar and meringue powder to the bowl of your stand mixer.
Use the paddle attachment if using a stand mixer. Stir these ingredients together briefly with a spoon or spatula on the lowest speed for just 5 seconds.
This preliminary mixing ensures the meringue powder distributes evenly throughout the sugar, creating a uniform base for your icing.
Step-3: Add Liquid Ingredients
Pour the warm water and vanilla extract into the bowl with the dry ingredients.
The warmth of the water helps dissolve the meringue powder more effectively.
Start mixing on the lowest speed to prevent a powdered sugar cloud from erupting in your kitchen.
Mix for about 30 seconds until the ingredients just begin to come together into a thick paste.
Step-4: Beat to Stiff Peaks
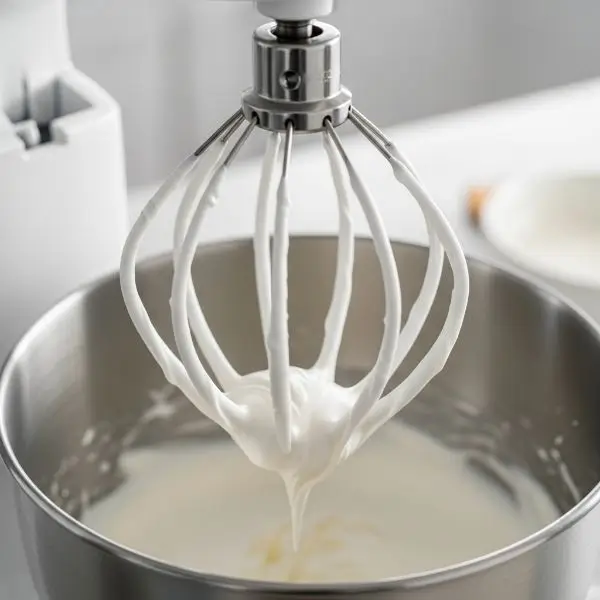
Increase the mixer speed to medium-high. Beat the mixture for 7 to 10 minutes until stiff, glossy peaks form.
The icing should stand straight up when you lift the beater, creating sharp peaks that don’t curl over.
The transformation is remarkable as the mixture goes from a dense paste to a fluffy, bright white icing.
You’ll hear the mixer working harder as the icing thickens and gains volume.
The glossy sheen that develops indicates proteins in the meringue powder have been properly activated.
Step-5: Test the Consistency
Lift the paddle or beaters from the bowl. The icing should form stiff peaks that hold their shape without drooping.
This is your piping consistency, perfect for creating outlines, writing, and dimensional decorations.
If the peaks curl over even slightly, beat for another minute.
The texture should feel smooth and velvety when rubbed between your fingers.
Step-6: Adjust for Different Consistencies
For outlining work, use the icing as is at stiff peak consistency.
For flooding large areas, thin the icing by adding water one teaspoon at a time. Mix thoroughly after each addition.
The ideal flooding consistency occurs when you drag a knife through the icing and the line disappears within 10 to 12 seconds.
This is often called “10-second icing” in the decorating world.
For medium consistency used for details and lettering, aim for lines that disappear in 15 to 20 seconds.
Step-7: Color the Icing
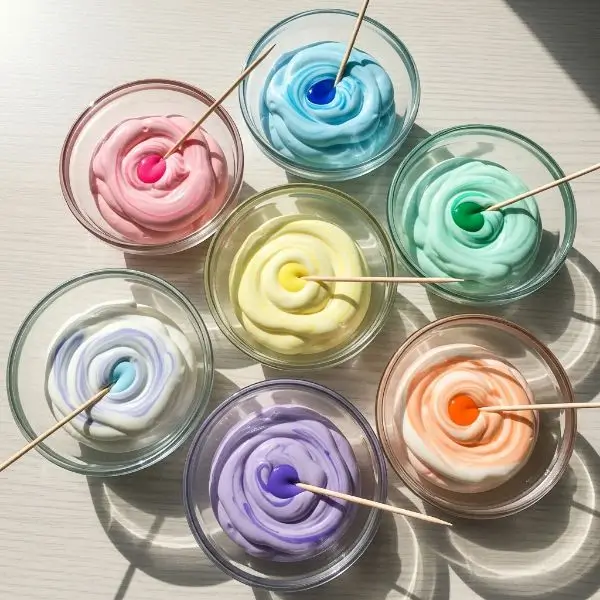
Divide the icing into separate bowls for different colors. Add gel food coloring using a toothpick, starting with the tiniest amount.
Gel colors are highly concentrated, so less is more. Mix thoroughly after each addition until the color is evenly distributed with no streaks.
The color will intensify slightly as the icing dries, so aim for a shade slightly lighter than your desired final result.
The vibrant hues transform the pure white base into a rainbow of decorating possibilities.
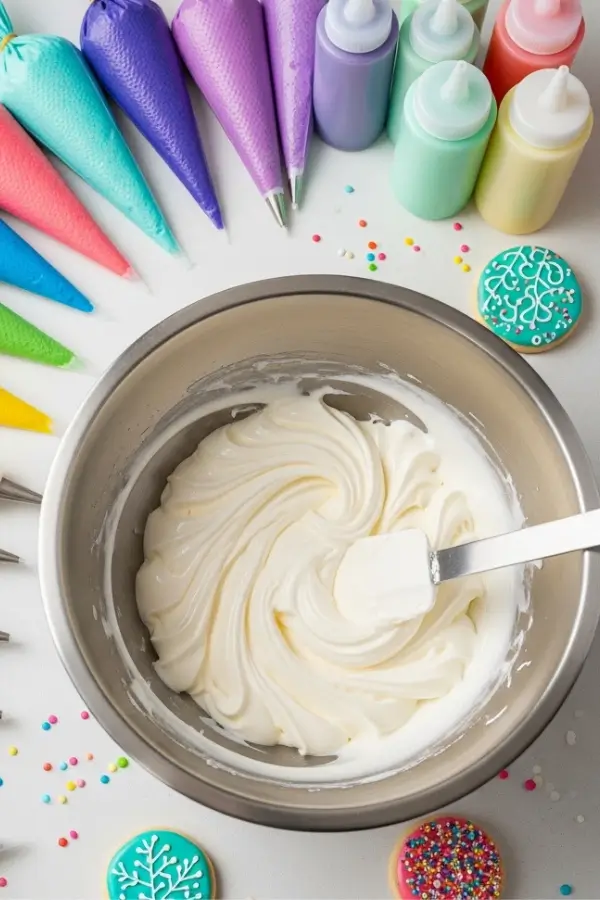
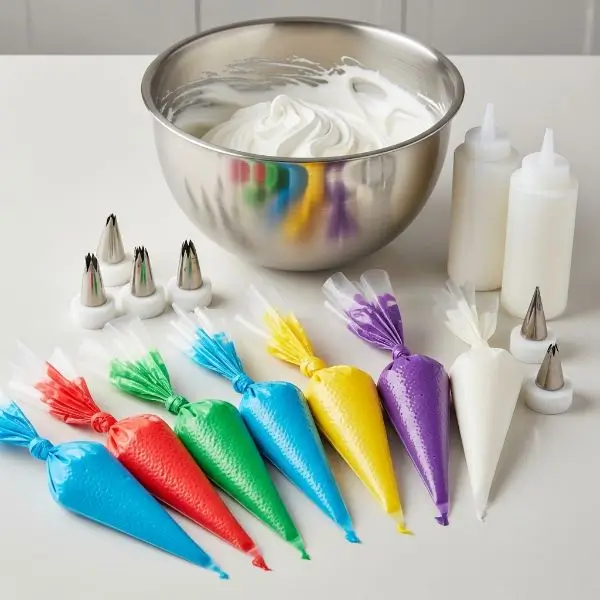
Step-8: Fill Piping Bags and Bottles
Transfer stiff consistency icing into piping bags fitted with small round tips.
Fold down the top of the bag to create a cuff, which keeps your hands clean while filling.
Use a spatula to push icing down into the bag, eliminating air pockets. Fill bags only halfway to maintain control while piping.
Pour flooding consistency icing into squeeze bottles for easy application.
Squeeze bottles give you better control than piping bags for covering large areas.
Step-9: Keep Icing Fresh While Working
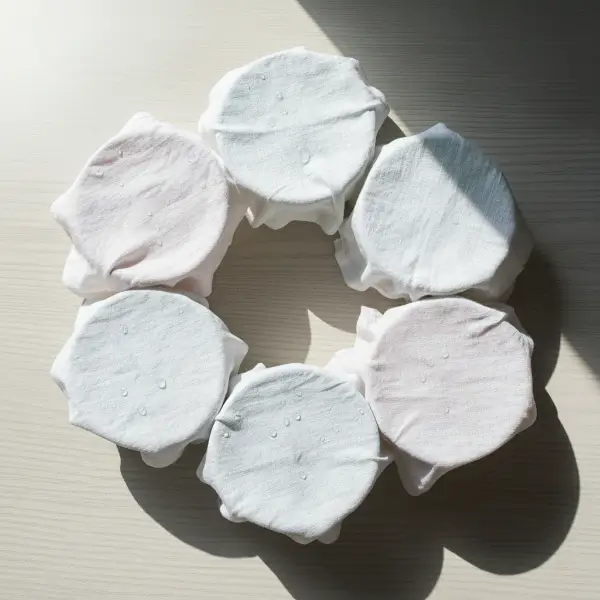
Cover bowls of icing with a damp cloth or paper towels pressed directly onto the surface.
Royal icing begins to crust over within minutes when exposed to air.
Press plastic wrap directly onto the icing surface in bowls, eliminating any air gaps.
This prevents the dreaded skin from forming that can ruin your smooth icing texture. Keep piping tips covered with a damp paper towel between uses.
Related Recipes You’ll Love to Try
- Creamy Dairy-Free Pumpkin Mousse: A Silky Fall Dessert
- Pumpkin Bread Ring With Maple Cream Cheese Filling
- Cinnamon Sugar Focaccia Sourdough Bread with Cream Cheese Icing
- Pumpkin Spice Thumbprint Cookies with Creamy Pumpkin Filling
Nutritional Information
Per 2 Tablespoon Serving:
- Calories: 120
- Protein: 0g
- Total Fat: 0g
- Carbohydrates: 30g
- Sodium: 5mg
Note: Nutritional values are estimates and may vary based on specific ingredients used.
Tips For Success
• Measure Powdered Sugar by Weight: Using a kitchen scale ensures accuracy, as scooping powdered sugar can pack it down and alter the ratio, resulting in icing that’s too thick or thin.
• Use Room Temperature Water: While the recipe calls for warm water, avoid using hot water which can cook the proteins in the meringue powder and create a grainy texture.
• Beat at Full Time: Don’t rush the beating process, as this develops the structure that makes royal icing dry hard and smooth with that signature glossy finish.
• Add Color Before Thinning: Always add food coloring to stiff consistency icing before thinning it down, as this ensures even color distribution without overworking thinned icing.
• Test Consistency On A Plate: Drop a small amount of flooding consistency icing onto a plate to see how it settles before committing to decorating your cookies.
• Work in Batches: Only thin as much icing as you need for immediate use, keeping the rest at stiff consistency for later adjustments.
• Use Clear Vanilla for White Icing: Regular vanilla extract adds a slight ivory tint, while clear vanilla extract keeps icing brilliantly white for wedding cookies and winter themes.
• Store Correctly: Transfer unused icing to airtight containers with plastic wrap pressed directly on the surface to prevent crusting during storage.
Common Mistakes to Avoid
• Not Sifting Powdered Sugar: Lumps in powdered sugar will clog piping tips and create bumpy surfaces that ruin the smooth appearance of decorated cookies.
• Adding too Much Water at Once: Flooding consistency can happen with just a few teaspoons of water, so add gradually to avoid making the icing too thin to work with.
• Overbeating Thinned Icing: Once you’ve thinned icing to flooding consistency, stir gently rather than beating to avoid incorporating air bubbles that create craters when drying.
• Using Expired Meringue Powder: Old meringue powder won’t whip up properly and creates icing that won’t set hard, check expiration dates before starting.
• Skipping the Damp Cloth: Even a few minutes of air exposure creates a crust on royal icing that will break into pieces when you try to stir or pipe it.
• Decorating on Warm Cookies: Always let cookies cool completely to room temperature, as residual heat will prevent royal icing from setting properly and cause colors to bleed.
• Rushing the Drying Process: Royal icing needs adequate drying time between layers, flooding over wet outlines causes colors to bleed together and ruins crisp lines.
• Using Liquid Food Coloring: Liquid colors add extra moisture that throws off the carefully balanced consistency, always use gel or powder food colors instead.
Creative Serving Ideas
• Cookie Gift Boxes: Arrange decorated cookies in clear cellophane bags tied with ribbons, or layer them in decorative tins separated by parchment paper for holiday gift giving.
• Cookie Bouquets: Attach decorated cookies to wooden skewers and arrange them in a foam base covered with tissue paper for an edible centerpiece at parties.
• Cookie Decorating Party: Set out plain baked cookies with bowls of different colored royal icing and let guests create their own designs for interactive entertainment.
• Seasonal Cookie Displays: Create tiered displays using cake stands at different heights to showcase themed cookies for holidays, birthdays, and celebrations.
• Cookie Place Cards: Pipe guest names onto decorated cookies and use them as edible place cards at dinner parties and wedding receptions.
• Cookie Cake Toppers: Use royal icing to attach decorated cookies to cakes and cupcakes for dimensional decorations that match your party theme.
• Cookie Sandwiches: Pipe royal icing between two cookies and let it set to create sandwich cookies with decorative edges showing through.
• Advent Calendar Cookies: Number individual cookies with royal icing and package separately for a homemade advent calendar that doubles as a daily treat.
Frequently Asked Questions
Can I Use Fresh Egg Whites instead of Meringue Powder?
Yes, you can substitute 2 large egg whites for the meringue powder and water in this recipe.
However, royal icing made with raw egg whites poses a food safety risk and has a shorter shelf life.
Pasteurized egg whites are a safer alternative if you prefer using real eggs.
How Long Does Royal Icing Take to Dry Completely?
Royal icing becomes touch-dry in about 2 hours but requires 6 to 8 hours to fully harden for stacking.
For best results, let decorated cookies dry overnight at room temperature before packaging.
Thick dimensional decorations may need 24 hours to dry completely through to the center.
Why Is My Royal Icing Grainy?
Graininess usually results from undissolved powdered sugar or insufficient beating time.
Make sure to sift the powdered sugar and beat the icing for the full 7 to 10 minutes.
If graininess appears after storage, briefly rebeat the icing to smooth it out.
Can I Make Royal Icing Ahead of Time?
Absolutely, royal icing stores beautifully in airtight containers at room temperature for up to 2 weeks.
Press plastic wrap directly onto the surface before sealing the container. When ready to use, stir gently and adjust consistency with water if needed.
What’s the Best Way to Fix Icing That’s too Thin?
Add more sifted powdered sugar a tablespoon at a time, mixing thoroughly after each addition until you reach the desired consistency.
For small amounts, add powdered sugar by the teaspoon to avoid over-thickening.
How Do I Get Rid of Air Bubbles in Royal Icing?
Let mixed icing sit for 5 minutes, then gently stir with a spatula to release trapped air bubbles.
For flooding consistency, tap the bottle on the counter several times before using.
You can also use a toothpick to pop bubbles that appear on the cookie surface immediately after flooding.
Can I Freeze Cookies Decorated with Royal Icing?
Yes, once the royal icing has completely dried and hardened, you can freeze decorated cookies for up to 3 months.
Layer them between sheets of parchment paper in airtight containers.
Thaw at room temperature still wrapped to prevent condensation from damaging the decorations.
Why Won’t My Royal Icing Harden?
This usually happens from too much liquid, high humidity, or not beating the icing long enough initially.
Try adding more powdered sugar to thicken the icing and ensure cookies dry in a low-humidity environment with good air circulation.