Our site contains ads and uses Amazon affiliate links. We may earn a small commission at no extra cost to you. We know ads can be distracting, and we’re sorry for any inconvenience they cause. It helps us keep the site running. Thanks for your understanding and supporting us!
Most homemade fancy butter cookies fail before they even reach the oven. The dough looks right in the bowl, pipes out beautifully, and then melts into flat, greasy discs the moment the tray hits the heat.
The problem is rarely the recipe’s ingredient list. It is almost always the temperature of the butter and the type of flour used, two details most recipes mention in passing and never actually explain.
This recipe walks through the mechanics behind a cookie that holds its piped shape every time:
- why butter temperature controls spread more than any other variable,
- how cake flour and milk powder recreate that bakery-tin texture,
- exactly how to pipe clean swirls without air bubbles,
- how to store and freeze a batch so they taste freshly baked for weeks.
Why Most “Fancy” Butter Cookies Fail Before They Reach the Oven
The gap between a bakery-style butter cookie and a homemade disappointment usually comes down to one thing: how the dough behaves under heat. If it spreads, the shape you piped disappears completely.
A properly built dough holds enough structure to keep its ridges and swirls through the entire bake. That structure comes from partially crystallized butter fat, not from extra flour or a longer chill.
Adding more flour to stop spreading is the most common fix bakers reach for, and it is also the one that ruins the texture. Too much flour turns a delicate, melt-in-your-mouth cookie into something dry and chalky.
Butter Temperature Science: Why 62 to 65°F Determines Whether Cookies Hold Their Shape
Butter is not a single substance. It is a mix of liquid fat and solid fat crystals, and the ratio between them shifts constantly with temperature.
At the ideal creaming temperature, butter is plastic: soft enough to fold air into during mixing, but still structured enough to hold that air once it is in the bowl.
Dairy scientists at the Center for Dairy Research note that the amount of solid, crystallized milk fat directly determines how firm or spreadable butter behaves at a given temperature.
When butter is too warm, most of that fat turns liquid. The crystal network that would normally support trapped air pockets collapses, and there is nothing left to hold your piped shape once the oven’s heat finishes the job.
If your kitchen runs warm, work in short bursts and return the bowl to the fridge for five minutes whenever the butter starts to feel soft rather than firm-soft.
Cake Flour and Milk Powder: The Bakery Secret Most Recipes Skip
Almost every fancy cookie recipe online calls for plain all-purpose flour. That single choice is why so many homemade versions taste noticeably less delicate than the ones from a bakery box.
Cake flour carries a lower protein content than all-purpose flour, which means it forms less gluten when mixed. Less gluten translates directly into a softer, more delicate crumb, the kind that shatters gently rather than chews.
Milk powder is the second piece most home bakers skip entirely. A couple of tablespoons folded into the dry ingredients adds concentrated milk proteins and sugars that deepen browning and add a rounded, creamy flavor without adding extra liquid.
Together, these two swaps recreate the tender, faintly sweet richness of a bakery tin using ingredients most grocery stores already carry.
Piping Technique for Clean, Professional Swirls
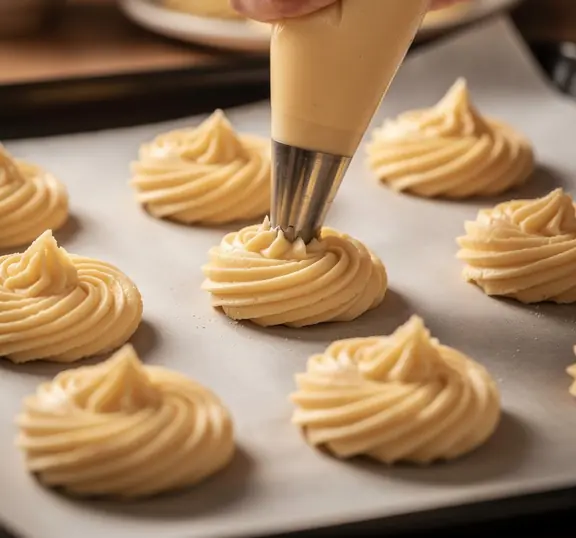
A star tip, ideally a 1M or similarly sized open star, creates the classic ridged swirl associated with fancy butter cookies. Fit your piping bag before you start mixing so the dough goes straight in while it is still at the correct temperature.
Hold the bag at a 90-degree angle directly above the parchment. Apply steady, even pressure and pipe in a tight spiral, starting from the center and working outward in one continuous motion.
Stop pressure before lifting the tip away. A quick flick upward at the end prevents a pointed tail that will burn before the rest of the cookie finishes baking.
Chilling Before Baking: The Step That Locks In the Shape
Once your cookies are piped onto the tray, resist the urge to bake them right away. A short chill in the refrigerator re-solidifies the butter’s fat crystals after the warmth of piping softened them slightly.
Twenty to thirty minutes is usually enough. You are not trying to freeze the dough solid, just firm it back up so the ridges hold through the first few minutes in the oven, which is when spreading actually happens.
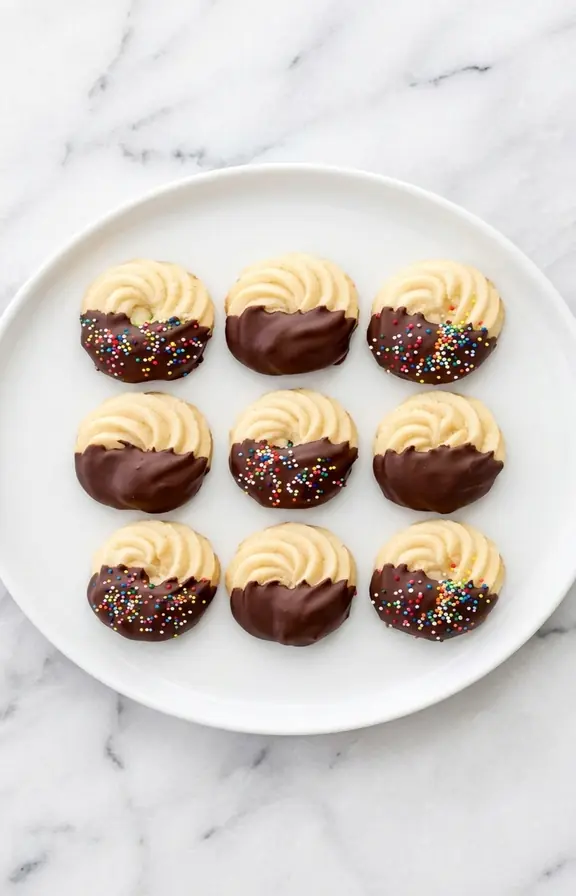
Dipping and Decorating: Turning Simple Cookies Into a Showstopper Platter
Once cooled, half-dipping each cookie in melted chocolate is the fastest way to make a plain batch look professional. Dark, milk, or white chocolate all work, and a light sprinkle of flaky salt or sprinkles adds contrast while the chocolate is still wet.
For a more decorated finish, a thin piped outline in hardened royal icing made for sugar cookies works beautifully along the ridges. If you want fuller coverage or intricate patterns, this meringue powder royal icing guide for decorating cookies covers outlining and flooding techniques step by step.
How to Store and Freeze Fancy Butter Cookies
Baked cookies keep well in an airtight container at room temperature for up to a week. Layer parchment between rows if any are chocolate-dipped to keep them from sticking together.
For longer storage, freeze baked cookies in a single layer until firm, then transfer to a freezer bag for up to three months. Let them thaw at room temperature for twenty minutes before serving.
You can also pipe the raw dough onto a tray, freeze it solid, then transfer the frozen swirls to a bag. Bake directly from frozen, adding two to three extra minutes to the bake time.
Frequently Asked Questions
Fancy Butter Cookies (Piped Danish-Style)
Piped, ridged butter cookies with a tender, bakery-style crumb. Butter held at the right temperature and a cake flour blend mean clean swirls that hold their shape every time.
- Hand mixer or stand mixer with paddle attachment
- Piping bag fitted with a 1M or similar open star tip
- Kitchen scale (for accurate flour measurement)
- Fine mesh sieve
- Rimmed baking sheet
- Parchment paper
- Wire cooling rack
- 1 cup (226g) unsalted butter, softened to 62 to 65°F
- 2/3 cup (80g) powdered sugar, sifted
- 1 large egg, room temperature
- 2 teaspoons pure vanilla extract
- 1/4 teaspoon fine sea salt
- 2 cups (220g) cake flour, spooned and leveled
- 2 tablespoons (16g) nonfat milk powder
- 6 oz (170g) chocolate of choice, melted
- Flaky salt or sprinkles, for topping
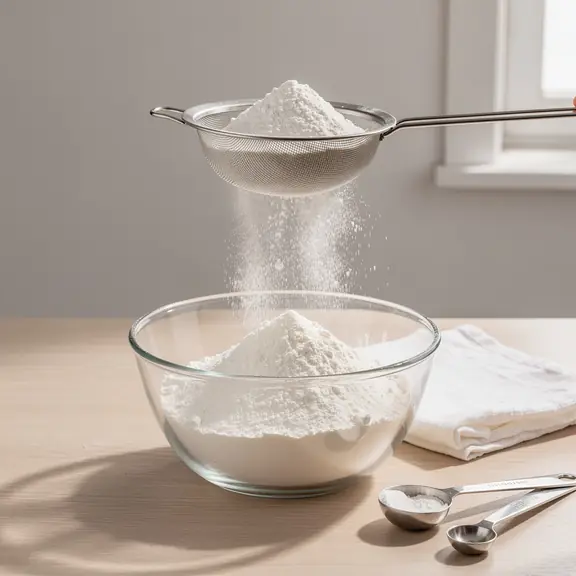
- Prepare the dry ingredients Sift the cake flour, milk powder, and salt together into a bowl. Set aside. Line two baking sheets with parchment paper and fit a piping bag with a 1M or similar open star tip.
- Cream the butter and sugar Beat the butter alone for 1 minute until smooth. Add the powdered sugar and beat on medium speed for 3 to 4 minutes until pale and fluffy. The butter should feel firm-soft throughout, never greasy or glossy. If it starts to look shiny, chill the bowl for 5 minutes before continuing.
- Add egg and vanilla Add the egg and vanilla extract. Beat on medium speed until fully combined, scraping down the sides of the bowl as needed.
- Fold in the dry ingredients Add the sifted flour mixture in two additions, mixing on low speed just until combined after each. Stop mixing as soon as no dry streaks remain. Overmixing at this stage develops gluten and stiffens the dough.
- Pipe the cookies Transfer the dough to the prepared piping bag. Holding the bag at a 90-degree angle, pipe tight spirals about 1.5 inches wide, starting from the center and working outward, spacing cookies 2 inches apart. Release pressure before lifting the tip away to avoid a pointed tail.
- Chill before baking Place the piped trays in the refrigerator for 20 to 30 minutes. This resolidifies the butter’s fat structure and prevents spreading once the cookies hit the oven. Preheat the oven to 350°F (175°C) during the last 10 minutes of chilling.
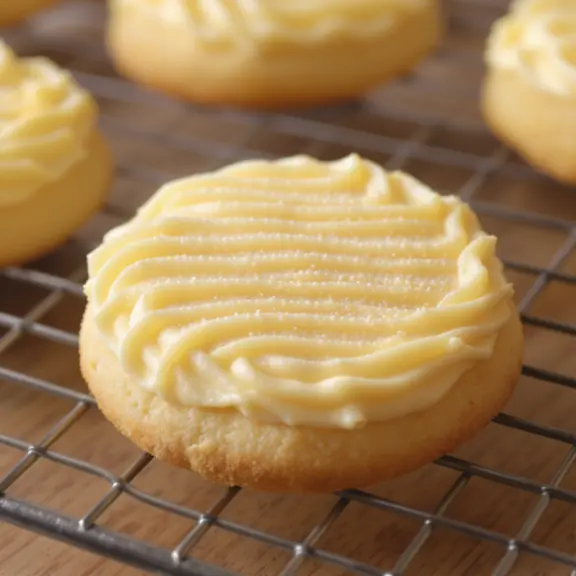
- Bake Bake for 12 to 14 minutes, until the edges turn pale golden and the center stays light. Rotate the trays halfway through for even color. The ridges should stay sharp and defined the entire bake.
- Cool and decorate Let the cookies cool on the tray for 5 minutes, then transfer to a wire rack to cool completely before handling. Once fully cool, dip each cookie halfway into melted chocolate and finish with flaky salt or sprinkles if desired. Let the chocolate set fully before storing.
Nutritional values are estimates calculated using standard USDA food composition data. Actual values will vary based on specific brands of butter, flour, and chocolate used, and exact cookie size after piping.


