Our site contains ads and uses Amazon affiliate links. We may earn a small commission at no extra cost to you. We know ads can be distracting, and we’re sorry for any inconvenience they cause. It helps us keep the site running. Thanks for your understanding and supporting us!
Most peach pie recipes fail in one of two ways. The filling turns into peach soup that floods the plate the moment you cut a slice.
Or the bottom crust stays pale and wet no matter how long the pie bakes, because the filling was never given a chance to release its liquid before it hit the oven.
Both problems come down to peach biology and starch chemistry, not bad luck. Once you understand what ripe peaches actually do to a filling, the fixes are simple.
This recipe walks through the mechanics of every decision:
- why peach variety and ripeness change how much liquid your filling releases,
- why cornstarch beats flour for a fruit filling that sets firm,
- which pie pan material actually bakes the crispest bottom crust,
- exactly how to blind bake the crust so it never turns soggy under the filling.

Why Peach Variety and Ripeness Decide Your Filling’s Texture
Not all peaches behave the same in a pie, and this is the step almost every recipe skips. Peaches are either freestone, where the pit lifts out cleanly, or clingstone, where the flesh clings to the pit.
Freestone peaches are the better choice for pie. Research on peach ripening shows that as peaches soften, their pectin converts from a water-insoluble form to a water-soluble one.
This conversion happens more completely in the melting-flesh varieties typical of freestone peaches. That means a fully ripe freestone peach releases more juice into your bowl than a firmer clingstone peach.
This is not a flaw. It is information. A juicier peach needs slightly more cornstarch and a longer maceration time so you can drain and concentrate that liquid before it goes anywhere near your crust.
Cornstarch vs. Flour: The Filling Science That Keeps Every Slice Intact
Flour is a common thickener in older peach pie recipes, but it is the wrong tool for this particular fruit. Peach filling is watery, acidic, and prone to weeping, and flour needs a wider temperature range and longer cooking time to fully thicken than most fruit pies allow during baking.
Cornstarch works faster and sets clearer. Starch granules swell and burst as they absorb hot liquid, a process called gelatinization, and cornstarch reaches full thickening power in a narrower, lower temperature band than wheat flour does.
That narrower window is exactly why cornstarch-thickened peach filling sets into clean, sliceable wedges instead of a loose, cloudy puddle.
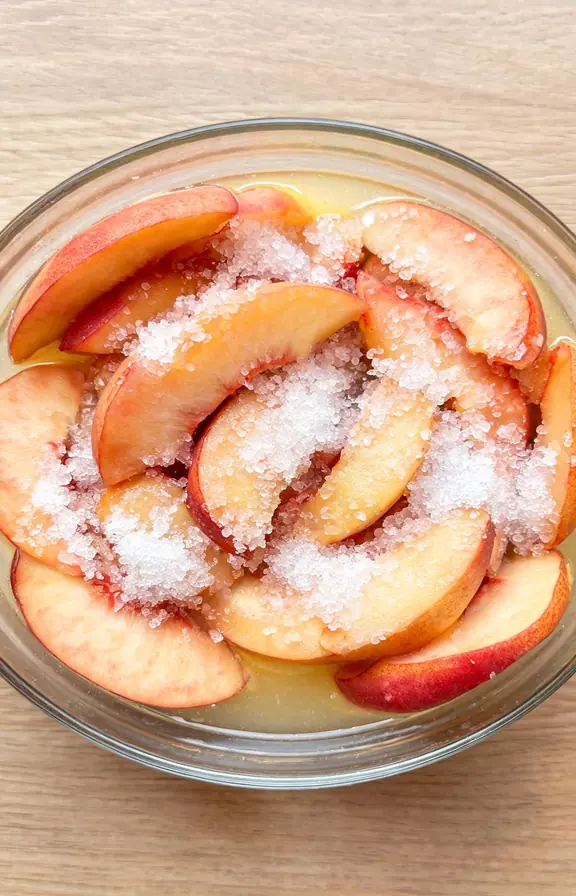
Macerating the Peaches Before You Ever Touch the Oven
Toss your sliced peaches with sugar, lemon juice, and salt, then let the bowl sit for 30 to 45 minutes. This draws out the extra liquid your peaches would otherwise dump straight into the crust.
Drain that liquid into a small saucepan and whisk in the cornstarch. Simmer it for one to two minutes until it turns glossy and thick, then fold it back into the peaches. You are now adding a pre-thickened glaze instead of hoping raw starch catches up during baking.
This one extra pan is the difference between a filling that mounds neatly on a fork and one that runs across the plate.
Glass, Ceramic, or Dark Metal: Which Pie Pan Bakes the Crispest Bottom
This comparison rarely shows up in peach pie recipes, but the pan you choose changes your outcome as much as the filling does.
A glass or light ceramic pie dish lets heat pass through slowly and evenly, and it lets you see the underside of the crust without lifting the whole pie. This visibility is the single easiest way to confirm your bottom crust is actually done, not just guessing based on the top.
A dark metal pie pan absorbs and radiates heat faster, which browns the bottom crust more aggressively in less time. It is the better choice if your oven runs cool or if soggy bottoms have been a recurring problem for you.
For this recipe, a clear glass pie dish is recommended so you can check the crust directly. If you only own metal, start checking for doneness about 10 minutes earlier than the recipe states.
Blind Baking the Bottom Crust So It Never Turns Soggy
Blind baking means pre-baking the crust briefly before the wet filling ever touches it, and it is the single most effective fix for a soggy bottom. Line your chilled crust with parchment, fill it with pie weights or dry beans, and bake at 425°F for 15 minutes.
Remove the weights and parchment, then bake for another 5 minutes until the base looks dry rather than wet and doughy. Let it cool slightly before adding the filling.
Venting, Lattice, and Egg Wash for a Bakery-Style Top
Whatever top crust style you choose, steam needs somewhere to go. A solid top crust needs several slashed vents, while a gluten free pie crust recipe works just as well for this filling if you need a dietary swap, since the venting and blind baking steps stay the same.
Brush the top crust with a whole egg beaten with a tablespoon of water, applied in one smooth pass with a pastry brush. This seals the surface and produces deep, even browning instead of pale, blotchy spots.
Sprinkle coarse turbinado sugar over the wet egg wash immediately so it adheres and gives the crust a light, crackly crunch once baked.
Storing, Freezing, and Reheating Peach Pie
Let the baked pie cool completely on a wire rack for at least three hours before slicing. Cutting into it early compresses the filling and undoes all the thickening work you just did.
Cover and store the cooled pie at room temperature for up to two days, or refrigerate for up to five days. To freeze, wrap the fully cooled pie tightly in plastic wrap and foil and freeze for up to three months.
Reheat individual slices in a 300°F oven for about 15 minutes to re-crisp the crust rather than using the microwave, which softens it.
Frequently Asked Questions
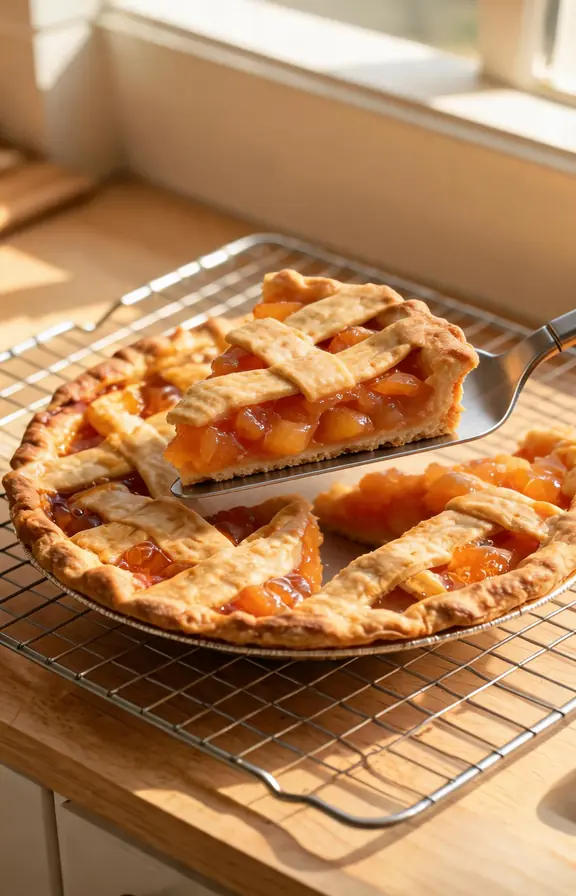
Peach Pie Recipe
A juicy, golden lattice peach pie with a blind-baked bottom crust and a cornstarch-thickened filling that slices clean every time.
- 9-inch glass or ceramic pie dish
- Rolling pin
- Pie weights or dried beans
- Parchment paper
- Small saucepan (for reducing peach juice)
- Pastry brush (for egg wash)
- Sharp paring knife (for peeling and venting)
- Baking sheet (to catch drips)
- 2 1/2 cups (313g) all-purpose flour
- 1 teaspoon (6g) fine sea salt
- 2 tablespoons (25g) granulated sugar
- 1 cup (226g) unsalted butter, very cold, cubed
- 6 to 8 tablespoons (90 to 120ml) ice water
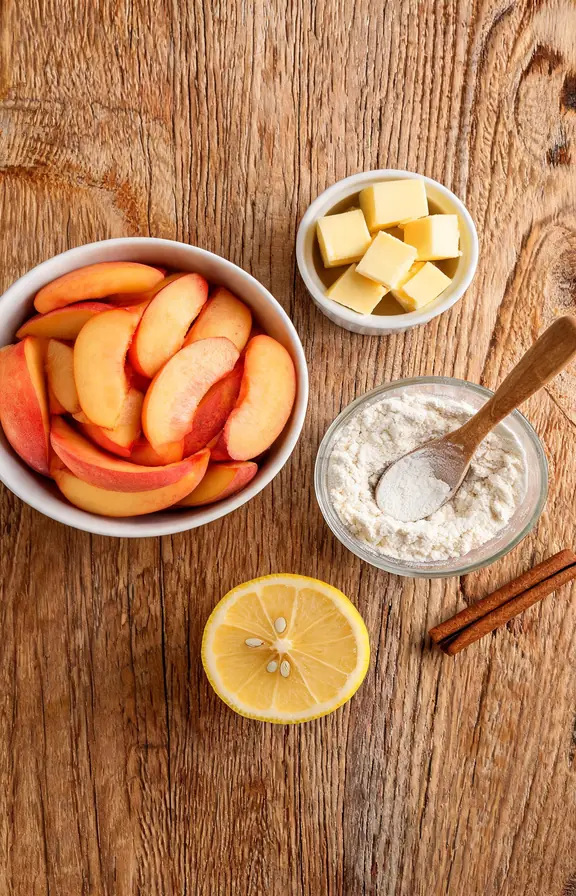
- 7 cups (about 2.5 lbs) fresh freestone peaches, peeled and sliced
- 3/4 cup (150g) granulated sugar, adjust to peach sweetness
- 1/4 cup (32g) cornstarch
- 2 tablespoons (30ml) fresh lemon juice
- 1/2 teaspoon ground cinnamon
- 1/4 teaspoon ground nutmeg
- 1/4 teaspoon fine sea salt
- 1 teaspoon vanilla extract
- 2 tablespoons cold unsalted butter, cut into small pieces
- 1 large egg
- 1 tablespoon water
- 2 tablespoons coarse turbinado sugar
- Make and chill the pie dough Whisk the flour, salt, and sugar together in a large bowl. Add the cold cubed butter and work it in with a pastry cutter or your fingers until pea-sized pieces remain. Drizzle in the ice water one tablespoon at a time, tossing gently, until the dough just holds together when squeezed. Divide into two disks, wrap tightly, and refrigerate for at least 1 hour.
- Macerate the peaches Toss the sliced peaches with sugar, lemon juice, and salt in a large bowl. Let sit for 30 to 45 minutes, stirring once, until visible juice pools at the bottom of the bowl.
- Roll and blind bake the bottom crust Preheat the oven to 425°F. Roll out one disk of dough and fit it into your glass pie dish. Line with parchment, fill with pie weights, and bake for 15 minutes. Remove the weights and parchment, then bake 5 more minutes until the base looks dry. Set aside to cool slightly.
- Thicken the peach juice Drain the released peach juice into a small saucepan and whisk in the cornstarch until smooth. Simmer over medium heat for 1 to 2 minutes, stirring constantly, until thick and glossy. Fold the thickened juice, cinnamon, nutmeg, and vanilla back into the peaches.
- Fill and top the pie Pour the peach filling into the blind-baked crust and dot with the cold butter pieces. Roll out the second dough disk and cut into strips for a lattice, or lay it whole and cut several vent slashes. Crimp the edges to seal.
- Egg wash and bake Whisk the egg and water together and brush over the top crust in one smooth pass. Sprinkle with turbinado sugar. Place the pie on a baking sheet and bake at 425°F for 20 minutes, then reduce the oven to 375°F and bake 30 to 35 minutes more, until the filling bubbles thickly at the vents and the internal temperature reads about 200°F.
- Cool completely before slicing Transfer the pie to a wire rack and cool for at least 3 hours before cutting. This resting time is what allows the cornstarch-thickened filling to fully set into clean, sliceable wedges.
Nutritional values are estimates calculated using standard USDA food composition data. Actual values will vary based on peach ripeness, specific crust ingredients used, and exact slice size.