Our site contains ads and uses Amazon affiliate links. We may earn a small commission at no extra cost to you. We know ads can be distracting, and we’re sorry for any inconvenience they cause. It helps us keep the site running. Thanks for your understanding and supporting us!
📊Recipe at a Glance
- Prep Time: 10 minutes
- Cook Time: 45 minutes
- Total Time: 55 minutes
- Servings: 12 servings
- Diet Type: Vegetarian
- Cuisine: American
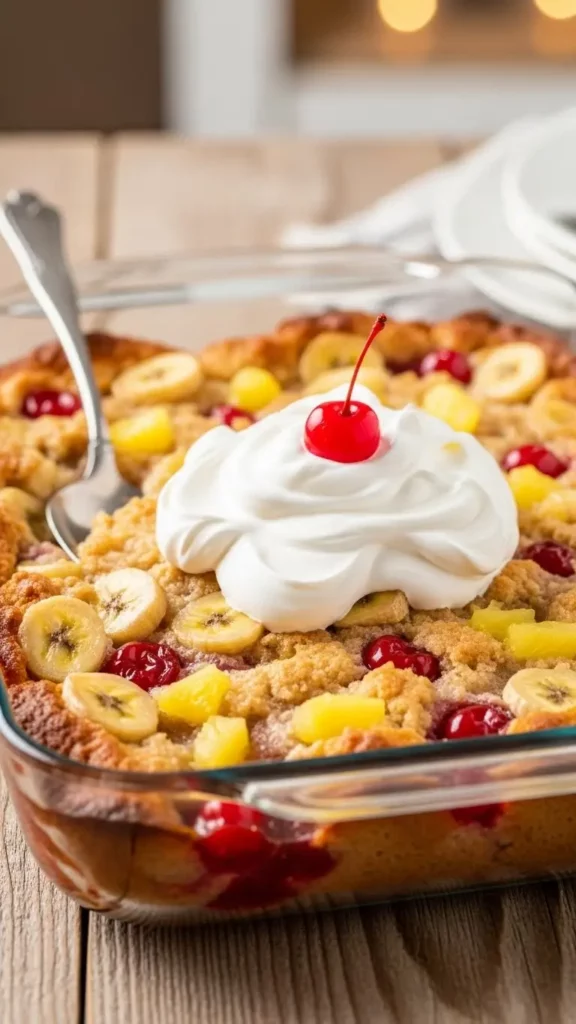
Imagine all the flavors of a classic banana split transformed into a warm, gooey dessert that requires almost no effort.
This Banana Split Dump Cake combines layers of crushed pineapple, fresh bananas, juicy strawberries, and chocolate chips beneath a golden, buttery cake topping.
The magic happens when everything melts together in the oven, creating a dessert that’s crispy on top and luxuriously soft underneath.
Perfect for potlucks, family gatherings, or whenever you crave something sweet without spending hours in the kitchen.
The aroma of caramelized bananas and melted chocolate will have everyone rushing to the table.
Why This Recipe Stands Out
- No Mixing Required: Simply layer ingredients in the pan and let the oven do all the work.
- Classic Flavor Combination: Captures the beloved taste of a traditional banana split in cake form.
- Budget Friendly: Uses simple pantry staples and affordable ingredients.
- Crowd Pleaser: Serves 12 people, making it perfect for gatherings and celebrations.
- Customizable: Easy to adapt with your favorite fruits and mix-ins.
- Quick Preparation: Only 10 minutes of hands-on time before baking.
Ingredients You’ll Need
- 1 can (20 oz) crushed pineapple in juice, undrained
- 3-4 medium ripe bananas, sliced
- 1 can (21 oz) strawberry pie filling
- 1 cup semi-sweet chocolate chips
- 1 box (15.25 oz) yellow cake mix
- 1/2 cup (1 stick) unsalted butter, melted
- 1 cup chopped walnuts or pecans (optional)
- 1/2 cup shredded coconut (optional)
- Whipped cream for serving
- Maraschino cherries for garnish
Tools to Use
- 9×13 inch baking dish
- Measuring cups
- Knife and cutting board
- Can opener
- Small bowl for melting butter
- Spoon or spatula
How to Make the Banana Split Dump Cake
Step-1: Prepare Your Baking Dish
Preheat your oven to 350°F (175°C).
Lightly grease a 9×13 inch baking dish with butter or non-stick cooking spray.
This prevents sticking and makes cleanup easier.
Step-2: Layer the Pineapple Base
Pour the entire can of crushed pineapple with its juice into the bottom of the prepared baking dish.
Spread it evenly across the pan using a spoon.
The juice keeps the cake moist and adds tropical sweetness.
Step-3: Add the Banana Layer
Slice your bananas into 1/4 inch rounds.
Arrange the banana slices evenly over the pineapple layer.
Make sure to cover the entire surface for consistent flavor in every bite.
Step-4: Spread the Strawberry Filling
Spoon the strawberry pie filling over the banana layer.
Gently spread it to create an even layer.
The filling adds fruity sweetness and a beautiful pink color.
Step-5: Sprinkle the Chocolate Chips
Scatter the chocolate chips evenly across the strawberry layer.
The chips will melt during baking, creating pockets of rich chocolate throughout.
Use dark chocolate chips for a more intense flavor if desired.
Step-6: Add Optional Toppings
If using, sprinkle the chopped nuts and shredded coconut over the chocolate chips.
These add delightful texture and authentic banana split flavor.
Toast the nuts beforehand for extra crunch and depth.
Step-7: Top with Cake Mix
Open the box of yellow cake mix and pour it evenly over all the layers.
Use a spoon to spread the dry mix to the edges of the pan.
Make sure the entire surface is covered with cake mix.
Step-8: Drizzle with Butter
Pour the melted butter evenly over the dry cake mix.
Try to cover as much of the surface as possible.
The butter helps create that golden, crispy top layer.
Step-9: Bake to Perfection
Place the baking dish in the preheated oven.
Bake for 45-50 minutes until the top is golden brown and bubbly around the edges.
The cake should be set but still moist underneath.
Step-10: Cool and Serve
Remove from the oven and let it cool for 10-15 minutes.
The dessert will be extremely hot and needs time to set.
Serve warm with a dollop of whipped cream and a cherry on top.
Related Recipes You’ll Love to Try
- Maple Chai Latte Cookies with Brown Butter Icing: Cozy Fall Baking Perfection
- Vegan Coconut Chocolate Brownies: Rich, Fudgy & Completely Dairy-Free
- Sweet, Simple & No-Bake: Peanut Butter Banana Bites You’ll Make on Repeat
- Soft, Sweet & High-Protein: Easy Vanilla Protein Mug Cake
Nutritional Information
Per Serving (1 slice):
- Calories: 385
- Protein: 3g
- Fat: 16g
- Carbohydrates: 58g
- Sodium: 320mg
Note: Nutritional values are approximate and may vary based on specific ingredients used.
Tips for Success
- Choose Ripe Bananas: Use bananas with brown spots for maximum sweetness and flavor.
- Don’t Skip the Juice: The pineapple juice is essential for moisture, so use the entire can.
- Butter Coverage Matters: Make sure the melted butter reaches the edges to prevent dry spots.
- Let It Rest: Allow the cake to cool slightly before serving so the layers can set properly.
- Customize Your Mix-Ins: Feel free to swap strawberry filling for cherry or use white chocolate chips.
- Test for Doneness: The top should be golden and the edges bubbling when fully baked.
- Make Ahead Option: Assemble everything except the butter and cake mix, then refrigerate until ready to bake.
Common Mistakes to Avoid
- Using Unripe Bananas: Green or firm bananas lack sweetness and won’t soften properly during baking.
- Draining the Pineapple: The juice is crucial for moisture, never pour it out.
- Mixing the Layers: Keep each layer distinct for the best texture and visual appeal.
- Not Covering with Butter: Dry spots on the cake mix won’t cook properly without butter.
- Overbaking: This can dry out the dessert, check at 45 minutes and remove when golden.
- Skipping the Cooling Time: Cutting too early causes the layers to run together messily.
- Using Cold Butter: Melted butter distributes evenly, while cold butter creates uneven patches.
Creative Serving Ideas
- Ice Cream Sundae Style: Serve warm with vanilla ice cream, chocolate sauce, and extra cherries.
- Breakfast Twist: Enjoy leftovers cold with Greek yogurt for a decadent morning treat.
- Individual Portions: Bake in ramekins for personal-sized desserts perfect for dinner parties.
- Tropical Upgrade: Top with fresh pineapple chunks and toasted coconut flakes before serving.
- Chocolate Drizzle: Melt chocolate chips with a bit of cream and drizzle over each slice.
- Layered Parfait: Break up cooled cake and layer with whipped cream in glasses.
- Campfire Version: Make in a cast iron skillet over a campfire or grill for outdoor gatherings.
Frequently Asked Questions
Can I Use Fresh Pineapple Instead of Canned?
Fresh pineapple works, but you’ll need to add about 1/4 cup of pineapple juice or water for moisture.
Canned pineapple is recommended because the juice keeps the cake perfectly moist.
Chop fresh pineapple into small pieces for even distribution.
How Do I Store Leftover Dump Cake?
Cover the baking dish tightly with plastic wrap or aluminum foil and refrigerate for up to 4 days.
The cake tastes delicious cold or reheated in the microwave for 30-45 seconds. You can also freeze individual portions for up to 3 months.
Can I Make This Gluten Free?
Yes, simply substitute a gluten-free yellow cake mix for the regular version.
All other ingredients are naturally gluten-free. The texture will be slightly different but still delicious.
What Other Cake Mix Flavors Work Well?
Chocolate cake mix creates a richer dessert, while white cake mix offers a lighter option.
Strawberry cake mix intensifies the berry flavor. Any flavor you choose will work with the dump cake method.
Do I Need to Use Pie Filling or Can I Use Fresh Strawberries?
Fresh strawberries work beautifully, but you’ll need to toss them with 2-3 tablespoons of sugar first.
Frozen strawberries (thawed and drained) are another option.
Pie filling provides consistent sweetness and texture with less effort.
Can I Make This Without Nuts?
Absolutely, the nuts are completely optional. The cake is just as delicious without them.
Consider adding extra chocolate chips or coconut instead for added texture.
Why Is My Dump Cake Soggy in the Middle?
This usually means it needs more baking time or the butter didn’t cover the cake mix completely.
Bake for an additional 5-10 minutes if the center seems wet.
Make sure all dry cake mix is moistened with butter before baking.
Can I Double This Recipe?
Yes, double all ingredients and use two 9×13 inch pans rather than one larger pan.
Baking time remains the same at 45-50 minutes.
Check both pans for doneness as oven hot spots may cause uneven baking.


