Our site contains ads and uses Amazon affiliate links. We may earn a small commission at no extra cost to you. We know ads can be distracting, and we’re sorry for any inconvenience they cause. It helps us keep the site running. Thanks for your understanding and supporting us!
Most pumpkin scone recipes treat pumpkin puree like a neutral add in. It is not.
Pumpkin puree carries a huge amount of water into your dough, and that water has to go somewhere. If you do not account for it, your scones spread instead of rise, and the inside stays dense and wet even after 20 minutes in the oven.
This recipe fixes that with two things almost no other pumpkin scone recipe explains clearly: exactly how much moisture to blot out, and why grated butter beats cubed butter for this specific dough.
Both changes take under five minutes and make the difference between a flat, cakey scone and a tall, flaky one.
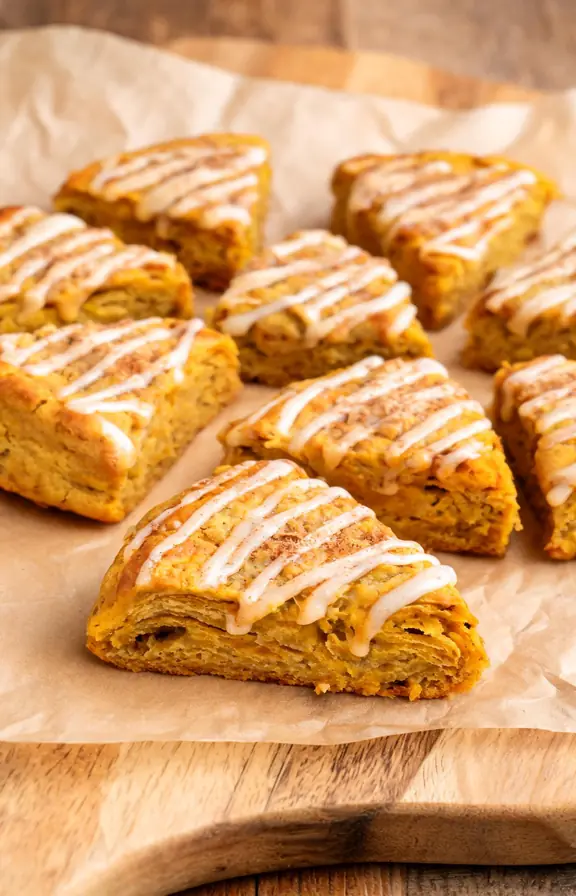
Why Most Pumpkin Scones Turn Out Dense or Flat
Two problems show up over and over in pumpkin scone recipes, and they both trace back to moisture. Canned pumpkin puree adds a lot of liquid to a dough that is supposed to stay firm and cold.
The second problem is warm butter. If butter softens before the dough hits the oven, it melts into the flour instead of creating steam pockets, and the scone bakes up short and dense.
Neither issue is hard to fix once you understand what is happening. You just need to control moisture going in and butter temperature the whole way through.
The Pumpkin Moisture Math Nobody Explains
Canned pumpkin puree is about 90 percent water by weight, according to USDA nutrient data on canned pumpkin. That means a half cup of puree carries close to 100 grams of water into your dough, which is more liquid than most scone recipes call for in total.
Blotting does not remove all of that water, and it should not. You want to keep enough moisture for flavor and that soft, cake like crumb pumpkin gives scones, while removing the excess that makes dough unworkable.
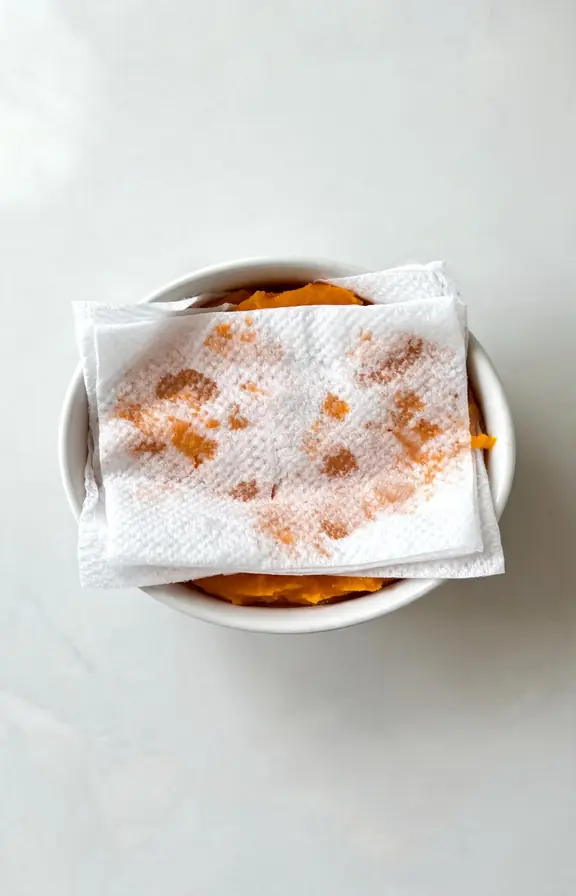
If your dough still feels tacky after blotting, resist the urge to add more flour at the mixing stage. Chill the dough for 10 minutes instead. Cold dough always handles better than dough with extra flour worked into it.
Grated Frozen Butter vs. Cubed Butter: Which Rises Taller
Almost every scone recipe tells you to use cold butter. Fewer explain that how you cut the butter changes how tall your scones rise.
Cubed butter, even when frozen, creates larger pockets of fat surrounded by flour. Those pockets take longer to melt in the oven, and by the time they do, your dough has often already set into its final shape, so you lose some of the steam lift.
Grated butter, pushed through the large holes of a box grater while frozen, creates thin shreds that distribute evenly through the flour. These shreds melt almost instantly in the oven’s first few minutes, releasing steam early and pushing the dough upward before the structure sets.
For this recipe, grate the butter on the coarse side of a box grater directly into your flour bowl, then return the whole bowl to the freezer for five minutes before mixing. This one swap is the fastest way to get noticeably taller scones without changing anything else in the recipe.
Folding the Dough for Bakery Style Layers
Full lamination, the kind used for croissants, is overkill for scones. A simplified version still builds visible layers without extra effort.
After the dough comes together into a shaggy mass, turn it onto a floured surface. Pat it into a rough rectangle, then fold it into thirds like a letter.
Rotate the dough a quarter turn, pat it out again, and fold it into thirds one more time. Two folds are enough. More than that starts to overwork the gluten and toughens the crumb.
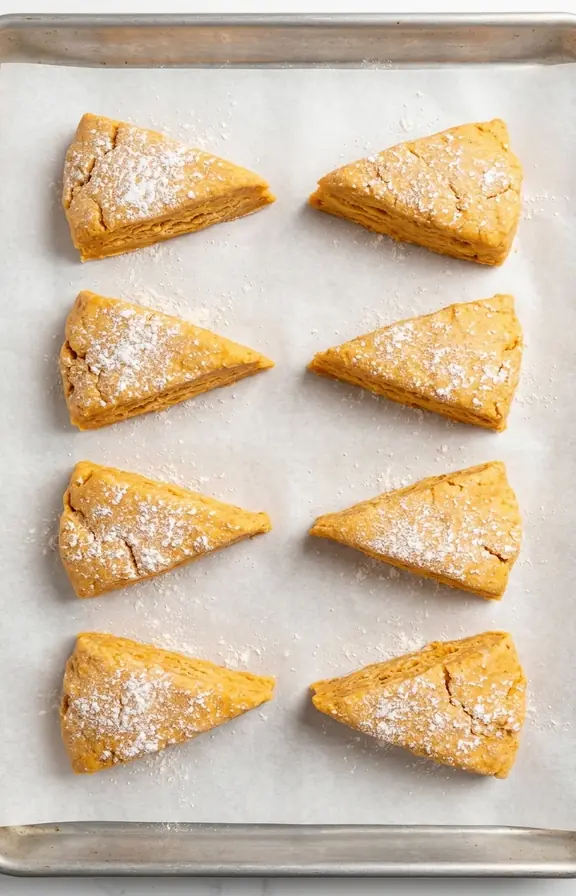
Pat the dough into a circle about one inch thick, then cut it into 8 wedges with a bench scraper or sharp knife. Straight down cuts, not a sawing motion, keep the edges clean so the layers stay visible after baking.
Freezing the Wedges Before Baking Matters More Than You Think
Once the dough is cut into wedges, place them on a parchment lined tray with space between each one. Freeze for 15 minutes before baking, even if you plan to bake them right away.
This short freeze re-solidifies any butter that softened from handling and firms up the pumpkin dough itself, which is naturally softer than a plain scone dough. Frozen wedges hold their shape and rise more evenly in a hot oven.
Brush the tops lightly with cream before baking for color, then bake at 400°F until the tops are deep golden and a toothpick inserted in the center comes out clean.
Storing, Freezing, and Reheating Leftover Scones
Baked scones keep well at room temperature in an airtight container for up to 2 days. After that, the pumpkin’s moisture starts to soften the crust.
To freeze baked scones, cool them completely, wrap individually, and freeze for up to 2 months. Reheat straight from frozen in a 300°F oven for about 10 minutes.
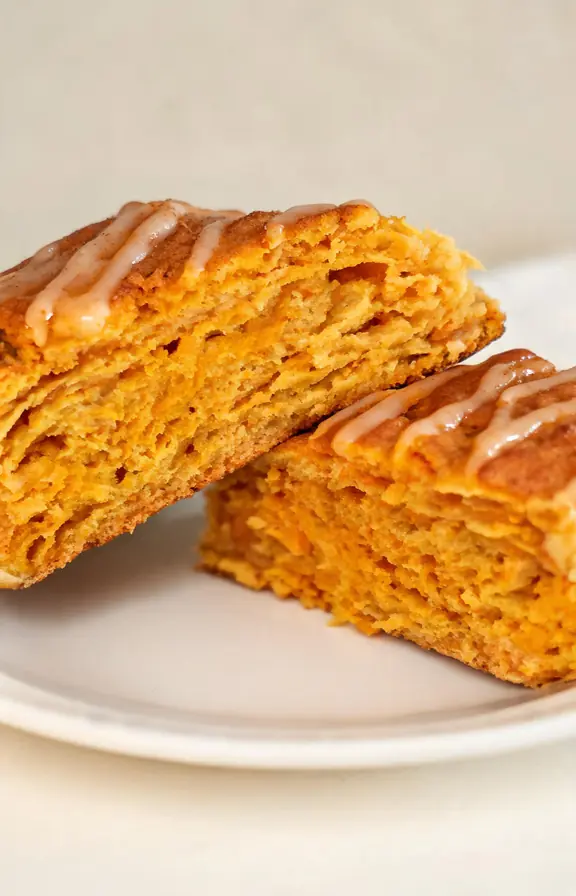
You can also freeze the shaped, unbaked wedges for up to 3 months. Bake straight from frozen, adding 3 to 4 extra minutes to the bake time. This is the better option if you want fresh, hot scones on a weekday morning without any prep.
Frequently Asked Questions
Pumpkin Scones with Cinnamon Glaze
Tall, flaky pumpkin scones with a tender, spiced crumb and a simple cinnamon glaze. Blotted pumpkin and grated frozen butter give these scones a taller rise than most bakery versions.
- Box grater (for the frozen butter)
- Large mixing bowl
- Kitchen scale (optional, for accuracy)
- Bench scraper or sharp knife
- Parchment paper
- Rimmed baking sheet
- Pastry brush
- Paper towels (for blotting pumpkin)
- 2 1/2 cups (313g) all-purpose flour, plus extra for dusting
- 1/3 cup (67g) granulated sugar
- 1 tablespoon (12g) baking powder
- 1 teaspoon pumpkin pie spice
- 1/2 teaspoon ground cinnamon
- 1/2 teaspoon fine sea salt
- 1/2 cup (113g) unsalted butter, frozen solid
- 1/2 cup (120g) canned pumpkin puree, blotted with paper towels
- 1/3 cup (80ml) heavy cream, plus 1 tablespoon for brushing
- 1 large egg, cold
- 1 teaspoon vanilla extract
- 1 cup (120g) powdered sugar
- 2 tablespoons (30ml) heavy cream or milk
- 1/4 teaspoon ground cinnamon
- Pinch of fine sea salt
- Blot the pumpkin puree Spread the pumpkin puree between two layers of paper towel. Press firmly for about 60 seconds to draw out surface moisture. Scrape the blotted puree into a small bowl and set aside.
- Whisk the dry ingredients In a large bowl, whisk together the flour, sugar, baking powder, pumpkin pie spice, cinnamon, and salt until evenly combined.
- Grate the butter Using the coarse side of a box grater, grate the frozen butter directly into the flour mixture. Toss gently with your fingers to coat the shreds in flour, then place the bowl in the freezer for 5 minutes.
- Combine wet ingredients In a separate bowl, whisk together the blotted pumpkin, heavy cream, egg, and vanilla extract until smooth.
- Mix the dough Remove the flour mixture from the freezer. Pour in the pumpkin mixture and stir with a spatula just until a shaggy dough forms and no dry flour remains at the bottom of the bowl. The dough will look rough. That is correct.
- Fold and shape Turn the dough onto a lightly floured surface. Pat into a rough rectangle, fold into thirds, rotate a quarter turn, and fold into thirds again. Pat the dough into a circle about 1 inch thick and cut into 8 wedges with a bench scraper.
- Freeze the wedges Arrange the wedges on a parchment lined baking sheet, spaced at least 2 inches apart. Freeze for 15 minutes. Preheat the oven to 400°F (200°C) during this time.
- Bake Brush the tops of the frozen wedges lightly with the reserved tablespoon of cream. Bake for 16 to 18 minutes, until the tops are deep golden and a toothpick inserted in the center comes out clean.
- Cool and glaze Transfer scones to a wire rack and cool for at least 15 minutes. Whisk together the powdered sugar, cream, cinnamon, and salt for the glaze, then drizzle over the cooled scones. Let the glaze set for 10 minutes before serving.
Nutritional values are estimates calculated using standard USDA food composition data. Actual values will vary based on the specific pumpkin puree, flour, and cream used, as well as exact scone weight after baking.