Our site contains ads and uses Amazon affiliate links. We may earn a small commission at no extra cost to you. We know ads can be distracting, and we’re sorry for any inconvenience they cause. It helps us keep the site running. Thanks for your understanding and supporting us!
Most chocolate cream pie recipes fail in one of two ways. The filling is thin and pudding-soft, collapsing when you lift a slice. Or it is grainy and dull, made with cocoa alone and no real chocolate.
Both problems trace back to the same root: not understanding what each ingredient actually does inside the custard.
This recipe fixes that with a dual-chocolate method and a precise tempering sequence that produces a filling so smooth and firm you can slice it cleanly eight ways without the layers shifting.

Why Most Chocolate Cream Pies Fail to Slice Cleanly
The custard filling in a chocolate cream pie relies on two thickening mechanisms working at the same time. Cornstarch gelatinizes when heated above 203°F, forming the structural network that makes the filling sliceable.
Egg yolk proteins coagulate more gently, adding a custardy richness and preventing the starch network from becoming rubbery.
When either element is rushed or skipped, the filling either sets too soft or turns grainy. The solution is sequencing: cook cornstarch first at full heat, then add egg yolks at a controlled temperature.
The Dual-Chocolate Method: Cocoa Plus Real Chocolate
Every top-ranked chocolate cream pie recipe uses either Dutch-process cocoa or chopped chocolate. This recipe uses both, and the difference is significant.
Dutch-process cocoa powder dissolves into the hot milk base and builds a deep, mellow chocolate backbone. It contributes color and flavor without adding fat that would interfere with the cornstarch structure.
Finely chopped bittersweet chocolate, stirred in off the heat, melts into the finished custard and adds gloss, richness, and a second layer of chocolate complexity that cocoa alone cannot deliver.
The ratio matters: too much chopped chocolate softens the filling by adding cocoa butter that competes with the starch gel. Stick to 2 ounces of bittersweet chocolate for every 3 cups of milk in the filling base.
Crust Decision: Oreo, Graham Cracker, or Blind-Baked Pastry
No competitor recipe walks through this decision properly. The crust you choose affects not just flavor but how well the filling holds its moisture boundary over 24 to 48 hours of chilling.
An Oreo crust gives the strongest chocolate statement and has a fat content that creates a semi-waterproof barrier between crust and filling. It is the right choice if you want every bite to be purely about chocolate.
A graham cracker crust offers a warmer, slightly spiced contrast that makes the chocolate filling taste richer by comparison. It also has a lighter texture and absorbs moisture faster, so it is best consumed within 24 hours of assembly.
A fully blind-baked pastry crust gives you the cleanest, most stable slice. The baked flour barrier resists moisture migration better than either cookie crust.
If you are making this pie a full day ahead and need clean edges at the table, blind-baked pastry wins. For same-day serving, an Oreo crust is faster and equally reliable.
This recipe uses an Oreo crust. If you want to explore pastry-based pies, the same filling works perfectly in a buttery digestive biscuit base like the one used in this no-bake banoffee pie with homemade toffee.
Tempering Egg Yolks: The Step That Prevents Scrambled Custard
Egg yolks begin to scramble above 160°F when exposed to rapid heat. Adding cold yolks directly to a simmering milk mixture guarantees a grainy, curdled filling. Tempering solves this by raising the yolk temperature gradually.
Whisk your yolks until pale in a heatproof bowl. Ladle roughly half a cup of the hot milk mixture into the yolks while whisking constantly.
This raises the yolk temperature to around 140°F without shocking the proteins. Then pour the tempered yolk mixture back into the saucepan in a slow, steady stream while stirring.
The result is a filling that thickens evenly to a smooth, cohesive gel with no curdled texture. This is the same tempering principle used in French pastry cream, applied here to a simpler American custard filling.
If you enjoy working with custard-based desserts, the silky texture principle is similar to what makes our cloud-light homemade chocolate mousse so smooth and airy.
Whipped Cream Topping: Stabilized vs. Fresh
Plain whipped cream begins to weep within two to three hours at refrigerator temperature. For a pie you are serving same-day, this is fine. For a pie you are making the day before, you need a stabilized whipped cream.
The fastest stabilizer is a small amount of cream cheese beaten into the heavy cream before whipping. It adds body and holds the structure firm for up to 24 hours without thinning.
Apply the topping no more than two hours before serving. This keeps the cream cloud-light and prevents the chocolate surface from softening under the weight of a heavy piped layer.
Make-Ahead and Storage Guide
This pie is actually better made the day before serving. The filling firms up completely after a full night of chilling, and the flavors deepen as the chocolate compounds settle into the custard base.
Assemble the pie without the whipped topping and cover it with plastic wrap pressed directly against the surface of the filling. This prevents a skin from forming.
It keeps well for up to two days in the refrigerator. Add the topping the morning of serving, or no more than two hours before guests arrive.
Do not freeze this pie. The cornstarch-based custard becomes watery and grainy when thawed because starch retrogradation releases the moisture locked in the gel during freezing. This is different from mousse-style fillings that freeze cleanly.
Frequently Asked Questions
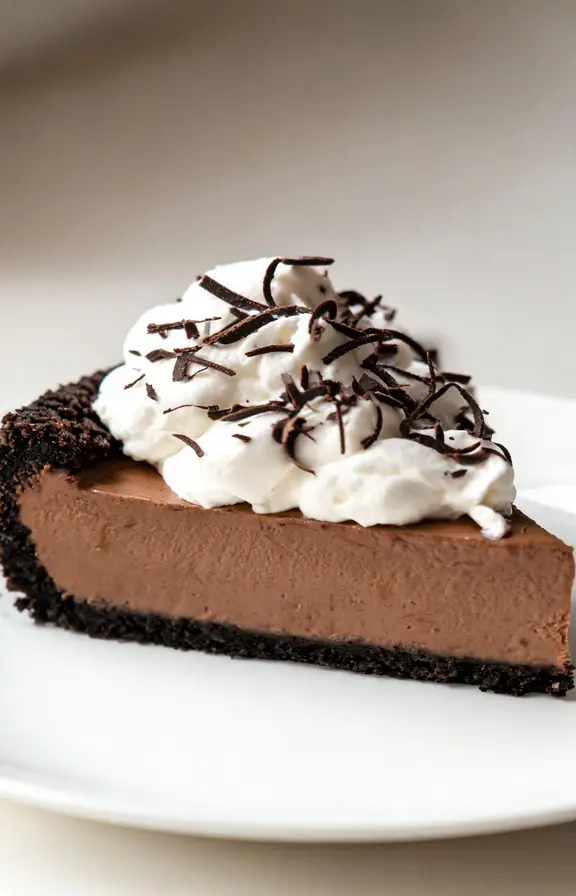
Chocolate Cream Pie Recipe
Silky, deeply chocolatey custard in a crisp Oreo crust. Made with Dutch-process cocoa and real bittersweet chocolate for a dual-chocolate filling that slices cleanly and stays set for two days.
- 9-inch pie dish
- Medium heavy-bottomed saucepan
- Whisk
- Heatproof mixing bowl (for tempering)
- Fine-mesh strainer
- Plastic wrap
- Stand mixer or hand mixer (for whipped cream)
- Offset spatula or piping bag
- 24 Oreo cookies (with filling), finely crushed (about 2 cups crumbs)
- 5 tablespoons (70g) unsalted butter, melted
- Pinch of fine sea salt
- 3 cups (720ml) whole milk
- 4 large egg yolks, room temperature
- 3/4 cup (150g) granulated sugar
- 1/4 cup (30g) cornstarch
- 1/3 cup (35g) Dutch-process cocoa powder, sifted
- 1/4 teaspoon fine sea salt
- 2 oz (57g) bittersweet chocolate (60-70% cacao), finely chopped
- 2 tablespoons (28g) unsalted butter, cut into pieces
- 1 teaspoon pure vanilla extract
- 1 cup (240ml) heavy whipping cream, cold
- 2 oz (57g) full-fat cream cheese, softened
- 3 tablespoons (23g) powdered sugar, sifted
- 1/2 teaspoon pure vanilla extract
- Chocolate shavings or cocoa powder for garnish (optional)
- Make and chill the Oreo crust Preheat the oven to 350°F (175°C). Pulse the Oreos in a food processor until finely ground with no large chunks. Transfer to a bowl, add melted butter and a pinch of salt, and stir until the crumbs look like damp sand and hold together when squeezed. Press firmly and evenly into the bottom and up the sides of a 9-inch pie dish using the back of a spoon or the base of a flat glass. Bake for 10 minutes until set and fragrant. Transfer to a wire rack and cool completely before adding the filling.
- Build the custard base In a medium heavy-bottomed saucepan, whisk together the sugar, cornstarch, sifted cocoa powder, and salt until fully combined with no lumps. Slowly pour in 2 cups of the whole milk, whisking as you pour until the dry ingredients are fully dissolved. Place over medium heat and warm this milk mixture, stirring occasionally, until it begins to steam and small bubbles appear around the edge of the pan. Do not bring to a full boil yet.
- Temper the egg yolks While the milk mixture heats, whisk the egg yolks and the remaining 1 cup of cold milk together in a heatproof bowl until smooth and pale. Once the milk mixture in the saucepan begins to steam, ladle approximately 1/2 cup of the hot liquid into the yolk mixture in a slow, steady stream while whisking constantly. This raises the yolk temperature gently without scrambling the proteins. Pour the warmed yolk mixture back into the saucepan in a steady stream, whisking the entire time.
- Cook to a full boil and hold Continue cooking over medium heat, stirring constantly with a whisk and reaching into the edges and bottom of the pan, until the mixture thickens and reaches a full rolling boil. The bubbles should break across the entire surface, not just around the edges. Hold the boil while stirring actively for 90 full seconds. This is the most critical step. Under-cooking at this stage leaves active enzymes that will break down the cornstarch gel and prevent the filling from setting firm.
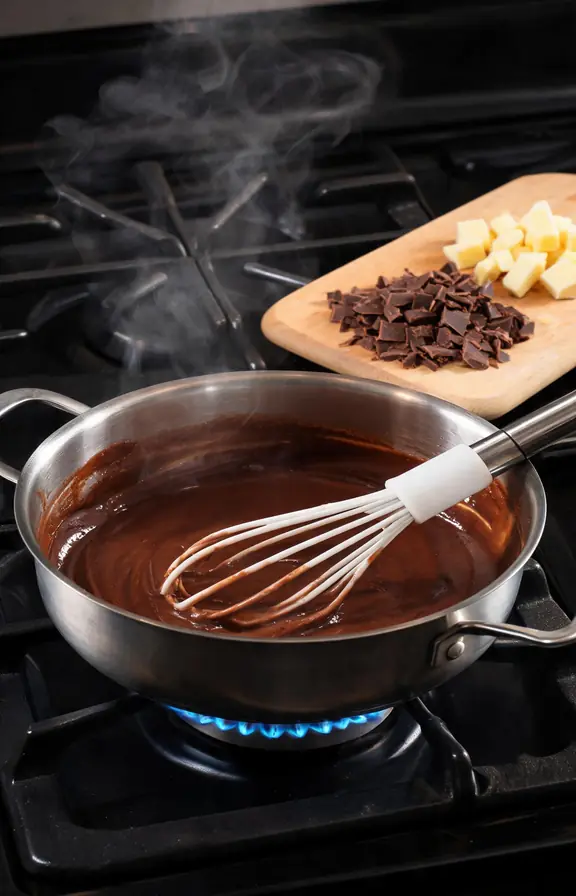
- Add chocolate, butter, and vanilla off heat Remove the saucepan from heat immediately after the 90-second hold. Add the finely chopped bittersweet chocolate and butter pieces. Stir gently until both are fully melted and the filling is smooth and glossy. Add the vanilla extract and stir to combine. If you notice any lumps, pour the filling through a fine-mesh strainer into a clean bowl. The filling should be thick, glossy, and coat the back of a spoon heavily.
- Fill the crust and chill Pour the hot filling into the cooled Oreo crust and spread to the edges with an offset spatula. Press a sheet of plastic wrap directly onto the surface of the filling so it makes full contact. This prevents a skin from forming during chilling. Refrigerate for a minimum of 4 hours. Overnight chilling produces the cleanest slice and the deepest flavor. Do not attempt to slice the pie before the full chill time is complete.
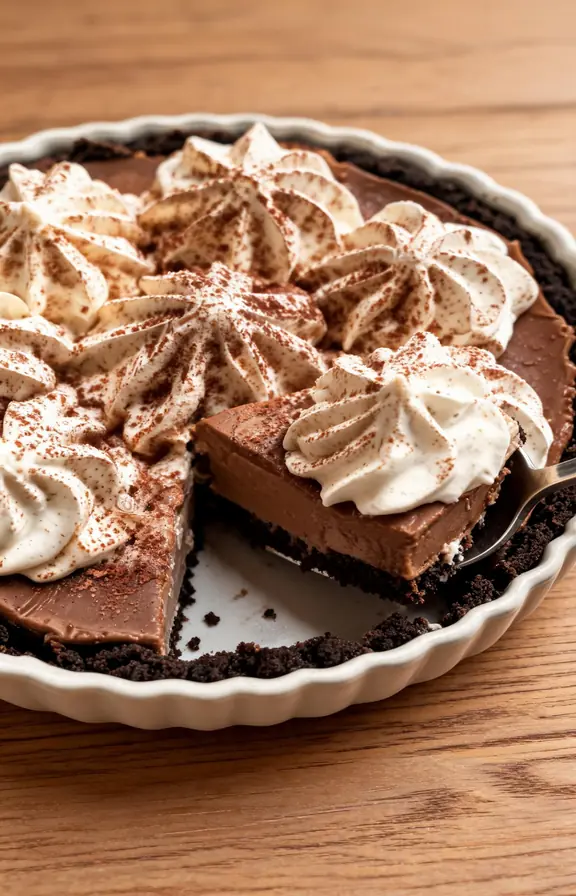
- Make stabilized whipped cream and top the pie Beat the softened cream cheese with a hand mixer until completely smooth with no lumps. Add the cold heavy cream, powdered sugar, and vanilla. Begin beating on medium speed and increase to high. Whip until stiff peaks form and the cream holds its shape firmly. Spread or pipe over the chilled pie no more than 2 hours before serving. Finish with chocolate shavings or a light dusting of cocoa powder through a fine sieve.
Nutritional values are estimates calculated using standard USDA FoodData Central composition data. Actual values will vary based on the specific chocolate brand, cocoa powder type, and exact Oreo crust thickness used.