Our site contains ads and uses Amazon affiliate links. We may earn a small commission at no extra cost to you. We know ads can be distracting, and we’re sorry for any inconvenience they cause. It helps us keep the site running. Thanks for your understanding and supporting us!
Most banoffee pie problems come down to two things: toffee that is too soft and runny, or bananas that turn brown before the pie even reaches the table.
Neither issue is hard to fix once you understand the mechanics of each layer. This recipe walks through every decision with the reasoning behind it.
So you can build a banoffee pie that slices cleanly, looks stunning, and tastes exactly like the original British dessert that made the whole world obsessed with the banana and toffee combination.
You will also find answers to the questions nobody else covers: what ripeness level actually works best, why the layer order matters, and how to make this pie a full day ahead without any loss of quality.
Where Banoffee Pie Came From (And Why the Original Still Wins)
Banoffee pie was created in 1971 by chef Ian Dowding and restaurant owner Nigel Mackenzie at the Hungry Monk restaurant in Jevington, East Sussex, England.
They adapted an American dessert called Blum’s Coffee Toffee Pie by replacing the original toffee method with slow-cooked condensed milk and adding bananas after apples and oranges failed to complement the flavour.
The name is a portmanteau of banana and toffee. It became so popular that customers would call ahead from London to check it was still on the menu before making the drive.
By the late 1970s it had spread to restaurants across Britain, and in 1997 the word “banoffee” entered the Oxford English Dictionary.
Understanding the origin matters because the original recipe used a shortcrust pastry base, not a biscuit crumb crust. The biscuit version came later and became the modern standard because it requires no baking and holds the toffee layer better.
This recipe uses a biscuit base for exactly those reasons. But the stovetop toffee method remains the gold standard for flavour, and that is what we use here.
The Toffee Layer: What the Science Actually Says
The toffee filling in a banoffee pie is not technically true toffee. It is a soft caramel made by concentrating and browning sweetened condensed milk with butter and sugar. What makes it taste so complex is the combination of two chemical reactions happening simultaneously.
Caramelization occurs when the sugars in condensed milk break down under heat, producing the deep amber colour and characteristic butterscotch notes.
The Maillard reaction runs alongside it: the amino acids in the milk solids react with lactose and reducing sugars to create layered, roasted complexity that plain caramel alone cannot produce.
This is why banoffee toffee tastes fundamentally different from sugar caramel even when both reach the same colour.
Practically, this means two things for your technique. First, cook over low to medium heat and stir constantly. High heat rushes past the ideal flavour window and can scorch the milk solids before the sugars develop.
Second, watch colour more than time. The toffee is ready when it shifts from pale gold to a deep amber and begins to pull slightly away from the sides of the pan.
The same principle is at work in other stovetop confections. The caramel-like base in a homemade German chocolate frosting cooked low and slow on the stovetop uses the same milk-and-sugar chemistry to develop deep, rounded flavour that no shortcut can replicate.
Choosing and Handling Your Bananas Correctly
Banana ripeness affects both texture and flavour more than most recipes admit. Fully yellow bananas with just one or two small brown spots are the ideal stage.
They are sweet enough to complement the toffee without competing with it, and firm enough to hold their shape under the weight of the cream layer above.
Underripe green bananas taste starchy and slightly bitter beside rich toffee. Overripe bananas with heavy brown spotting are too soft and release excess moisture into the toffee layer, softening the crust from underneath within a few hours of assembly.
The other banana problem that most recipes skip over is enzymatic browning. Sliced bananas oxidize quickly when cut surfaces are exposed to air.
A thin coating of fresh lemon juice inhibits the enzyme polyphenol oxidase that drives the browning reaction.
Toss the slices gently in half a teaspoon of lemon juice and they will stay bright yellow for four to six hours. At that small amount, the lemon is completely undetectable in the finished pie.
Layer Order: Why It Matters More Than You Think
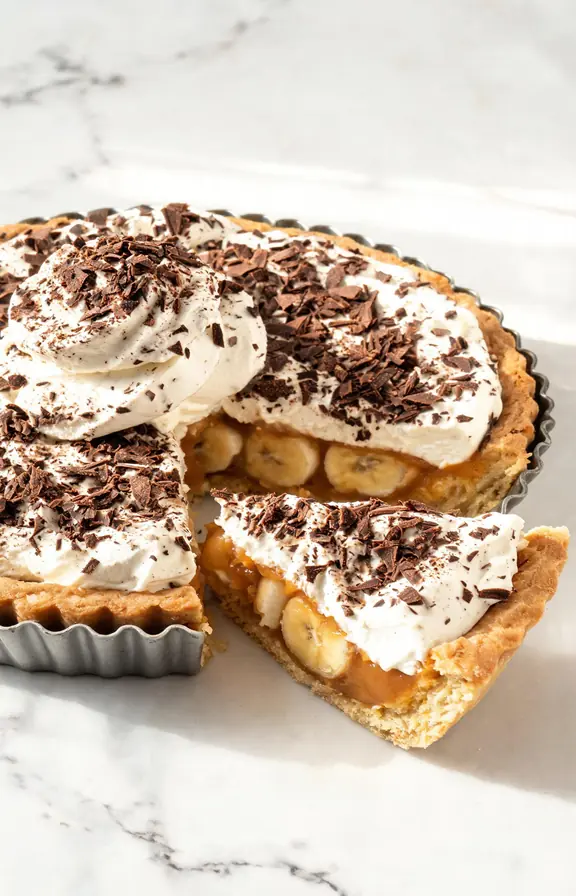
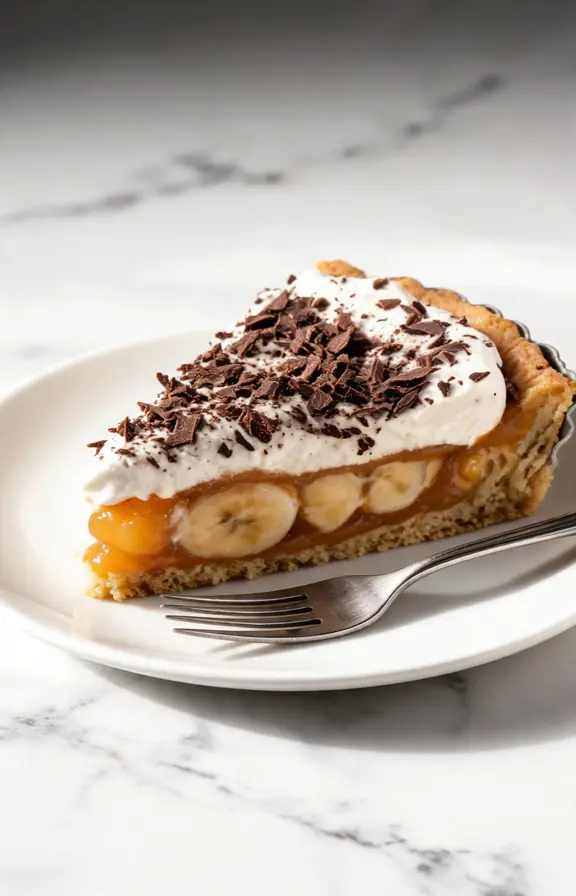
The correct assembly sequence for banoffee pie is crust first, then toffee directly on the crust, then banana slices on the set toffee, then whipped cream on top. This order is not arbitrary. It is structural.
Placing bananas directly on the biscuit base introduces moisture between the crust and the toffee, which causes the base to soften rapidly. The toffee layer poured directly onto the crust seals its surface and acts as a moisture barrier.
This keeps the crust noticeably crispier for longer, even when the finished pie is refrigerated overnight.
The cream goes on last for the same reason. Whipped cream placed on top of the banana layer covers the cut surfaces and slows further browning by reducing their exposure to air.
If you plan to serve the pie the next day, add the cream layer two to three hours before serving rather than the night before for the best appearance.
For make-ahead assembly, the base and toffee can be prepared up to 24 hours in advance and refrigerated. The toffee actually sets firmer and slices cleaner after a full night of chilling. Add bananas and cream on the day you plan to serve.
- Layer 1 – Biscuit crust: press firmly into the tin and chill at least 30 minutes before adding toffee
- Layer 2 – Toffee: pour warm directly onto the chilled crust and spread to the edges, then refrigerate until fully set, minimum 1 hour
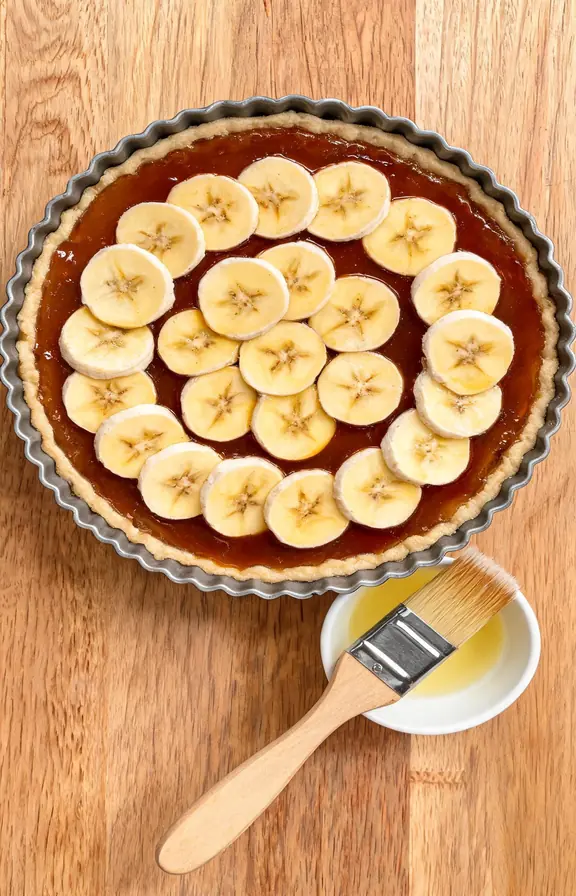
- Layer 3 – Bananas: toss in lemon juice first, then arrange in a single overlapping layer on the set toffee
- Layer 4 – Cream: whip to soft peaks only, spread generously, and finish with grated dark chocolate or a dusting of cocoa
Getting the Whipped Cream Right
Traditional banoffee pie uses double cream, the British equivalent of heavy whipping cream with at least 35% fat content.
The high fat content gives the cream body and stability so it holds its shape on top of the banana layer without weeping liquid into the filling below.
The most important detail most recipes miss is the target texture. You want soft peaks for banoffee pie, not stiff peaks. Soft peaks drape naturally over the bananas and look generous and elegant.
Stiff peaks produce a dense layer that feels heavy against the already very rich toffee. Stop beating when the cream just barely holds its shape and falls gently when the whisk is lifted.
For a stabilised cream that holds for longer without weeping, add one tablespoon of icing sugar per 240ml (1 cup) of cream before whipping.
If you need extra insurance for a warmer room or longer serving time, this whipped cream frosting that stays stable all day uses a cream cheese base that keeps the cream firm for hours without any compromise in texture.
For a more indulgent finish, a thin layer of tangy cream cheese frosting piped around the edge of each slice creates a beautiful flavour contrast that cuts through the sweetness beautifully.
Frequently Asked Questions
Banoffee Pie
Classic British no-bake pie with a buttery digestive biscuit crust, deep stovetop toffee, fresh banana slices, and billowy whipped cream. No oven needed. Slices cleanly when properly chilled. Make the base and toffee the night before for the best results.
- 23cm (9 inch) loose-bottomed tart tin or springform pan
- Heavy-bottomed saucepan (for toffee)
- Mixing bowls
- Hand mixer or stand mixer with whisk attachment
- Flat-bottomed glass or measuring cup (for pressing crust)
- Pastry brush or offset spatula
- Box grater (for chocolate finishing)
- 250g (about 16) digestive biscuits or graham crackers, finely crushed
- 110g (1/2 cup) unsalted butter, melted
- 1 pinch fine sea salt
- 75g (5 tablespoons) unsalted butter
- 75g (1/3 cup packed) dark brown sugar
- 397g (1 standard can) sweetened condensed milk
- 1 pinch fine sea salt
- 3 to 4 ripe bananas, yellow with only 1 to 2 small brown spots
- 1/2 teaspoon fresh lemon juice
- 480ml (2 cups) heavy whipping cream or double cream, very cold
- 2 tablespoons icing sugar (powdered sugar)
- 1 teaspoon pure vanilla extract
- Dark chocolate for grating, or unsweetened cocoa powder for dusting
- Make the biscuit crust Crush the biscuits into fine crumbs using a food processor or by sealing them in a zip-lock bag and rolling with a rolling pin. No large chunks should remain. Transfer to a bowl, add the melted butter and a pinch of salt, and stir until the crumbs look like wet sand and hold together when squeezed. Press firmly into the base and up the sides of a 23cm (9 inch) loose-bottomed tart tin or springform pan. Use the back of a spoon and the base of a flat glass to compact it evenly. Refrigerate for at least 30 minutes to set before adding toffee.
- Cook the toffee filling Combine the butter and dark brown sugar in a heavy-bottomed saucepan over low to medium heat. Stir constantly until the butter melts and the sugar fully dissolves, about 2 minutes. Pour in the condensed milk and increase the heat slightly to bring to a gentle bubble. Stir continuously for 4 to 5 minutes. The mixture will darken from pale gold to a deep amber and thicken enough to coat the back of a spoon heavily. Add a pinch of salt, remove from heat immediately, and pour over the chilled biscuit base, spreading to the edges. Allow to cool at room temperature for 20 minutes, then refrigerate for a minimum of 1 hour until fully set and firm.
- Prepare and layer the bananas Peel and slice the bananas into rounds approximately 1cm thick. Place in a bowl and toss gently with the lemon juice to coat all cut surfaces. Arrange the banana slices in a single overlapping layer directly on top of the fully set toffee, working from the outer edge toward the centre. Fill the entire surface so that every slice of the pie gets banana in every bite.
- Whip the cream Pour the very cold cream into a chilled bowl. Add the icing sugar and vanilla extract. Whip using a hand mixer or stand mixer beginning on medium speed, then increasing to medium-high. Stop when the cream reaches soft peaks. It should hold its shape gently but fall slowly when the whisk is lifted. Do not over-whip to stiff peaks, as this produces a dense, heavy layer that overwhelms the banana and toffee below.
- Assemble and finish Spoon or pipe the whipped cream generously over the banana layer, covering all exposed banana surfaces completely. Grate dark chocolate directly over the cream using a box grater, or dust lightly with cocoa powder through a fine sieve. Refrigerate for at least 30 minutes before serving to allow the cream to firm slightly and the layers to settle together. Slice with a sharp knife wiped clean between each cut for the cleanest presentation.
Nutritional values are estimates calculated using standard USDA food composition data. Actual values vary based on specific brands of biscuits, condensed milk, cream fat content, and banana size. Estimates are per 1 of 8 equal slices.