Our site contains ads and uses Amazon affiliate links. We may earn a small commission at no extra cost to you. We know ads can be distracting, and we’re sorry for any inconvenience they cause. It helps us keep the site running. Thanks for your understanding and supporting us!
Recipe at a Glance
- Prep Time: 10 minutes
- Cook Time: 20-25 minutes
- Total Time: 30-35 minutes
- Servings: 12 muffins
- Diet Type: Gluten Free, Dairy Free (optional)
- Cuisine: American
Baking gluten-free muffins can feel intimidating when you’re just starting your baking journey.
You might worry about dense textures, dry crumbs, or complicated mixing techniques that require special equipment.
The beautiful truth is that banana muffins are naturally forgiving, and this one-bowl method strips away all the stress.
Your kitchen will fill with the irresistible aroma of ripe bananas and warm spices within minutes, and you’ll have golden, fluffy muffins without a single mixer in sight.
Why This Recipe Stands Out
- One-bowl simplicity means minimal cleanup and maximum enjoyment of baking.
- No mixer required, making it perfect for beginners with limited kitchen equipment.
- Naturally gluten-free using certified gluten-free flour blends or simple rice flour combinations.
- The ripe bananas create natural sweetness and moisture without added fat complications.
- Ready in under 35 minutes from start to golden-brown finish.
- Yields 12 muffins that freeze beautifully for grab-and-go breakfasts throughout your week.
Tips for Success
- Use overripe bananas with brown spots on the skin for maximum sweetness and easier mashing.
- Mash your bananas thoroughly until only tiny lumps remain for consistent texture throughout.
- Mix your wet and dry ingredients separately in the same bowl to prevent overmixing.
- Fill muffin cups only two-thirds full so the tops bake evenly without overflow.
- Insert a toothpick in the center of a muffin; it should come out clean or with just a few moist crumbs.
- Cool muffins in the pan for 5 minutes before turning them out onto a wire rack.
- Store cooled muffins in an airtight container at room temperature for up to three days.
Common Mistakes to Avoid
- Using firm, yellow bananas instead of soft, overripe ones results in less sweet and drier muffins.
- Overmixing the batter creates tough, dense muffins with tunneling throughout the crumb.
- Opening the oven door repeatedly during baking causes temperature fluctuations and uneven rising.
- Skipping the rest time between combining wet and dry ingredients can lead to gummy centers.
- Forgetting to line or grease your muffin tin properly causes sticking and tearing when removing.
- Baking at incorrect temperature either burns the tops or leaves centers underbaked.
Creative Serving Ideas
- Serve warm muffins with a dollop of dairy-free Greek yogurt and fresh berries for breakfast.
- Slice muffins horizontally and use as a base for mini banana splits with coconut cream.
- Pair cooled muffins with a hot cup of coffee or herbal tea for an afternoon snack.
- Crumble muffins over gluten-free granola and dairy-free yogurt for an easy parfait.
- Toast day-old muffins lightly and spread with almond butter and honey for extra richness.
- Pack individual muffins in parchment paper for convenient lunchbox additions all week long.
Frequently Asked Questions
Can I use all-purpose flour instead of gluten-free flour?
Yes, you absolutely can if you’re not baking for someone with celiac disease or gluten sensitivity.
The texture and rise will be very similar to the gluten-free version.
Simply substitute one-to-one with your preferred all-purpose flour.
How do I know if my muffins are fully baked?
Insert a toothpick or thin knife into the center of a muffin and it should come out clean or with just a few moist crumbs.
The tops should be golden brown and a light touch should feel firm but slightly springy.
If the toothpick comes out wet with batter, return to the oven for 2-3 minutes longer.
Can I freeze these muffins for later?
Yes, these muffins freeze beautifully for up to three months in an airtight container.
Let them cool completely before wrapping each muffin individually in plastic wrap and placing them in a freezer bag.
Simply thaw at room temperature for 30 minutes or reheat in a 350-degree oven for about 10 minutes when ready to enjoy.
What can I add to the batter for extra flavor?
Chocolate chips, chopped walnuts, shredded coconut, or blueberries all work wonderfully in this recipe.
Add up to half a cup of mix-ins after combining the wet and dry ingredients.
Cinnamon or nutmeg can also be sprinkled in for warm spice notes that complement banana beautifully.
Is this recipe really dairy-free?
Yes, this base recipe contains no dairy products at all.
Make sure to use dairy-free milk and confirm your gluten-free flour blend doesn’t contain any hidden dairy.
Check all ingredient labels carefully if you’re baking for someone with a dairy allergy.
Why did my muffins turn out dense and heavy?
Dense muffins usually result from overmixing the batter, which develops too much gluten structure even in gluten-free flour blends.
Mix just until the dry ingredients are barely moistened and still look slightly lumpy.
Also ensure your baking soda or baking powder is fresh, as expired leavening agents won’t help your muffins rise properly.
Ingredients You’ll Need
- 3 overripe bananas, peeled
- 1/3 cup neutral oil or melted coconut oil
- 1/4 cup unsweetened applesauce
- 1/2 cup coconut milk or dairy-free milk
- 1 tablespoon vanilla extract
- 1 2/3 cups gluten-free all-purpose flour blend with xanthan gum
- 1/2 cup granulated sugar
- 1/4 cup brown sugar, packed
- 1 1/2 teaspoons baking soda
- 1 teaspoon baking powder
- 1/2 teaspoon salt
- 1 teaspoon ground cinnamon
- 1/4 teaspoon ground nutmeg
- Optional: 1/2 cup chocolate chips or chopped walnuts
Tools to Use
- One large mixing bowl
- One medium mixing bowl
- 12-cup muffin tin
- Muffin liners or cooking spray
- Wooden spoon or spatula
- Fork for mashing bananas
- Measuring cups and spoons
- Wire whisk
- Toothpick or thin knife for testing doneness
- Wire cooling rack
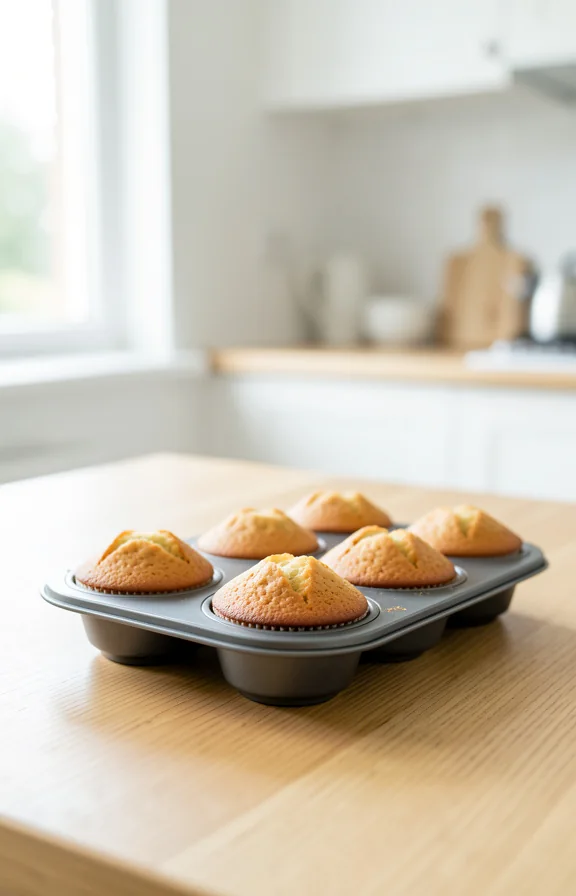
How to Make the No Mixer Gluten Free Banana Muffins
Step-1: Prepare Your Muffin Tin
Preheat your oven to 350 degrees Fahrenheit and position the rack in the center.
Line your 12-cup muffin tin with paper liners or lightly coat each cup with cooking spray.
This prevents sticking and makes removing the finished muffins much easier.
Step-2: Combine Your Wet Ingredients
Peel your three overripe bananas and place them in your large mixing bowl.
Using a fork, mash the bananas until only tiny lumps remain, which takes about 1-2 minutes of gentle pressing.
Add the oil, applesauce, milk, and vanilla extract to the mashed bananas and stir until well combined using a wooden spoon.
Step-3: Mix Your Dry Ingredients
In your medium mixing bowl, whisk together the gluten-free flour, granulated sugar, brown sugar, baking soda, baking powder, salt, cinnamon, and nutmeg.
Whisking these dry ingredients together distributes the leavening agents evenly without needing a mixer.
Set this bowl aside temporarily while you finish preparing.
Step-4: Combine Wet and Dry Ingredients
Pour the dry ingredient mixture into your large bowl with the banana mixture.
Using your wooden spoon, stir gently until the dry ingredients are just moistened, about 10-15 stirs.
Stop mixing immediately when you no longer see streaks of flour, even if tiny lumps remain.
Step-5: Add Optional Mix-Ins
If using chocolate chips or chopped walnuts, fold them gently into the batter now using your spoon.
Use only 1/2 cup total of mix-ins to avoid overwhelming the delicate banana flavor.
Distribute them evenly with just 3-4 gentle folds of the spoon.
Step-6: Fill Your Muffin Cups
Using a spoon or small ice cream scoop, divide the batter evenly among your 12 prepared muffin cups.
Fill each cup only two-thirds full to allow room for rising during baking.
The batter will look thick and bumpy, which is exactly what you want.
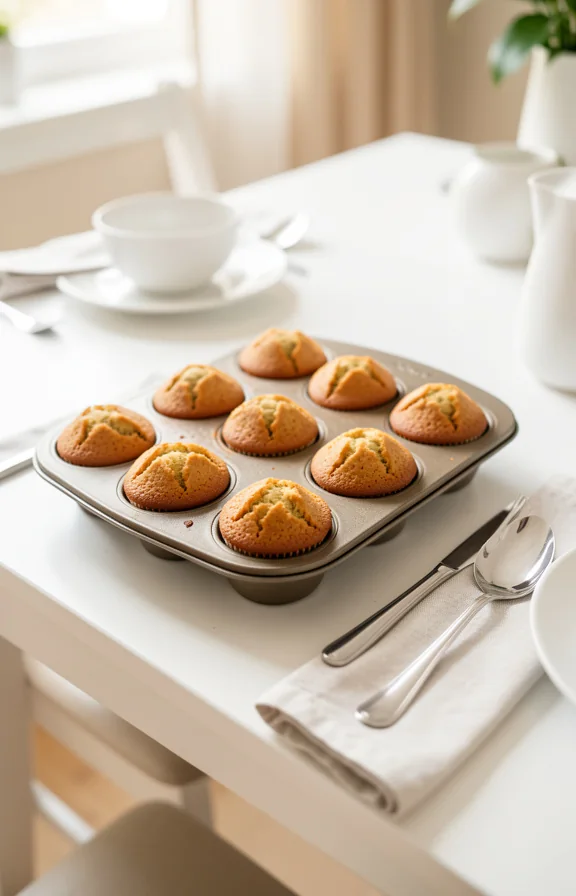
Step-7: Bake Your Muffins
Place your muffin tin in the preheated 350-degree oven for 20-25 minutes.
The muffins are done when the tops are golden brown and a toothpick inserted in the center comes out clean or with just a few moist crumbs.
Avoid opening the oven door before 20 minutes, as temperature fluctuations can prevent proper rising.
Step-8: Cool Your Muffins
Remove the muffin tin from the oven and let the muffins rest in the pan for 5 minutes.
This resting time allows them to firm up slightly so they don’t fall apart when removed.
After 5 minutes, turn the muffins out onto a wire cooling rack.
Step-9: Final Cooling
Allow the muffins to cool completely on the wire rack, which takes about 15-20 minutes total.
This prevents condensation from making them soggy on the bottoms.
Once cooled, serve immediately or store in an airtight container for later enjoyment.
Nutritional Information
- Calories: 215 per muffin
- Protein: 2g
- Fat: 9g
- Carbohydrates: 32g
- Fiber: 1.5g
- Sugar: 22g
- Sodium: 280mg
Note: Nutritional values are approximate and may vary based on specific ingredient brands used.


