Our site contains ads and uses Amazon affiliate links. We may earn a small commission at no extra cost to you. We know ads can be distracting, and we’re sorry for any inconvenience they cause. It helps us keep the site running. Thanks for your understanding and supporting us!
Recipe at a Glance
- Prep Time: 15 minutes
- Cook Time: 10 minutes
- Total Time: 25 minutes (plus 30-minute dough rest)
- Servings: 24 cookies
- Diet Type: Gluten-Free
- Cuisine: American
Most gluten free cookies crumble before they reach the plate.
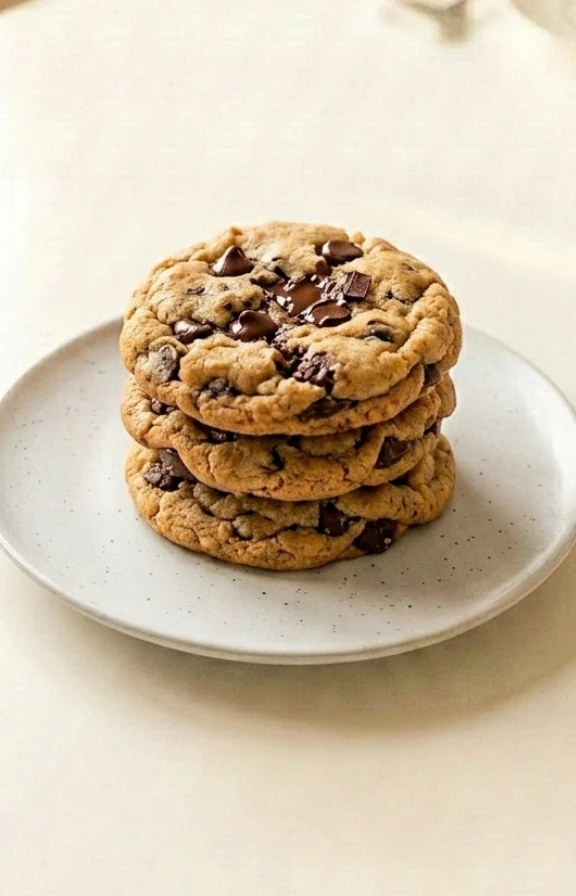
These gluten free chocolate chip cookies hold their shape, stay chewy in the center, and taste like nothing was swapped out at all.
The difference comes down to one step most recipes leave out.
Resting the dough for 30 minutes lets the gluten free flour fully hydrate, which kills the gritty texture completely.
Why This Recipe Stands Out
- Browned butter adds depth. Cooking the butter until golden creates nutty, caramel notes that plain melted butter cannot achieve. This technique lifts the overall flavour noticeably.
- Almond flour boosts richness. A small amount of almond flour alongside the gluten-free blend adds moisture and helps the cookies bake up golden brown and tender every time.
- Brown sugar drives chewiness. Its higher moisture content keeps the centres soft and chewy rather than dry and crumbly, a common problem with gluten-free baking.
- A 30-minute dough rest hydrates the flour. Gluten-free flours absorb liquid more slowly than wheat flour. Resting the dough gives the starches time to fully hydrate, resulting in better structure and texture.
- No mixer required. The entire dough comes together by hand in one bowl, keeping both prep and cleanup fast.
Tips for Success
- Use a 1:1 gluten-free flour blend that contains xanthan gum. Brands like King Arthur Measure-for-Measure or Bob’s Red Mill 1-to-1 perform consistently well. If your blend already contains xanthan gum, do not add more.
- Brown the butter fully before combining. Wait until the butter turns golden amber and smells nutty. Then let it cool for 10 minutes before mixing with sugars, or the heat will melt the sugar unevenly.
- Add an extra egg yolk. One whole egg plus one extra yolk adds richness and binding power without making the cookies cakey. The yolk increases chewiness noticeably.
- Scoop uniform balls and press slightly flat. Gluten-free dough does not spread as reliably as wheat dough. A gentle flatten before baking ensures even cooking and the right final shape.
- Pull cookies out when edges are golden but centres look underdone. They continue to set on the hot baking sheet for 5 minutes after coming out of the oven. Overbaking leads to dry, crumbly cookies.
- Sprinkle flaky sea salt immediately after baking. The heat helps the salt adhere, and it balances the sweetness of the chocolate beautifully.
Common Mistakes to Avoid
- Skipping the dough rest. Gluten-free flours absorb moisture more slowly than wheat flour. Baking immediately produces a gritty texture and cookies that spread unevenly. Resting for at least 30 minutes allows full hydration.
- Using warm browned butter straight away. Adding hot brown butter directly to sugar and eggs causes the eggs to scramble and the sugar to seize up partially. Always cool the butter to room temperature first.
- Doubling up on xanthan gum. If your gluten-free flour already contains xanthan gum and you add more, the cookies turn gummy and dense rather than soft and chewy. Always check the label before adding any binder.
- Overbaking by even 2 minutes. Gluten-free cookies appear underdone in the centre when they are actually ready. Removing them too late results in a hard, dry texture once cooled. Golden edges with a pale centre is the correct cue to stop baking.
- Using cold butter instead of melted. Cold butter does not blend evenly into gluten-free dough and leads to uneven spreading and inconsistent texture across the batch. Melted and cooled butter removes all guesswork.
Creative Serving Ideas
- Make ice cream sandwiches. Sandwich a scoop of vanilla or salted caramel ice cream between two cooled cookies. Freeze for 20 minutes for a firm, clean bite.
- Crumble over warm rice pudding. The crunch of the cookie against creamy pudding adds texture contrast and turns a simple dessert into something much more interesting.
- Serve warm alongside espresso. The bitterness of a short espresso cuts through the sweetness and highlights the caramel notes from the brown butter beautifully.
- Stack and wrap as edible gifts. Layer 4 to 6 cookies between parchment, tie with twine, and add a label. They hold their texture well for up to 5 days, making them ideal for gifting.
- Chop and fold into homemade gluten-free brownies. Roughly chopped cookies baked into brownie batter create pockets of chocolate chip cookie flavour throughout each slice.
Frequently Asked Questions
Can I use a different gluten-free flour blend?
Yes, but results vary depending on the blend you choose. Use a 1:1 baking blend that contains xanthan gum for the most reliable texture.
Blends with almond flour already included will brown faster, so check the cookies a minute or two early.
Avoid single-grain flours like rice flour alone, as they do not provide enough structure on their own.
My gluten free chocolate chip cookies came out flat and greasy. What went wrong?
This usually means the butter was too warm when mixed, or the dough was baked without resting first. Cool the browned butter completely before combining it with the sugars.
If the dough feels very soft or sticky, rest it in the refrigerator for 30 to 60 minutes before scooping.
Also check that your baking soda is fresh, as expired leavening agent loses its lifting power and causes spreading.
How do I store leftover cookies?
Store baked cookies in an airtight container at room temperature for up to 5 days. They stay soft and chewy longest when kept sealed.
For longer storage, freeze baked cookies in a zip bag for up to 3 months. Thaw at room temperature for 20 minutes before serving.
You can also freeze raw cookie dough balls and bake directly from frozen, adding 1 to 2 extra minutes to the bake time.
Can I make these dairy-free too?
Yes, swap the butter for a dairy-free alternative like Earth Balance or Miyoko’s, keeping in mind that dairy-free butter will not brown in the same way.
You will lose the nutty depth that brown butter provides, but the cookies will still bake up soft and chewy.
Use dairy-free chocolate chips such as Enjoy Life or Nestle Simply Delicious.
Omit any milk called for and replace with an equal amount of unsweetened oat milk.
I’ve never browned butter before. Is it difficult?
Not at all. Place the butter in a light-colored saucepan over medium heat so you can see the colour change clearly.
Stir gently as it melts and foams. After 3 to 4 minutes it will turn golden amber and smell nutty, which means it is ready.
Remove it from the heat immediately and pour it into a bowl to stop the cooking. Let it cool for 10 minutes before using.
Can I freeze the cookie dough to bake later?
Yes, scoop the dough into balls, place on a parchment-lined tray, and freeze until solid. Then transfer to a sealed freezer bag and store for up to 3 months.
Bake directly from frozen at the same temperature, adding 1 to 2 extra minutes to the bake time.
This method lets you bake just a few cookies at a time whenever you want a fresh-baked treat.
Ingredients You’ll Need
- ½ cup (113g) unsalted butter
- ¾ cup (150g) light brown sugar, packed
- ¼ cup (50g) granulated white sugar
- 1 large egg, room temperature
- 1 large egg yolk, room temperature
- 2 teaspoons pure vanilla extract
- 1½ cups (210g) gluten-free 1:1 baking flour blend (with xanthan gum)
- ¼ cup (28g) almond flour
- ½ teaspoon baking soda
- ½ teaspoon fine sea salt
- 1½ cups (255g) gluten-free semi-sweet chocolate chips
- Flaky sea salt, for finishing (optional)
Tools to Use
- Light-colored saucepan
- Large mixing bowl
- Medium mixing bowl
- Whisk
- Rubber spatula
- Cookie scoop (2 tablespoon capacity)
- Half sheet baking pan
- Parchment paper
- Wire cooling rack
How to Make the Gluten Free Chocolate Chip Cookies
Step-1: Brown the Butter
Place the butter in a light-coloured saucepan over medium heat. Stir gently as it melts, foams, and begins to turn golden amber.
Once you see golden brown specks on the bottom and smell a nutty aroma, pour immediately into a large mixing bowl. Cool for 10 minutes.
Step-2: Mix Butter and Sugars
Add the brown sugar and granulated sugar to the cooled brown butter. Whisk vigorously for about 60 seconds until smooth and combined.
The mixture should look glossy and slightly thickened at this point.

Step-3: Add Eggs and Vanilla
Add the whole egg, egg yolk, and vanilla extract to the butter-sugar mixture. Whisk until fully combined and the mixture lightens slightly in colour.
Scrape down the sides of the bowl with a rubber spatula to ensure everything is evenly mixed.
Step-4: Combine Dry Ingredients
In a separate medium bowl, whisk together the gluten-free flour blend, almond flour, baking soda, and salt. Break up any clumps fully before continuing.
Whisking the dry ingredients together ensures the baking soda distributes evenly through the dough.
Step-5: Mix Dough and Add Chocolate Chips
Add the dry ingredients to the wet ingredients and fold together with a rubber spatula until just combined. Do not overmix.
Fold in the chocolate chips until evenly distributed throughout the dough.
Step-6: Rest the Dough
Cover the bowl with plastic wrap and let the dough rest at room temperature for 30 minutes. This allows the gluten-free flour to fully hydrate.
For an even better texture and deeper flavour, refrigerate the dough for up to 48 hours before baking.
Step-7: Preheat and Prepare
Preheat your oven to 350°F (175°C) and line a half sheet pan with parchment paper. Allow at least 15 minutes for the oven to fully come to temperature.
If the dough was refrigerated, let it sit at room temperature for 10 minutes before scooping so it is easier to handle.
Step-8: Scoop and Shape
Use a 2-tablespoon cookie scoop to portion dough balls onto the prepared baking sheet, spacing them 2 inches apart. Gently press each ball slightly flat with your palm.
Press a few extra chocolate chips on top of each ball for a more attractive finished cookie.
Step-9: Bake to Golden Edges
Bake for 10 to 12 minutes until the edges are golden brown and the centres still look slightly underdone. They will continue to set as they cool.
Sprinkle immediately with flaky sea salt if using, while the cookies are still hot and the salt will adhere.
Step-10: Cool Before Serving
Let the cookies cool on the baking sheet for 5 minutes before transferring to a wire rack. This resting time finishes the baking process gently.
Allow to cool for at least 10 more minutes on the rack before eating so the centres can firm up fully.
Nutritional Information
- Calories: 184 kcal
- Carbohydrates: 25g
- Protein: 2g
- Total Fat: 9g
- Saturated Fat: 5g
- Cholesterol: 28mg
- Sodium: 115mg
- Fibre: 1g
- Sugar: 16g
- Calcium: 18mg
- Iron: 0.8mg
Note: Nutritional values are approximate and may vary based on specific ingredient brands used.


