Our site contains ads and uses Amazon affiliate links. We may earn a small commission at no extra cost to you. We know ads can be distracting, and we’re sorry for any inconvenience they cause. It helps us keep the site running. Thanks for your understanding and supporting us!
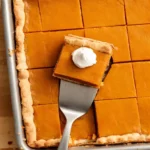
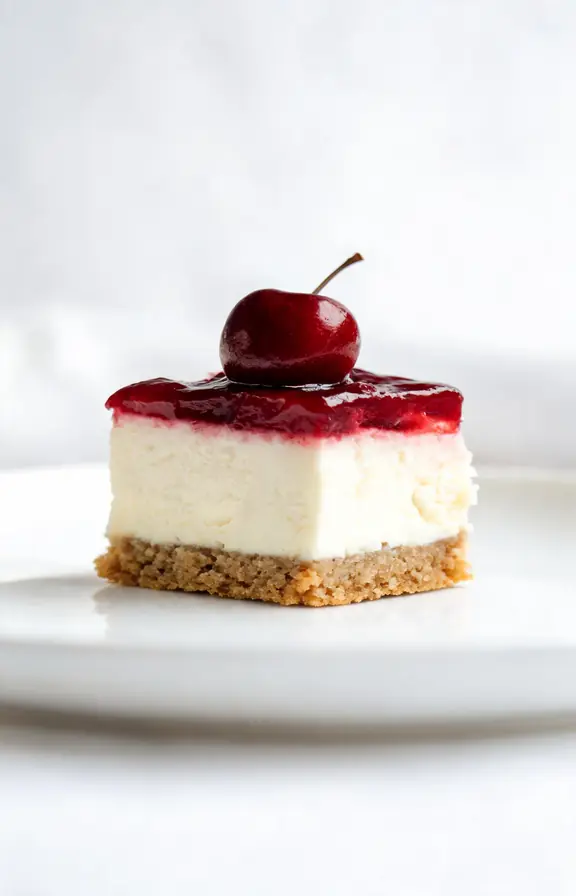
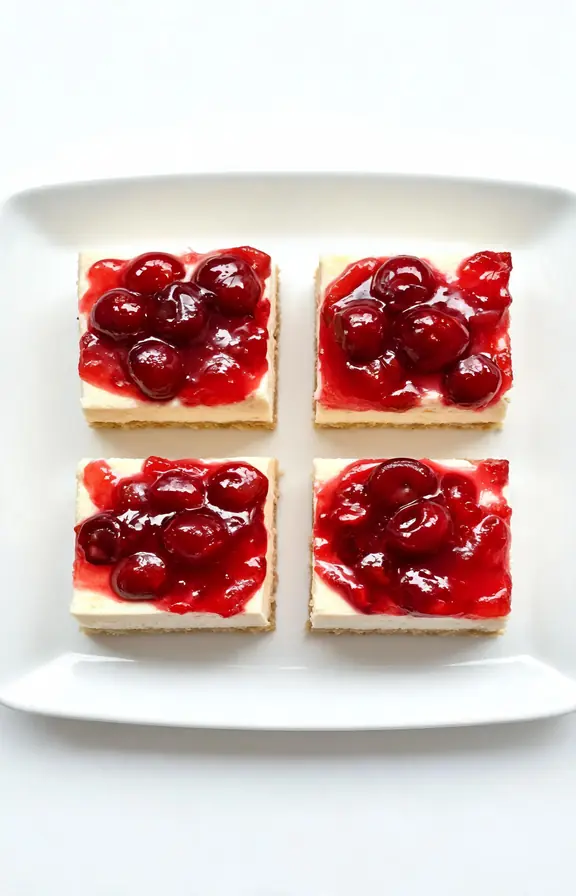
No bake cherry cheesecake bars are a three-layer dessert built for warm weather and low effort. A buttery graham cracker crust forms the base.
A light, tangy cream cheese filling sits in the middle. A glossy cherry topping finishes each bar with a sweet-tart punch.
No eggs. No oven. No water bath. The filling sets in the refrigerator using a combination of cold temperature and the natural acid in lemon juice, which causes the fat proteins in cream cheese to firm up without any heat.
This article explains the mechanics behind every layer. You will learn why temperature sequencing matters when mixing the filling, how to time the cherry topping for clean bars, and which mistakes cause the filling to stay soft even after hours in the fridge.
Why No-Bake Cheesecake Sets Without Eggs or Gelatin
Traditional baked cheesecake sets because heat coagulates the egg proteins. No-bake cheesecake uses a completely different mechanism. It relies on two things working together: cold temperature and acid.
Lemon juice is acidic. When acid meets the casein proteins in cream cheese, it causes them to bond and tighten. The result is a filling that holds its shape once chilled, even without eggs or gelatin.
This is also why using full-fat, brick-style cream cheese is non-negotiable. Reduced-fat cream cheese has a higher water content and fewer fat molecules for the proteins to bind around. The filling stays soft no matter how long it chills.
The second part of the equation is whipped cream or whipped topping. Beating cream to stiff peaks traps air inside the fat structure.
When you fold that into the cream cheese base, you build a filling that is both airy and structurally stable. It sets up firm enough to slice cleanly while staying light enough to eat with a spoon.
The Graham Cracker Crust: Getting the Ratio and Texture Right
The crust has one job: stay firm under a wet filling without crumbling when you slice the bars. Getting there requires the right butter ratio and the right pressing technique.
The standard ratio is 1.5 cups of graham cracker crumbs to 6 tablespoons of melted butter. That is enough butter to coat every crumb without making the crust greasy. Too little butter and the crust falls apart. Too much and it sets up dense and oily.
Press the mixture firmly using the flat bottom of a measuring cup or glass. Work from the center outward, pressing firmly into the corners. The compressed layer should feel solid, not loose, when you tap it.
Line your pan with parchment paper before pressing in the crust, leaving an overhang on two sides. That overhang is your handle for lifting the entire slab out of the pan once chilled, which is what makes clean slicing possible.
The Two-Step Cream Cheese Method for a Lump-Free Filling
Most recipes tell you to beat the cream cheese and sugar together in one step. That often leads to a gritty or slightly lumpy filling, because the sugar drags across un-emulsified cream cheese before it is smooth enough to absorb it.
A better approach is to beat the cream cheese alone first. Use a hand mixer on medium speed for 90 seconds until the cream cheese is completely smooth, white, and slightly increased in volume. Then add the powdered sugar, vanilla, and lemon juice and beat again until silky.
Powdered sugar is the right choice here. Granulated sugar does not fully dissolve in a cold mixture, leaving a slightly gritty finish on the palate. Powdered sugar dissolves instantly and blends in without any texture.
In a separate cold bowl, whip the heavy cream to stiff peaks. Fold the whipped cream into the cream cheese base using a rubber spatula, not a mixer. Use slow, wide strokes from the bottom of the bowl up and over the top.
Stop as soon as the mixture is uniform. Over-folding collapses the air you just built into the cream, and the filling loses the light, mousse-like quality that makes these bars so good.
If you enjoy the same layered-bar format with a different fruit profile, the process in our silky no-bake cheesecake filling guide uses the same two-step cream cheese method and walks through the exact fold technique with step-by-step detail.
The Cherry Topping Problem No One Talks About
Adding cherry pie filling before the cheesecake layer has fully set is the most common reason these bars disappoint.
Canned cherry pie filling contains syrup. Syrup is mostly water and sugar. When you spoon it onto a filling that is still soft, the liquid seeps into the top layer of the cheesecake and softens it from above.
The crust gets the same treatment from below once you cut the bars and the syrup has nowhere to drain.
The fix is simple but requires patience. Chill the filling for a minimum of 4 hours before adding the cherry topping. For the cleanest results, chill overnight and add the topping at serving time, not before.
If you are making these bars for a gathering, store the cherry pie filling separately in a small bowl. Spoon it over individual bars right before serving. This keeps the crust crisp and the cheesecake surface firm all the way to the last bar on the plate.
According to the USDA National Nutrient Database, canned cherry pie filling contains roughly 88% water and carbohydrate by weight, which explains why its liquid content is substantial enough to migrate into an adjacent soft layer.
Fresh Cherry Topping vs Canned: When Each Makes Sense
Canned cherry pie filling is the fastest option and works well when convenience is the priority. It is thick, glossy, and sweet-tart in the way that most people picture when they think of this dessert.
Fresh cherry topping takes about 15 minutes on the stovetop and produces a noticeably brighter, less sweet flavor.
Combine pitted cherries with sugar, cornstarch, lemon juice, and a small amount of water in a saucepan. Cook over medium heat until the mixture thickens into a glossy sauce. Cool completely before spooning over the chilled bars.
The cornstarch is critical. It gelatinizes the fruit liquid into a topping that holds its shape on the bar instead of running off the edges. Without it, cooked fresh cherries produce a thin, watery sauce that soaks directly into the cheesecake layer.
For anyone looking to deepen their understanding of cornstarch as a thickener in fruit-based recipes, Serious Eats covers the science of fruit thickeners in detail, including why cornstarch outperforms flour for clear, glossy sauces.
Frequently Asked Questions
No Bake Cherry Cheesecake Bars
Buttery graham cracker crust, light and tangy cream cheese filling, and a glossy cherry topping. No oven, 7 ingredients, and ready to slice after 4 hours in the fridge.
- 8×8 inch square baking pan
- Parchment paper
- Hand mixer or stand mixer
- Two large mixing bowls
- Rubber spatula
- Measuring cups and spoons
- 1.5 cups (150g) graham cracker crumbs (about 10 full graham cracker sheets)
- 6 tablespoons (85g) unsalted butter, melted
- 2 tablespoons (25g) granulated sugar
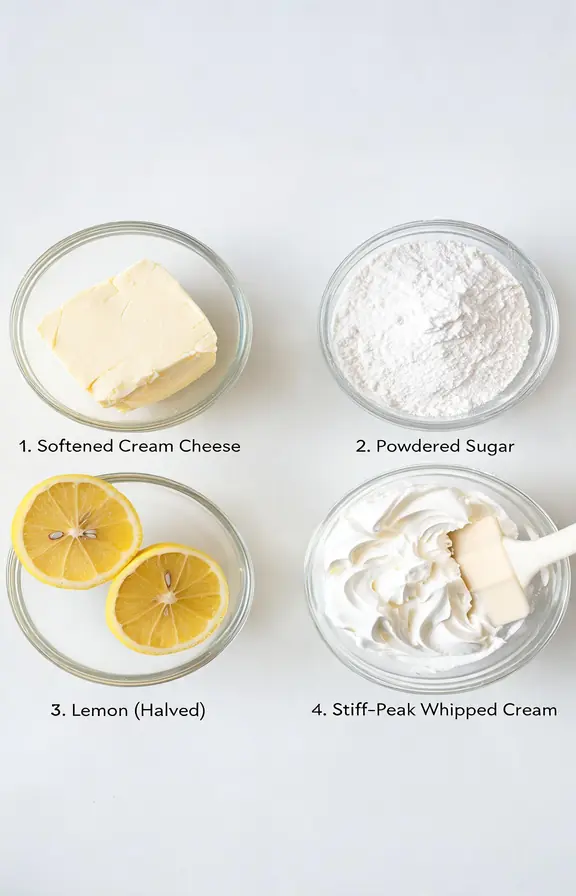
- 16 oz (450g) full-fat brick-style cream cheese, room temperature
- 3/4 cup (90g) powdered sugar, sifted
- 1 teaspoon pure vanilla extract
- 2 teaspoons fresh lemon juice
- 1 cup (240ml) cold heavy whipping cream
- 1 can (21 oz / 595g) cherry pie filling
- Step-1: Prepare the pan Line an 8×8 inch square baking pan with parchment paper, leaving a 2-inch overhang on two opposite sides. This overhang is how you will lift the finished bars out of the pan for clean slicing. Lightly spray the parchment with non-stick cooking spray.
- Step-2: Make the crust In a medium bowl, combine the graham cracker crumbs, melted butter, and granulated sugar. Stir until every crumb is coated and the mixture looks like wet sand. Pour into the prepared pan. Press firmly and evenly using the flat bottom of a measuring cup, working from the center out to the corners. The layer should feel compact, not loose. Refrigerate for 15 minutes while you make the filling.
- Step-3: Beat the cream cheese smooth In a large bowl, beat the softened cream cheese alone on medium speed for 90 seconds until completely smooth, fluffy, and lump-free. Do not skip this step. Add the powdered sugar, vanilla extract, and lemon juice. Beat for another 60 seconds until silky and uniform. Set aside.
- Step-4: Whip the cream In a separate chilled bowl, beat the cold heavy cream on medium-high speed until stiff peaks form. The cream should hold its shape firmly when you lift the beaters. If it still looks soft or droopy, keep beating in 20-second intervals.
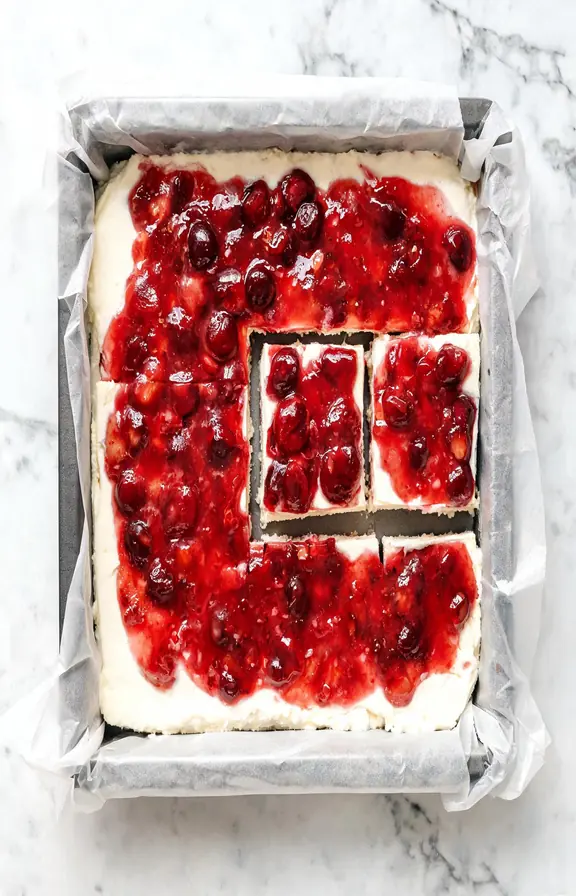
- Step-5: Fold and fill Add the whipped cream to the cream cheese mixture. Using a rubber spatula, fold gently with wide, slow strokes from the bottom of the bowl up and over the top. Fold only until no white streaks remain. Do not stir or beat. Spoon the filling over the chilled crust and smooth the top with the spatula. Refrigerate for a minimum of 4 hours, or overnight for best results.
- Step-6: Add the cherry topping and slice Once the filling is fully set and firm, lift the bars from the pan using the parchment overhang. Place on a cutting board. Slice into 9 equal squares using a sharp knife wiped clean between cuts. Spoon the cherry pie filling over individual bars at serving time, not all at once over the whole slab. This keeps the crust from softening before all bars are served.
Nutritional values are estimates calculated using standard USDA food data. Actual values may vary based on the brand of cream cheese used, the specific cherry pie filling chosen, and individual bar size.