Our site contains ads and uses Amazon affiliate links. We may earn a small commission at no extra cost to you. We know ads can be distracting, and we’re sorry for any inconvenience they cause. It helps us keep the site running. Thanks for your understanding and supporting us!
Most homemade Samoas cookie recipes fail in the same place. The shortbread is too thick and biscuity, the caramel goes on raw coconut and stays chewy in the wrong way, or the chocolate is drizzled carelessly over unevenly set caramel.
The result tastes like the right ingredients in the wrong order. This recipe fixes that by explaining what each stage is actually doing, not just telling you to do it.
Samoas, also called Caramel deLites depending on which regional bakery produces your box, are the second best-selling Girl Scout cookie in the US.
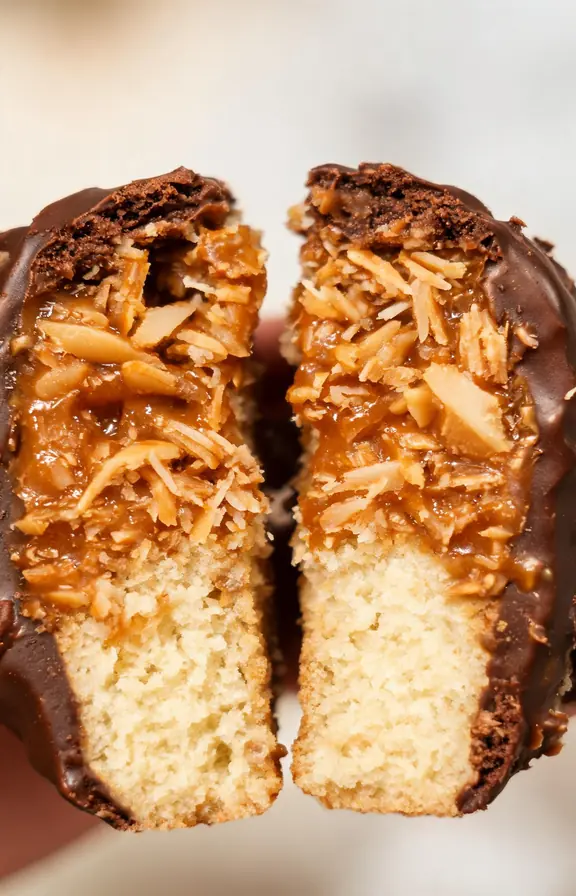
They are beloved for a very specific texture ratio: a thin, snap-crisp shortbread base beneath a thick, chewy, deeply caramelized coconut layer, with just enough chocolate to tie the bitter, sweet, and toasted notes together. Replicating that ratio at home requires understanding each layer individually.
Why Shortbread Rings Fail (and How to Fix Them Before You Mix)
The shortbread in a Samoa is not the same as a standard shortbread biscuit. It needs to be thin, crisp, and sturdy enough to hold a sticky caramel-coconut topping without bending or snapping when you pick the cookie up.
Most copycat recipes use too much butter or too much leavening. The extra butter makes the dough spread during baking, giving you a thicker, softer base. Baking powder lifts the cookie into a puffy dome instead of a flat disc. Neither result works with a Samoa topping.
This recipe uses a higher flour-to-butter ratio than a standard shortbread and omits baking powder entirely. The dough is also chilled for one hour before rolling.
Cold dough holds its shape during cutting and does not spread in the oven. You get a thin, flat cookie with clean edges that actually holds the ring shape it is cut into.
The ring shape is not just cosmetic. It gives the coconut caramel more surface area to grip and ensures the chocolate-to-topping ratio stays correct across every bite. Do not skip the center hole.
The Coconut Toasting Step Nobody Talks About (But Should)
Toasted coconut and untoasted coconut are not interchangeable. They taste completely different, and the texture changes significantly.
Raw sweetened coconut is soft, dense, and very sweet. When it is mixed with caramel and pressed onto a cookie, it compresses into a sticky, overly sweet layer that does not have any of the complexity the Girl Scout original is known for.
Toasted coconut is drier, nuttier, and far more aromatic. The Maillard reaction that happens during toasting converts surface sugars and proteins into hundreds of new flavor compounds.
According to BBC Science Focus, the Maillard reaction produces toasted pyrazines and sweet furanones that fundamentally change how food smells and tastes. That complexity is exactly what separates a great Samoa from a mediocre one.
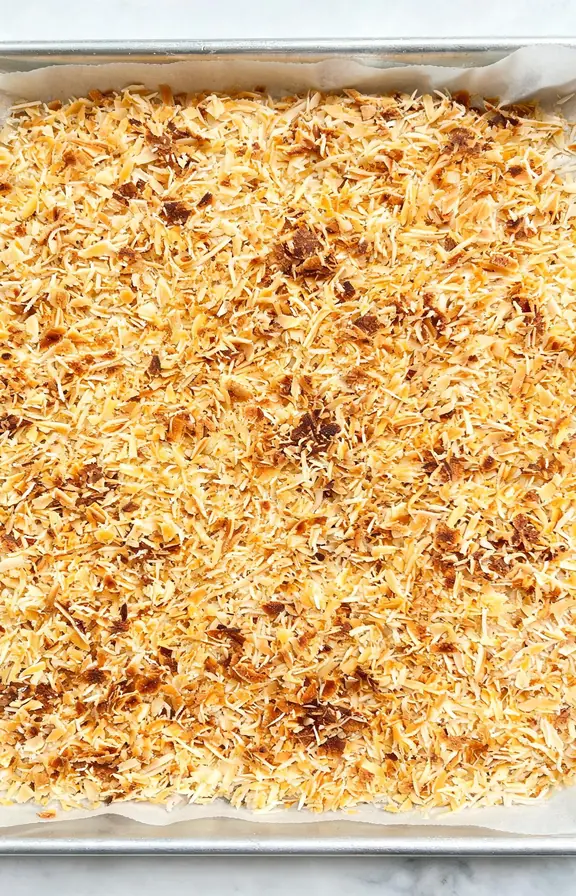
Toast the coconut in a dry skillet or spread it on a baking sheet and put it in a 325 degree F oven. It goes from pale to golden very fast. Stir every 2 minutes in the oven, or every 30 seconds in the skillet.
Pull it off the heat the moment it turns a warm golden color with some slightly darker patches. It will continue to toast on the residual heat of the pan.
If you enjoy the caramel and toasted coconut flavor combination in baked goods more broadly, the same principles of deep caramelization and nutty coconut flavor apply to a scratch-made German Chocolate Cake Frosting with toasted pecans and caramelized coconut filling.
How to Make Foolproof Caramel for the Coconut Layer
You have two options for the caramel: melt store-bought soft caramel candies, or make a quick stovetop caramel sauce. Both work, and each has a genuine tradeoff.
Store-bought soft caramels (Werther’s Soft or Kraft caramels) are easy and consistent. They melt smoothly with a splash of heavy cream or milk and produce a thick, pourable caramel in about 5 minutes. The flavor is sweet and reliable, though it lacks the slight bitterness of a homemade caramel.
A quick dry caramel made from granulated sugar gives you more control over depth of flavor. Cook the sugar in a dry pan over medium-high heat without stirring until it melts and turns a deep amber color.
Then whisk in butter and cream off the heat. The result is richer and slightly more complex. It also sets firmer, which can make the layer easier to handle during the chocolate-dipping step.
Either way, the coconut-to-caramel ratio matters. Use about 2.5 cups of toasted coconut to every 11 oz of caramel. Too much caramel and the layer is sticky and slides off the cookie. Too little and the coconut falls apart when you pick up the cookie.
The Two-Step Chocolate Method That No Competitor Uses
Every published copycat Samoas recipe treats chocolate as one step. You either dip the bottom or drizzle the stripes, but rarely both in sequence with a set time in between. That matters more than it sounds.
The original Girl Scout Samoa has a fully set chocolate base and crisp, distinct chocolate stripes on top. If you drizzle the stripes onto wet bottom chocolate, they sink in and disappear. The visual result looks sloppy, and the chocolate ratio on the bottom becomes uneven.
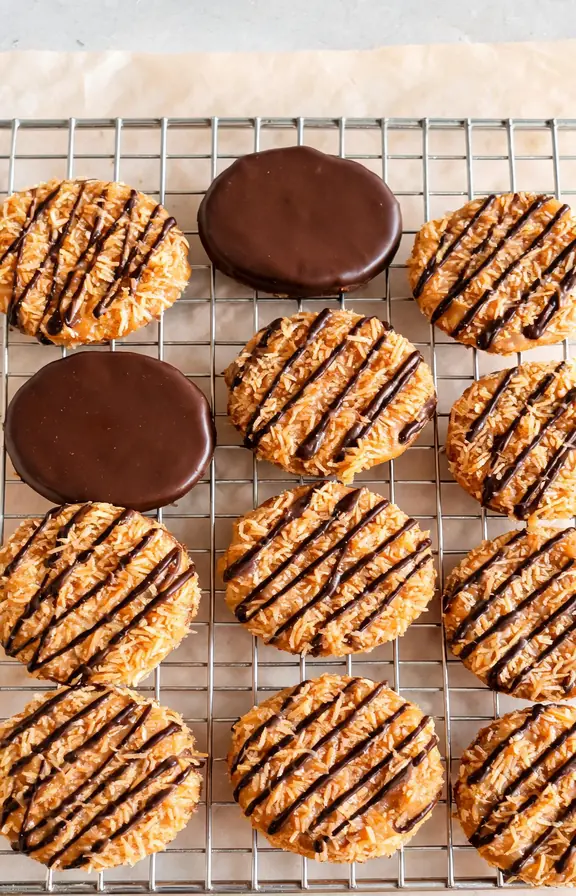
The right method is a two-step process. Dip the bottom of each cookie in melted chocolate, shake off the excess, place it chocolate-side-down on parchment, and refrigerate for 10 minutes until the bottom is fully set.
Then drizzle the stripes using a piping bag or a zip-lock bag with a small corner cut off. Return to the fridge for another 5 minutes. The stripes will sit on top of the set base, just like the original.
For the chocolate itself, use semisweet chocolate chips or a chopped bar with about 60 to 65 percent cacao. Pure dark chocolate above 70 percent is too bitter against the sweetened coconut.
Milk chocolate is too sweet and does not set firmly enough at room temperature. Add a half teaspoon of coconut oil to the chocolate before melting to help it thin slightly for easier dipping.
If you want to understand the science behind working with chocolate, our guide to making silky chocolate mousse covers melting and tempering chocolate without seizing.
How to Store Samoas Cookies So They Stay Perfect for a Week
Samoas cookies are more storage-sensitive than most home bakers expect. The main enemies are humidity and warmth.
Humidity softens the shortbread base and makes the caramel sticky. Warmth causes the chocolate to bloom, developing a gray surface coating as the cocoa butter separates. Neither issue ruins the flavor, but both affect the texture and appearance significantly.
Store Samoas in a single layer in an airtight container in the refrigerator. The cool temperature keeps the caramel firm, the chocolate glossy, and the shortbread crisp. They will stay in perfect condition for up to a week refrigerated.
For longer storage, freeze them. Place cookies in a single layer on a parchment-lined tray and freeze until solid, then transfer to a freezer bag with parchment between layers.
They keep for up to 3 months. Thaw at room temperature for 20 minutes before serving, or eat them frozen for a surprisingly satisfying chilled texture.
Frequently Asked Questions
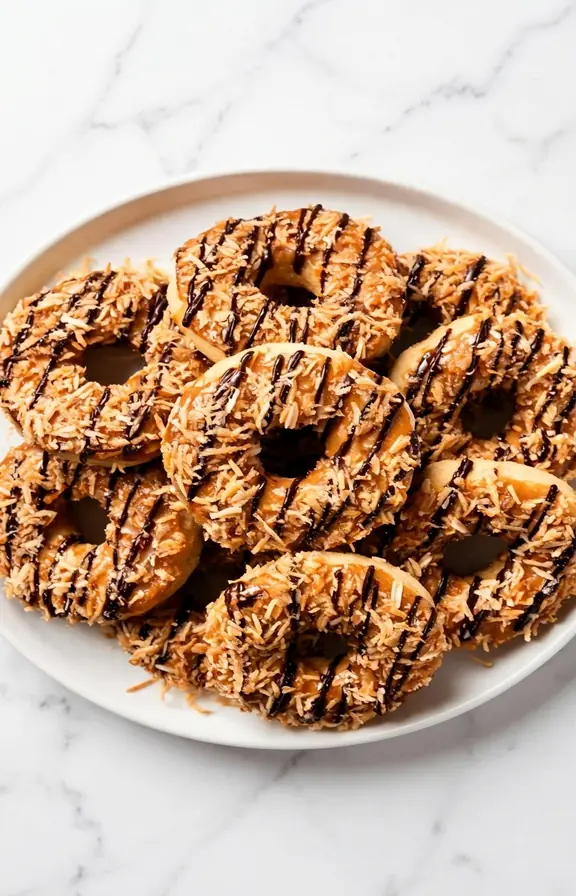
Samoas Cookies Recipe
Crispy shortbread rings topped with toasted coconut caramel and finished with a two-step dark chocolate coating and hand-piped chocolate stripes. Better than the original. Made year-round in under 2 hours active time.
- Stand mixer or hand mixer
- Rolling pin
- 2-inch round cookie cutter
- 1-inch round cutter or large metal piping tip (for center holes)
- Two rimmed baking sheets lined with parchment
- Heavy-bottomed saucepan (for caramel)
- Dry skillet or sheet pan (for toasting coconut)
- Piping bag or zip-lock bag with corner snipped (for chocolate stripes)
- Kitchen thermometer (recommended for caramel)
- 1 cup (225g) unsalted butter, softened to room temperature
- 1/2 cup (100g) granulated sugar
- 1/4 cup (30g) powdered sugar, sifted
- 2 cups (250g) all-purpose flour
- 1/4 teaspoon fine sea salt
- 1 teaspoon pure vanilla extract
- 1 tablespoon whole milk
- 2.5 cups (200g) sweetened shredded coconut
- 11 oz (312g) soft caramel candies, unwrapped
- 3 tablespoons (45ml) heavy cream or whole milk
- 1/4 teaspoon fine sea salt
- 10 oz (280g) semisweet chocolate chips or chopped bar (60 to 65% cacao)
- 1 teaspoon coconut oil or neutral oil (for thinning)
- Make and chill the shortbread dough Beat the softened butter with granulated sugar and powdered sugar on medium speed for 3 minutes until light and creamy. Add the vanilla extract and milk and mix briefly to combine. Add the flour and salt all at once and mix on low speed until just combined. Do not overmix. The dough will look crumbly at first but will come together when pressed. Shape into two flat discs, wrap tightly in plastic wrap, and refrigerate for at least 1 hour or up to 24 hours.
- Toast the coconut Spread the shredded coconut evenly on a rimmed baking sheet. Toast in a 325 degree F oven for 8 to 10 minutes, stirring every 2 minutes, until the coconut is golden brown with slightly darker patches. Alternatively, toast in a dry skillet over medium heat, stirring constantly for 4 to 5 minutes. Watch it carefully: coconut goes from golden to burnt very quickly. Transfer to a bowl immediately and set aside to cool.
- Cut and bake the shortbread rings Preheat the oven to 350 degrees F (175 degrees C). Remove one disc of dough from the refrigerator and roll it out on a lightly floured surface to about 1/8-inch thickness. Use the 2-inch round cutter to cut circles, then use the 1-inch cutter or a large metal piping tip to cut center holes from each circle. Place rings on parchment-lined baking sheets 1 inch apart. Bake for 10 to 12 minutes until the edges are just barely golden. The centers will look pale, which is correct. Do not overbake. Cool on the baking sheet for 5 minutes, then transfer to a wire rack to cool completely.
- Make the coconut caramel Combine the unwrapped caramel candies, heavy cream, and salt in a medium heavy-bottomed saucepan over low heat. Stir constantly until the caramels melt completely and the mixture is smooth and pourable, about 5 to 7 minutes. Remove from heat and stir in the toasted coconut immediately. Let the mixture cool for 3 to 4 minutes until it is warm but no longer steaming. It should be thick enough to hold its shape when scooped.
- Top the cookies with coconut caramel Working quickly while the coconut caramel is still warm, spoon about 1 teaspoon of the mixture onto each cooled shortbread ring. Use slightly wet fingertips to press the coconut caramel into an even dome shape around the ring, pressing down gently into the center hole and around the outer edge. The layer should be about 1/2-inch thick and cover the entire top surface of the cookie. Work in batches since the caramel becomes harder to shape as it cools. Allow the topped cookies to sit at room temperature for 20 minutes to firm up before chocolate dipping.
- Dip the chocolate base and set Melt the chocolate chips and coconut oil together in a heatproof bowl set over a pan of barely simmering water, stirring until smooth. Do not let the bowl touch the water. Alternatively, microwave in 30-second bursts, stirring between each, until just melted. One at a time, hold each cookie by the top and dip the bottom into the melted chocolate to coat it evenly. Let the excess drip off, then place the cookie chocolate-side-down on a parchment-lined sheet. Refrigerate for 10 minutes until the bottom chocolate is fully set.
- Pipe the chocolate stripes and set Transfer the remaining melted chocolate to a piping bag or a small zip-lock bag with one corner snipped off to create a tiny opening. Working over the parchment sheet, pipe 3 to 4 thin parallel stripes across the top of each cookie from edge to edge. Move quickly and keep consistent pressure on the bag for even stripes. Return the cookies to the refrigerator for 5 minutes until the stripes are fully set before storing or serving.
Nutritional values are estimates calculated using standard USDA food composition data. Actual values will vary based on the specific brand of caramel candies, chocolate, and coconut used, as well as the exact thickness of the shortbread base.


