Our site contains ads and uses Amazon affiliate links. We may earn a small commission at no extra cost to you. We know ads can be distracting, and we’re sorry for any inconvenience they cause. It helps us keep the site running. Thanks for your understanding and supporting us!
📊Recipe at a Glance
- Prep Time: 15 minutes
- Cook Time: 0 minutes (no-bake recipe)
- Total Time: 30 minutes (plus 20 minutes chilling)
- Servings: 6 servings (24-30 pine cones)
- Diet Type: Vegan, Gluten-Free (when using certified products)
- Cuisine: American
Transform your holiday dessert board with these stunning Strawberry Chocolate Pine Cones.
Fresh, juicy strawberries are dipped in velvety chocolate and topped with delicate almond slices to create a pine cone shape that looks almost too beautiful to eat.
This no-bake treat combines the natural sweetness of strawberries with rich chocolate and the satisfying crunch of toasted almonds.
Perfect for any festive parties and gatherings, or a special date night at home. These edible pine cones take just 30 minutes to make and will have your guests absolutely amazed at your culinary creativity.
Why This Recipe Stands Out
- No-bake dessert that requires minimal cooking skills and no oven time.
- Made with fresh, natural strawberries for a healthier chocolate treat option.
- Combines textures with creamy chocolate, tender berries, and crunchy almond scales.
- Simple ingredient list using items you likely already have in your pantry.
- Strikingly beautiful presentation that impresses guests without seeming complicated.
- Can be prepared up to 24 hours in advance and stored in the refrigerator.
- A festive treat that works for festivals, winter celebrations, or any elegant occasion.
- Naturally vegan and gluten-free when using certified products.
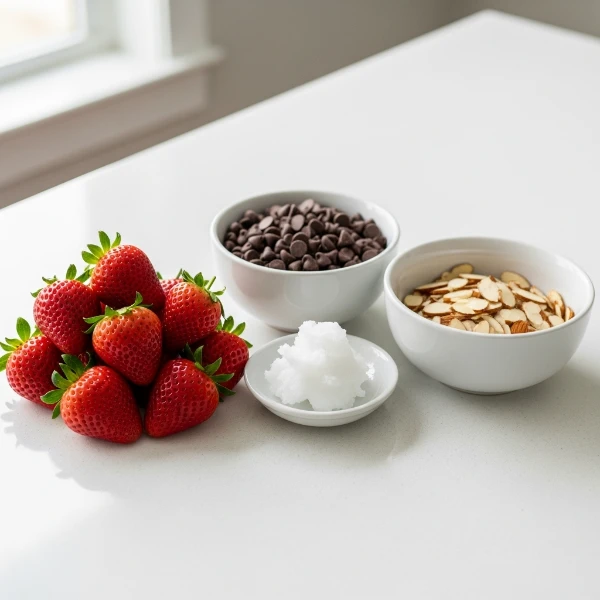
Ingredients You’ll Need
- 1.5 pounds fresh, medium strawberries (about 24-30 pieces)
- 12 ounces semi-sweet or dark chocolate chips
- 2 tablespoons coconut oil or vegetable oil
- 1 cup sliced almonds (preferably blanched for a cleaner appearance)
Tools to Use
- Double boiler or microwave-safe bowl
- Shallow bowl or cup for dipping
- Fork or dipping fork
- Baking sheet
- Parchment paper
- Small spoon
- Paper towels
How to Make the Strawberry Chocolate Pine Cones
Step-1: Prepare Your Strawberries
Rinse the strawberries under cool water and pat them completely dry with paper towels.
Moisture on the berries will cause the chocolate to slide off. Leave the green tops attached for an authentic pine cone look.
The stems will act as natural handles while dipping. Pat them thoroughly until no water droplets remain.
Step-2: Line Your Workspace
Cover your baking sheet or workspace with parchment paper.
This prevents the chocolate from sticking and makes cleanup much easier.
Make sure your workspace is clean and dry.
Having everything ready before you start the dipping process will keep you organized and focused.
Step-3: Melt the Chocolate
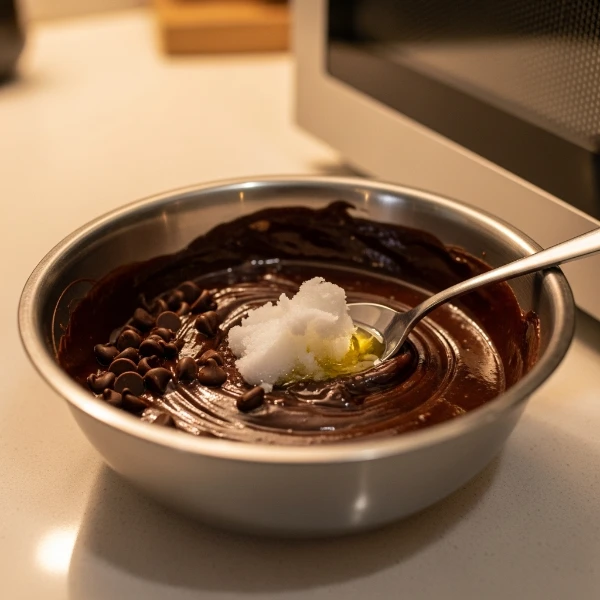
Pour the chocolate chips into your double boiler or microwave-safe bowl.
Add the coconut oil, which creates a thinner, more fluid chocolate coating.
If using the microwave, heat in 30-second intervals, stirring well between each interval.
If using a double boiler, melt over medium heat with gentle stirring. The chocolate should be smooth and pourable but not hot.
Once the chocolate reaches the perfect consistency, transfer it to a shallow dipping bowl.
Step-4: Dip Each Strawberry
Hold a strawberry by its stem and dip it into the melted chocolate.
Rotate it slowly to coat the entire berry except for the very top. Lift it out carefully and let excess chocolate drip back into the bowl.
Place the dipped strawberry on your parchment-lined sheet.
Work quickly but carefully to avoid chocolate cooling and becoming lumpy.
Step-5: Create the Pine Cone Texture
While the chocolate is still warm and wet, immediately begin pressing almond slices into the chocolate coating.
Start at the bottom of the strawberry and work your way up in a spiral pattern.
Overlap each almond slice slightly, angling them upward to mimic real pine cone scales.
Press them in firmly so they stick securely to the chocolate.
Step-6: Complete the Cone Shape
Continue layering almonds up to the very tip of the strawberry.
At the top, you can place a single almond or a small cluster for visual interest.
The goal is complete coverage with a realistic pine cone appearance. Take your time with this step for the most polished look.
Step-7: Set and Chill
Once all your strawberry pine cones are assembled with almonds, place the entire sheet in the refrigerator.
Let them chill for at least 15 to 20 minutes until the chocolate sets completely.
This hardens the coating and ensures the almonds stay firmly in place. You can chill them longer if needed up to 24 hours.
Step-8: Storage and Serving
Remove the pine cones from the refrigerator just before serving for the best texture and appearance.
Store them in an airtight container in the refrigerator for up to 3 days.
They are best served cold or at room temperature within 30 minutes of removal from the fridge.
The chocolate may soften if left out too long in warm temperatures.
Related Recipes You’ll Love to Try
- Decadent Hot Chocolate Mousse Cups: A Cozy Winter Treat
- Crave-Worthy Brown Sugar Cinnamon Pop Tarts
- Chocolate Peppermint Pavlova Wreath: Light, Crisp & Delicious
- How to Make Marshmallow Frosting: Simple, Silky & No-Fail!
Nutritional Information
Per serving (estimated based on 6 servings).
- Calories: 285
- Protein: 6 grams
- Fat: 18 grams
- Carbohydrates: 28 grams
- Sodium: 12 mg
Note: Nutritional values are approximate and based on standard ingredient brands. Actual nutrition may vary based on specific products used.
Tips for Success
- Use room-temperature strawberries before dipping for the best chocolate adhesion.
- Chop or break larger almonds into more manageable pieces for easier application.
- If your chocolate gets too thick while working, gently reheat it for 10 to 15 seconds.
- Blanched almonds create a lighter, more elegant appearance than unblanched varieties.
- Work in small batches so the chocolate stays at the optimal temperature.
- Pat strawberries extra dry to ensure the chocolate coating sticks properly and looks smooth.
- Use a high-quality chocolate for better flavor and smoother melting properties.
- Keep your workspace cool to prevent the chocolate from melting too quickly.
- If almonds keep falling off, try using a fork to spread a tiny bit of chocolate on the back of each almond before pressing.
- Double-check that all strawberries are completely dry before starting the dipping process.
Common Mistakes to Avoid
- Dipping wet strawberries into chocolate causes the coating to slide off easily.
- Applying almonds to chocolate that has already cooled and hardened results in poor adhesion.
- Using overly hot chocolate can actually soften the texture and cause uneven coating.
- Leaving strawberries at room temperature for too long makes them soften and become mushy.
- Not overlapping almond slices properly ruins the authentic pine cone appearance.
- Skipping the coconut oil in the chocolate makes the coating too thick and heavy.
- Forgetting to pat the strawberries dry before refrigeration can cause condensation and soggy treats.
- Storing at room temperature allows the chocolate coating to melt and almonds to fall off.
- Handling finished pine cones with wet hands causes fingerprints and marks on the chocolate.
- Using roasted almonds instead of blanched creates a darker, less elegant presentation.
Creative Serving Ideas
- Arrange the strawberry pine cones on a festive holiday dessert board alongside other small treats and cheese.
- Create a winter wonderland display by dusting the finished cones with a tiny bit of edible glitter.
- Serve them as an elegant dinner party dessert paired with champagne or sparkling cider.
- Stack them in a pyramid shape on a tiered cake stand for a stunning centerpiece.
- Wrap individual cones in clear cellophane with a ribbon for gorgeous homemade gift packages.
- Combine them with fresh cranberries, sugared rosemary, and candied nuts for a festive grazing board.
- Serve alongside vanilla ice cream for a delightful warm-and-cold contrast.
- Place them on top of a layered trifle or holiday cake as a sophisticated garnish.
- Create mini ice cream cone holders by placing them upside down on top of small vanilla cones.
- Package them in decorative boxes for unique homemade holiday gifts that everyone will love.
Frequently Asked Questions
Can I Make These Ahead of Time?
Yes, these strawberry chocolate pine cones can be made up to 24 hours in advance.
Store them in an airtight container in the refrigerator until ready to serve.
Remove them 15 to 30 minutes before serving for optimal texture and appearance.
What Type of Chocolate Works Best?
Semi-sweet or dark chocolate work wonderfully for this recipe.
Avoid using white chocolate as it may overpower the strawberry flavor. High-quality chocolate chips produce smoother melting and better taste.
Can I Use a Different Type of Nut?
Absolutely, you can substitute sliced almonds with chopped pistachios, walnuts, or pecans.
Each nut creates a different visual effect and adds unique flavor notes. Blanched versions create a more elegant look.
Why is My Chocolate Coating Cracking?
Cracking usually occurs when the chocolate is too thick or has cooled too quickly.
Add a small amount of coconut oil to thin the chocolate and work in a cool environment.
How Long Will They Stay Fresh?
These treats stay fresh in an airtight container in the refrigerator for up to 3 days.
They do not freeze well because the strawberry texture becomes mushy.
Can I Use Frozen Strawberries?
Fresh strawberries are highly recommended for best results.
Frozen strawberries release excess moisture when thawed, making chocolate application difficult.
What If the Almonds Keep Falling Off?
Ensure the chocolate is still warm and wet when applying almonds. If they keep falling off, apply a tiny bit of chocolate to the back of each almond slice before pressing it on.
Are These Suitable for People with Nut Allergies?
These contain almonds, so they are not suitable for those with tree nut allergies.
You can substitute coconut flakes or chocolate chips pressed into the chocolate for a nut-free version.
Can I Add Toppings Like Powdered Sugar?
Yes, you can dust finished pine cones with powdered sugar to create a snowy appearance.
Do this just before serving to avoid the powder dissolving on moist chocolate.


