Our site contains ads and uses Amazon affiliate links. We may earn a small commission at no extra cost to you. We know ads can be distracting, and we’re sorry for any inconvenience they cause. It helps us keep the site running. Thanks for your understanding and supporting us!
Recipe at a Glance
- Prep Time: 20 minutes
- Cook Time: 0 minutes
- Total Time: 4 hours 20 minutes (including chilling)
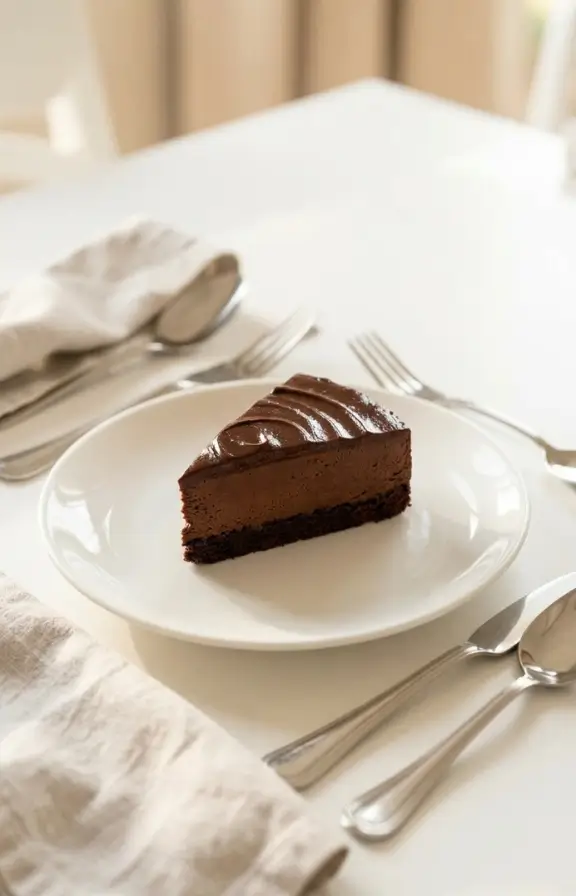
- Servings: 8 servings
- Diet Type: Vegan, Gluten-Free, Dairy-Free
- Cuisine: Dessert
Are you searching for a dessert that satisfies your chocolate cravings while keeping things naturally creamy and surprisingly nutritious?
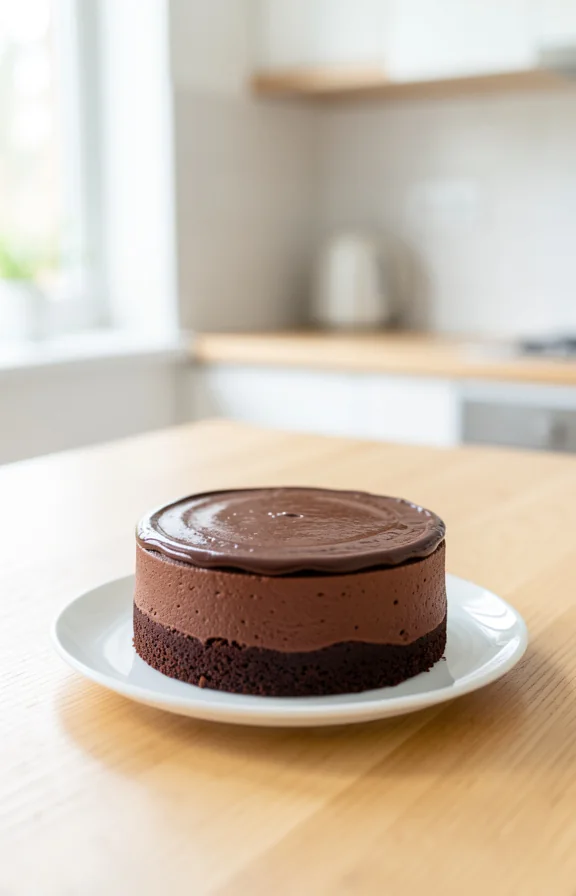
This vegan chocolate avocado mousse cake solves the dilemma of wanting indulgence without heaviness or animal products.
The silky texture comes from ripe avocados, creating a decadent experience that even non-vegans will love.
You’ll discover that this no-bake masterpiece requires minimal ingredients and delivers maximum satisfaction in every spoonful.
Your guests won’t believe this luxurious dessert is completely plant-based and ready in under five minutes of actual work.
Why This Recipe Stands Out
- Rich, velvety mousse texture that melts on your tongue without any gritty or chalky aftertaste.
- Naturally sweetened with maple syrup or agave, avoiding processed sugars and artificial sweeteners.
- No-bake preparation means you spend minimal time in the kitchen while achieving bakery-quality results.
- Hidden health benefits from avocado’s heart-healthy fats and antioxidants from dark chocolate.
- Naturally dairy-free and egg-free, making it perfect for guests with dietary restrictions.
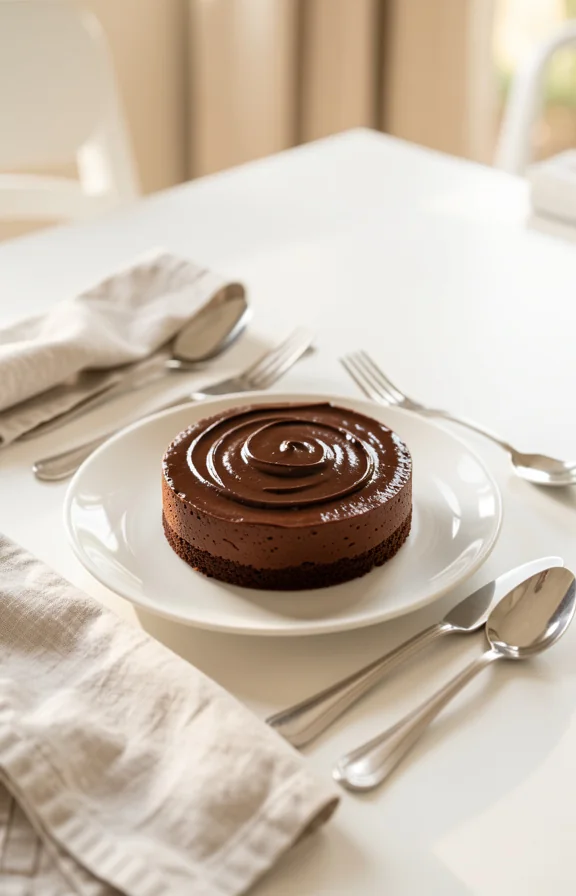
- Stunning visual presentation with its deep chocolate color and elegant simplicity.
Tips for Success
- Choose perfectly ripe avocados that yield slightly to gentle pressure but aren’t mushy or brown inside.
- Use high-quality cocoa powder or melted dark chocolate for the deepest, most authentic chocolate flavor.
- Blend the mousse filling until completely smooth, scraping down the sides of your food processor frequently.
- Chill your cake for at least four hours to allow the layers to set properly and flavors to meld together.
- Prepare the crust while your filling chills to save time and create better texture separation.
- Keep your cake refrigerated until just before serving for the best texture and presentation.
Common Mistakes to Avoid
- Using underripe or overripe avocados will result in either a grainy texture or an unpleasantly brown-tinted mousse.
- Skipping the food processor step and attempting to mash by hand creates lumpy, unevenly textured filling.
- Adding too much liquid at once can make your mousse runny and difficult to set properly.
- Removing the cake from the refrigerator too early causes the mousse to become too soft and lose its structure.
- Using low-quality chocolate or cocoa powder results in a bitter, unpleasant flavor that overpowers the dessert.
- Pressing down too firmly when creating the crust compresses it too much and makes it dense and hard.
Creative Serving Ideas
- Top each slice with fresh raspberries and a dusting of cocoa powder for a restaurant-style presentation.
- Drizzle with warm vegan chocolate sauce and add a dollop of coconut whipped cream on the side.
- Serve alongside fresh berries, sliced bananas, or candied orange peel for textural contrast.
- Garnish with toasted nuts, coconut flakes, or a sprinkle of sea salt to enhance the chocolate flavor.
- Create individual dessert cups by crumbling the cake and layering it with mousse and fresh fruit.
- Pair with strong espresso or herbal tea for an elegant after-dinner treat that won’t weigh you down.
Frequently Asked Questions
Can I prepare this cake ahead of time?
Yes, this cake actually improves when made one day ahead as flavors deepen and layers set more firmly.
Store it covered in the refrigerator for up to three days without any quality loss.
What if I don’t have a food processor?
A high-powered blender works just as well for creating the smooth chocolate avocado mousse.
Manual mashing with a fork will work but may result in slightly less smooth texture.
How can I make the crust gluten-free?
Replace regular oats with certified gluten-free oats or use ground almonds as your base.
Ensure all other ingredients including baking powder and vanilla extract are certified gluten-free.
Can I freeze this cake?
Yes, wrap the entire cake well and freeze for up to one month without texture changes.
Thaw in the refrigerator for two hours before serving for best results.
What if my avocado mousse is too thick?
Add non-dairy milk one tablespoon at a time while blending until you reach desired consistency.
Avoid adding too much at once as the mousse will become runny and won’t set properly.
Is this recipe nut-free?
The basic recipe is nut-free but the crust can contain nuts depending on your version.
Use seeds like sunflower or pumpkin seeds instead for a nut-free alternative.
Ingredients You’ll Need
For the Crust
- 1.5 cups rolled oats
- 0.5 cup unsweetened cocoa powder
- 0.25 cup maple syrup or agave nectar
- 0.25 cup coconut oil, melted
- 0.25 teaspoon sea salt
For the Mousse Filling
- 2 ripe avocados, pitted and scooped
- 0.75 cup unsweetened cocoa powder
- 0.5 cup maple syrup or agave nectar
- 0.33 cup non-dairy milk (almond, oat, or cashew)
- 2 tablespoons vanilla extract
- 1 teaspoon instant espresso powder
- 0.25 teaspoon sea salt
For Topping
- Fresh berries
- Cocoa powder for dusting
- Vegan dark chocolate shavings
Tools to Use
- 8-inch springform pan or cake pan
- Food processor or high-powered blender
- Mixing bowls
- Measuring cups and spoons
- Spatula
- Parchment paper
- Knife for pitting avocados
- Offset spatula or cake spreader
How to Make the Vegan Chocolate Avocado Mousse Cake
Step-1: Prepare Your Pan
Line your 8-inch springform pan with parchment paper, letting the edges extend slightly beyond the rim.
This prevents sticking and makes removal effortless when your cake is perfectly set.
Step-2: Create the Crust Base
Pulse rolled oats in your food processor until they resemble coarse breadcrumbs with some small chunks remaining.
This texture creates a more interesting, less dense crust than finely ground oats.
Step-3: Mix Dry Crust Ingredients
Combine the processed oats with cocoa powder and sea salt in a large mixing bowl.
Whisk together until the cocoa powder is evenly distributed throughout the oat mixture.
Step-4: Add Wet Crust Ingredients
Pour the melted coconut oil and maple syrup into your dry mixture.
Stir vigorously until every oat particle is coated and the mixture holds together when pressed.
Step-5: Press Crust Into Pan
Transfer the crust mixture to your prepared pan, pressing firmly and evenly across the bottom.
Use the bottom of a measuring cup to create an even, compact layer about 0.5 inch thick.
Step-6: Prepare Mousse Ingredients
Scoop the flesh from your ripe avocados directly into your food processor.
Work quickly to prevent the avocado from oxidizing and turning an unappetizing brown color.
Step-7: Combine Mousse Dry Ingredients
Add cocoa powder, espresso powder, and sea salt to the food processor with your avocados.
Pulse several times to break down the larger ingredients before fully blending.
Step-8: Add Sweetener
Pour in your maple syrup or agave nectar while the food processor is running.
This ensures even distribution and prevents overly sweet pockets in your finished mousse.
Step-9: Incorporate Liquid and Vanilla
Add your vanilla extract and non-dairy milk to the blending mixture.
These ingredients create the silky, spreadable consistency you’re seeking.
Step-10: Blend Until Silky Smooth
Process the mousse for two to three minutes until it reaches a completely smooth, velvety consistency.
Stop periodically to scrape down the sides, ensuring all ingredients are fully incorporated.
Step-11: Spread Mousse Over Crust
Pour the mousse onto your prepared crust, using an offset spatula to spread it evenly.
Work quickly and gently to avoid disturbing the crust layer beneath.
Step-12: Smooth the Top
Use your spatula to create a perfectly even, smooth surface across the top of the mousse.
A level surface makes the finished cake look more professional and elegant.
Step-13: Refrigerate Your Cake
Cover the cake loosely with plastic wrap and refrigerate for at least four hours, or preferably overnight.
Longer chilling time allows the layers to set firmly and the flavors to meld beautifully.
Step-14: Remove From Pan
When ready to serve, gently run a thin knife around the inside edge of the springform pan.
Carefully release the springform, allowing the parchment paper to support the delicate cake.
Step-15: Add Final Touches
Dust the top with cocoa powder, add fresh berries, or scatter chocolate shavings across the surface.
These toppings add visual appeal and enhance the chocolate flavor experience.
Nutritional Information
Per serving (based on 8 servings):
- Calories: 280
- Protein: 4g
- Fat: 18g
- Carbohydrates: 28g
- Fiber: 5g
- Sodium: 95mg
- Sugar: 18g
Note: Nutritional values are approximate and may vary based on specific ingredient brands used.