Our site contains ads and uses Amazon affiliate links. We may earn a small commission at no extra cost to you. We know ads can be distracting, and we’re sorry for any inconvenience they cause. It helps us keep the site running. Thanks for your understanding and supporting us!
Most no bake cheesecake fillings end up one of two ways: either grainy with visible cream cheese lumps, or too soft to hold a clean slice.
Both problems come from the same root cause. The order and temperature of the ingredients were wrong from the start.
This article covers exactly how Philadelphia cream cheese behaves differently from other brands, why the mixing sequence is not optional, and the specific chilling window that gives you a clean, silky result every time.
Why Philadelphia Cream Cheese Works Differently in No-Bake Fillings
Philadelphia cream cheese has a higher fat content and a denser block structure than most store-brand alternatives. That density is exactly what makes it work in a no-bake filling without gelatin or eggs.
The fat molecules in full-fat Philadelphia cream cheese provide physical structure once chilled. They hold the air whipped into the filling and resist the gravity that causes softer, lower-fat versions to slowly collapse on a plate.
Tub-style or spreadable cream cheese is a different product. It contains added gums and stabilizers that make it spoonable, not sliceable. In a no-bake filling, those additives interfere with proper aeration and prevent the filling from firming correctly.
Always use the brick-style Philadelphia blocks. One 8-ounce block per standard cheesecake. That is non-negotiable for structure.
The 3-Ingredient Formula: What Each One Is Actually Doing
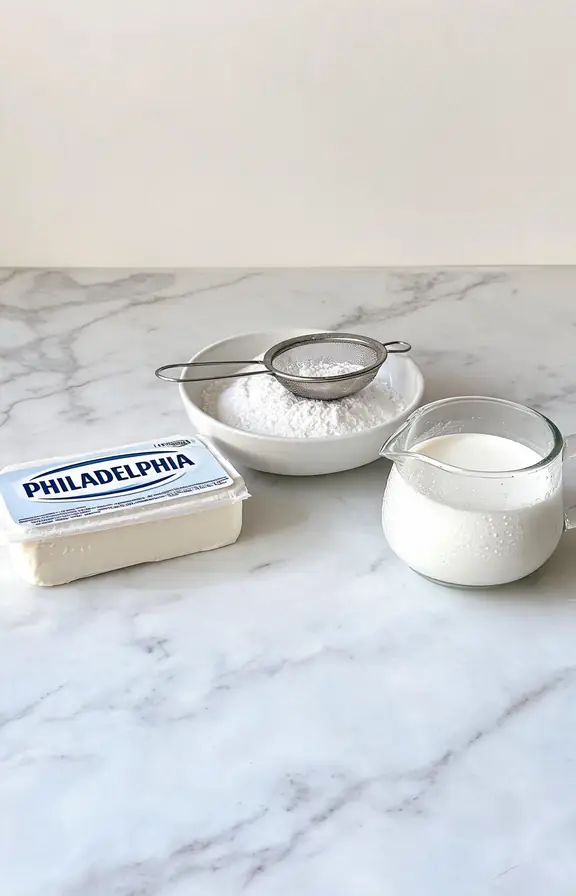
This filling uses only Philadelphia cream cheese, powdered sugar, and cold heavy whipping cream. Each ingredient has a specific structural and flavor job. None of them are interchangeable.
1. Philadelphia Cream Cheese (the fat scaffold)
Cream cheese is an oil-in-water emulsion. When beaten at room temperature, the fat globules disperse and trap air pockets. Those trapped air pockets are what give the filling its light texture once set.
The casein proteins in cream cheese also firm up when chilled, providing the sliceable structure you need. This is why full-fat is mandatory: lower-fat versions have fewer fat globules and less casein, meaning less structure and a looser final texture.
2. Powdered Sugar (not granulated)
Granulated sugar does not dissolve cleanly into cold dairy fat. You would feel and taste the grit.
Powdered sugar is pre-ground and contains a small amount of cornstarch, which does two things: it dissolves instantly and it lightly thickens the filling as it absorbs moisture from the cream.
The cornstarch in powdered sugar is a passive stabilizer. It is not doing the heavy lifting that gelatin would, but it does make a measurable difference in firmness compared to granulated sugar at the same sweetness level.
3. Cold Heavy Whipping Cream (the aerator)
Heavy whipping cream needs at least 36% fat content to whip correctly. This fat percentage is what allows the cream to hold stiff peaks that do not collapse when folded into the cream cheese base.
Keep the cream in the fridge until the moment you need it. Some bakers also chill the mixing bowl and whisk attachment in the freezer for 10 minutes first. This keeps the fat cold during whipping and accelerates the process.
For a dessert in a different texture range, our no bake strawberry cheesecake bars use a similar cold-cream technique in a sliceable bar format that travels better than a whole cheesecake.
The Mixing Sequence That Changes the Texture Completely
The order you add ingredients is more important than almost anything else in this recipe. Get it wrong and you will spend extra time trying to fix lumps that should never have formed.
Step one: beat the room-temperature cream cheese alone. No sugar yet. Beat it for a full two minutes on medium-high speed until it is completely smooth and slightly fluffy. Scrape down the bowl and beat for another 30 seconds.
Step two: sift the powdered sugar directly into the beaten cream cheese. Beat on low first to prevent a sugar cloud, then increase to medium until fully combined. The mixture should look dense and smooth, with no visible sugar grains.
Step three: add the cold heavy cream gradually in three additions, not all at once. Pour one-third in, beat on medium until just combined, then add the next third.
On the final addition, increase speed to high and whip until the filling is thick, light, and holds a shape when you lift the beaters.
This method prevents the cream from deflating the cream cheese base and ensures both components aerate together evenly.
The Chill Window: Why Timing Matters More Than Most Recipes Admit
Most recipes say to chill for at least four hours. That is the absolute minimum. The science behind it is straightforward.
When the filling goes into the fridge, two things happen at once. The fat globules from both the cream cheese and the whipped cream firm up and create a tighter network.
At the same time, the cornstarch from the powdered sugar continues absorbing free moisture in the filling.
At four hours, the filling is set enough to slice but still has a very soft, almost mousse-like texture near the center. At eight hours, the structure is significantly firmer and the flavor has developed more depth as the cream cheese tang becomes more pronounced.
Overnight chilling produces the best result. The texture is cleaner, the slice holds its shape without drooping, and the filling flavor tastes more unified rather than like separate ingredients.
If you are making this for an event, prepare it the night before. Cover tightly with plastic wrap pressed directly onto the surface of the filling to prevent a skin from forming.
Crust Options and What Each One Changes About the Final Bite
The filling is versatile enough to pair with almost any base. But different crusts change the eating experience significantly.
Topping Ideas That Match the Filling Without Overpowering It
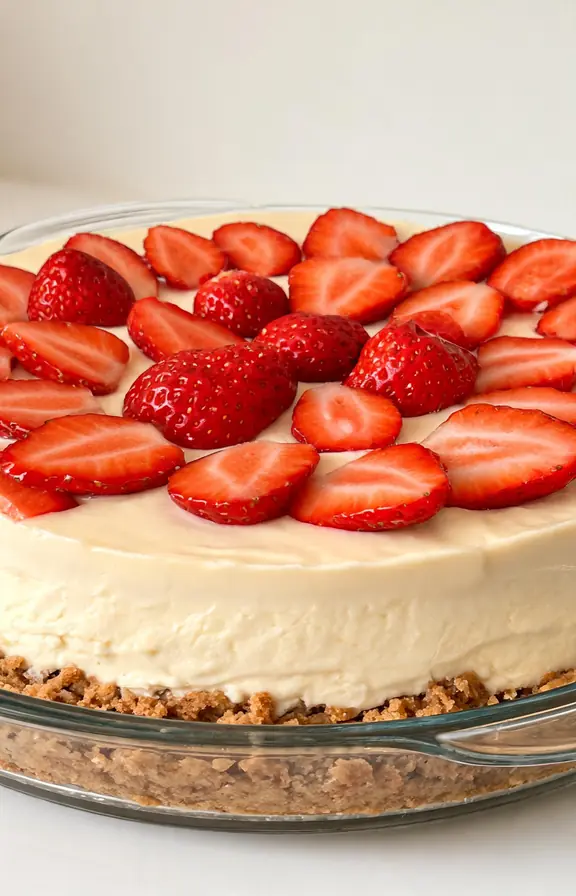
Philadelphia no bake cheesecake filling has a clean, lightly tangy base flavor. The best toppings either amplify that tang or add a contrasting sweetness.
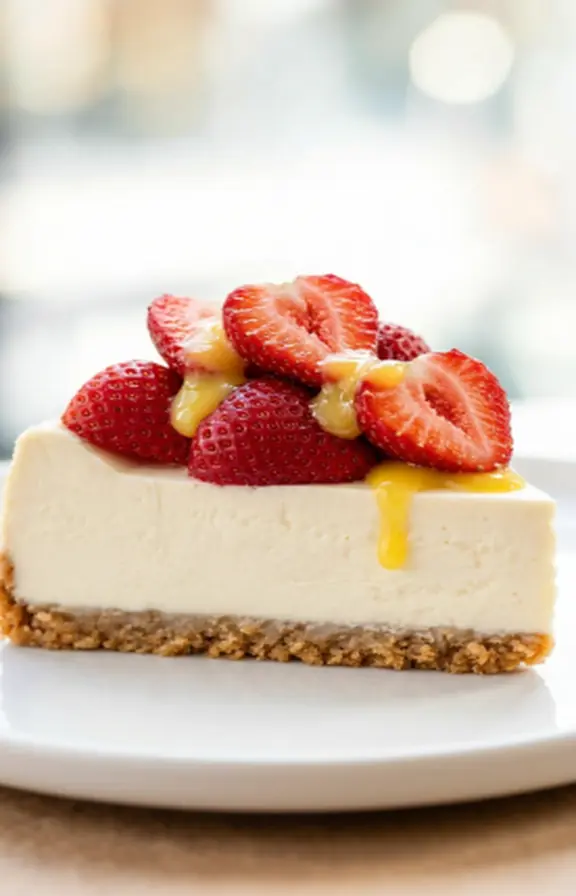
Fresh strawberries or blueberries work because their natural acidity echoes the cream cheese tang. A brief maceration with a small amount of sugar intensifies their flavor without cooking.
Lemon curd is the underused option. A thin layer spread over the chilled filling just before serving adds brightness without competing with the cream. It also sets firmly enough that slices stay clean.
Chocolate ganache works if you want a richer, dessert-bar feel. Let it cool to room temperature before pouring over a fully chilled cheesecake. A warm ganache will melt the top layer of the filling.
For a no-topping presentation, dust the surface lightly with powdered sugar through a fine sieve right before serving. It looks polished and costs nothing extra.
If you enjoy the layered flavors of cream cheese and fruit together, our strawberry cream cheese pound cake builds on the same flavor combination in a baked format worth exploring.
Troubleshooting: Why the Filling Did Not Set and How to Fix It
The three most common reasons a no bake cheesecake filling stays soft and will not slice cleanly are cold cream cheese going in, low-fat cream cheese used, or cream that was not whipped to stiff peaks before folding.
If the filling is already in the fridge and seems too loose after four hours, give it another four to eight hours before cutting. Sometimes it is simply underset, not structurally broken.
If it is still loose after overnight chilling, the fat structure did not form correctly. This usually points to low-fat cream cheese or warm cream. The filling is still edible, just serve it in cups rather than slicing it.
The one fix that does work is portioning the loose filling into individual glasses, adding crushed graham crackers on top like a parfait, and chilling for another two hours. The structure problem becomes invisible and the dessert is still excellent.
Make-Ahead, Storage, and Freezing Rules
The filling can be made up to five days ahead and stored covered in the fridge. Press plastic wrap directly onto the filling surface to prevent it from drying out or absorbing refrigerator odors.
For longer storage, the filled cheesecake freezes well. Wrap the entire pan tightly with two layers of plastic wrap and one layer of foil. It keeps for up to three months in the freezer.
To thaw, transfer to the refrigerator the night before serving. Never thaw at room temperature. The outer layers warm faster than the center, creating an uneven texture and potential condensation that pools on the surface.
Individual slices can also be frozen on a baking sheet until solid, then wrapped individually and stored in a zip bag. This makes single-serving portions easy to pull out throughout the month.
Leftover filling without a crust stores for up to five days refrigerated in an airtight container and works well as a fruit dip, a pancake spread, or a filling for our keto strawberry cheesecake bites for a lower-carb serving option.
Frequently Asked Questions
Silky Philadelphia No Bake Cheesecake Filling
Three ingredients, ten minutes of active prep, zero oven time. Silky, sliceable, and stable enough to serve to guests. Made with full-fat Philadelphia cream cheese, powdered sugar, and cold heavy whipping cream.
- Stand mixer or electric hand mixer with whisk attachment
- Large mixing bowl
- Rubber spatula for scraping
- Fine mesh sieve for sifting powdered sugar
- 9-inch springform pan or serving dish of choice
- Plastic wrap
- 16 oz (2 blocks / 454g) Philadelphia full-fat cream cheese, room temperature (45 to 60 min out of fridge)
- 1 cup (120g) powdered sugar, sifted
- 1 cup (240ml) cold heavy whipping cream (36% fat or higher)
- 1 tsp pure vanilla extract
- 1 tbsp fresh lemon juice
- Step-1: Warm the cream cheese Remove both blocks of Philadelphia cream cheese from the fridge 45 to 60 minutes before starting. Unwrap and place on a plate at room temperature. The cheese is ready when it feels soft when pressed with a fingertip but is not slimy or oily. This step cannot be rushed safely in a microwave without risking uneven softening.
- Step-2: Chill the bowl and whisk Place your mixing bowl and whisk attachment in the freezer for 10 minutes before starting. This keeps the heavy cream cold during whipping and helps it reach stiff peaks faster. Skip this step only if your kitchen temperature is below 68°F.
- Step-3: Beat cream cheese alone first Add the softened cream cheese to your chilled bowl. Beat on medium-high speed for 2 full minutes until it is completely smooth and slightly fluffy with no lumps. Stop and scrape down the sides and bottom of the bowl with a rubber spatula. Beat for another 30 seconds. Do not skip this step. A lumpy cream cheese base cannot be fixed after the cream is added.
- Step-4: Add powdered sugar Sift the powdered sugar directly into the beaten cream cheese. Start mixing on low to avoid a dust cloud, then increase to medium. Beat until fully incorporated and no white streaks remain, about 1 minute. If using vanilla extract or lemon juice, add them now and beat for another 30 seconds.
- Step-5: Add cold heavy cream in thirds Pour one-third of the cold heavy cream into the cream cheese mixture. Beat on medium until just combined, about 20 seconds. Add the second third and repeat. Add the final third, then increase speed to high and whip until the filling is thick, light, and holds a ribbon when the beaters are lifted. This should take 2 to 3 minutes total on high. Stop the moment you reach stiff, glossy peaks. Do not overmix.
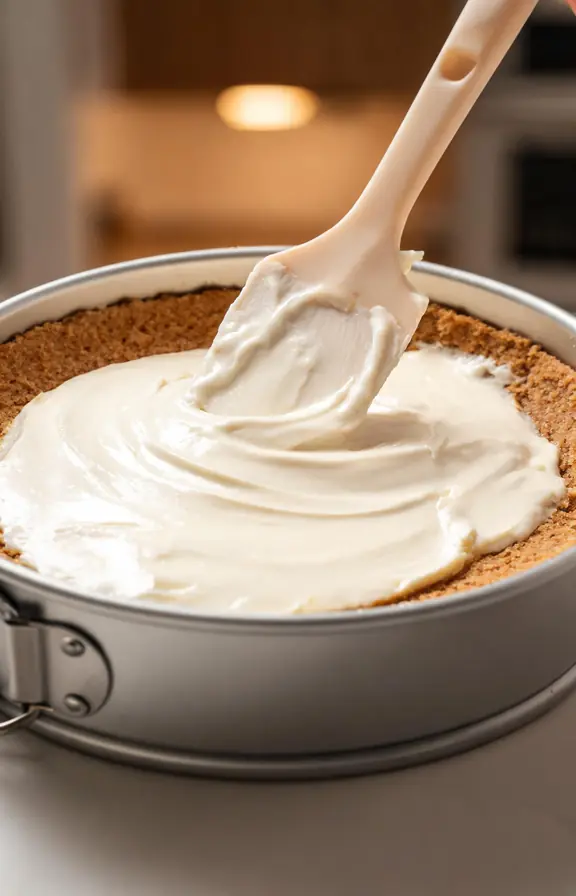
- Step-6: Transfer and smooth Pour the filling into your prepared crust or dish. Use a spatula to spread it into an even layer. Gently tap the pan on the counter two or three times to release any large air pockets beneath the surface.
- Step-7: Cover and chill Press a sheet of plastic wrap directly onto the surface of the filling to prevent a skin from forming. Refrigerate for a minimum of 4 hours. For a cleaner slice and more developed flavor, chill overnight or for at least 8 hours. Do not place in the freezer to speed this process, as the outer edges will freeze before the center sets evenly.
- Step-8: Slice and serve Remove from the fridge and add any toppings just before serving. To cut clean slices, use a sharp knife dipped in hot water and wiped dry between each cut. Serve immediately from the fridge. The filling softens noticeably at room temperature after about 20 to 30 minutes.
Nutritional values are estimates based on standard USDA food data for full-fat cream cheese and heavy whipping cream. Values do not include crust or toppings. Actual values vary by brand and serving size.