Our site contains ads and uses Amazon affiliate links. We may earn a small commission at no extra cost to you. We know ads can be distracting, and we’re sorry for any inconvenience they cause. It helps us keep the site running. Thanks for your understanding and supporting us!
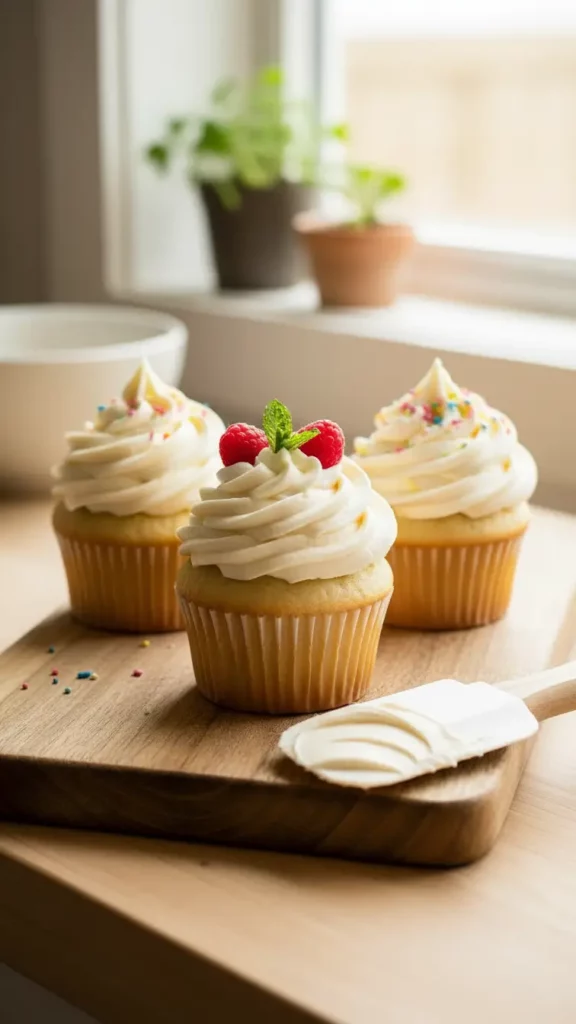
American buttercream frosting is your secret weapon for effortless, delicious baking.
You can whip it up with simple ingredients you already have. The texture turns light and creamy in minutes.
The flavor is rich, sweet, and easy to customize. You can pipe it, spread it, or swirl it on any dessert.
It holds its shape well, even when you need extra time to decorate. You get full control over sweetness and color.
Once you learn the basics, you can make it your own. This frosting is your go-to for quick, beautiful results.
Why This Frosting Stands Out
- Incredibly easy to make with just four to five basic ingredients you likely already have in your pantry.
- Ready in under fifteen minutes without any special equipment or technical skills required.
- Works beautifully for piping intricate designs, smooth frosting, or rustic spreading on baked goods.
- Stable enough to hold decorations and withstand warm temperatures, making it ideal for outdoor celebrations.
- Highly customizable with endless flavor variations from chocolate to citrus to coffee.
- Creates a light, airy texture when properly whipped that feels less heavy than store-bought alternatives.
- Forms a delicate crust when exposed to air, perfect for stacking cookies or achieving clean cake edges.
Ingredients You’ll Need
- 1 pound (4 sticks) unsalted butter, softened to room temperature
- 3 to 4 cups powdered sugar (confectioners’ sugar), sifted
- 1 tablespoon vanilla extract or vanilla bean paste
- 1/2 teaspoon salt
- 2 to 4 tablespoons heavy cream or whole milk, at room temperature
Tools to Use
- Stand mixer with paddle attachment (or hand mixer)
- Large mixing bowl
- Rubber spatula
- Measuring cups and spoons
- Sifter or fine mesh strainer
- Piping bag with assorted tips (optional)
How to Make American Buttercream Frosting
Step-1: Prepare Your Butter
Place your softened butter in the bowl of your stand mixer fitted with the paddle attachment.
The butter should yield easily to finger pressure without feeling greasy or melted.
If your butter is too cold, the emulsion will break and create a separated, grainy frosting.
Beat the butter on medium speed for about five minutes until it transforms from pale yellow to a much lighter, almost white color.
You’ll notice it becoming incredibly fluffy and airy as you mix.
This stage is crucial because you’re incorporating air into the butter, which creates the light texture everyone loves.
Scrape down the sides of the bowl occasionally to ensure even mixing throughout the process.
Step-2: Add Salt and Vanilla
With the mixer still running on low speed, add your salt and vanilla extract to the fluffy butter.
Mix these ingredients together for about thirty seconds until they’re fully incorporated throughout.
The vanilla will contribute its warm, sweet aroma to your frosting base.
If you choose vanilla bean paste instead of extract, the speckled appearance adds visual interest and slightly more pronounced vanilla flavor.
Keep the mixer at low speed during this step to prevent splashing and to allow for gentle, even distribution of these flavoring components.
Step-3: Gradually Add Powdered Sugar

Reduce your mixer speed to the lowest setting and begin adding your sifted powdered sugar one cup at a time.
The sifting step prevents lumps and clumping that can create a grainy texture in your finished frosting.
Add the sugar slowly to prevent white powder from flying everywhere.
After adding each cup, let the mixer run for a few seconds to incorporate it before adding the next cup.
Once all the sugar is incorporated, the mixture will look somewhat crumbly and dry at this point.
Don’t worry; this is completely normal and the next step will transform it into silky frosting.
Step-4: Increase Speed and Whip Until Fluffy
Now increase your mixer speed to medium or medium-high and continue beating for three to four additional minutes.
This extended mixing time is essential for achieving the light, airy texture that distinguishes homemade American buttercream from dense store-bought versions.
As you beat, watch the texture transform from crumbly to smooth and fluffy.
The color will become even lighter, and the frosting will become spreadable and pipeable.
Scrape down the bowl at least once during this phase to ensure all ingredients are evenly distributed and no streaks of butter remain.
Step-5: Adjust Consistency With Cream
Add two tablespoons of heavy cream or milk and continue beating on low speed until the liquid is fully incorporated.
Check the consistency. The frosting should be thick enough to hold decorative piping but soft enough to spread smoothly.
If it’s still too thick, add an additional tablespoon of cream at a time, mixing between each addition.
If you accidentally add too much liquid and the frosting becomes too soft, simply beat it on high speed for a minute to firm it up slightly.
The temperature of your cream matters; cold cream can cause the frosting to break or become lumpy, so make sure yours is at room temperature.
Step-6: Final Quality Check

Mix the frosting on the lowest speed with a rubber spatula for a minute or two by hand to create an ultra-smooth, bubble-free finish.
This gentle mixing removes any air bubbles that may have incorporated during the vigorous beating phase.
Your frosting should now be creamy, light, smooth, and ready to use immediately or store for later.
The surface should be glossy and smooth, with a consistency similar to thick whipped cream.
It should hold peaks when you lift the spatula but spread easily across cakes or cupcakes.
Related Recipes You’ll Love to Try
- Holiday Showstopper: Easy Eggnog Crème Tart You Must Try
- Crave-Worthy Brown Sugar Cinnamon Pop Tarts
- Easy Strawberry Chocolate Pine Cones: Magical Winter Dessert
- No-Bake Eggnog Cheesecake with Gingersnap Crust
Nutritional Information
Per two tablespoon serving, American buttercream frosting contains approximately:
- Calories: 147
- Protein: 1 gram
- Fat: 8 grams
- Carbohydrates: 19 grams
- Sodium: 68 milligrams
Note: Nutritional values are estimates based on standard ingredients and may vary depending on brands used.
Tips for Success
- Always start with room temperature butter to ensure proper emulsification and prevent separation. Cold butter won’t cream properly, resulting in a broken, grainy frosting with visible streaks.
- Measure your ingredients by weight rather than volume for maximum accuracy, especially with powdered sugar which can vary significantly based on how it’s scooped.
- Don’t skip the sifting step for powdered sugar as it prevents lumps and clumping that create a grainy texture in your finished product.
- Whip the butter for a full five minutes before adding sugar; this isn’t laziness prevention time but rather crucial air incorporation.
- If your frosting looks separated or broken, it’s usually because the butter wasn’t warm enough or you added the liquid too quickly. Beat it on high speed for a minute to re-emulsify it.
- Use unsalted butter and add salt separately so you can control the total sodium content in your frosting.
- Let scooped frosting come to room temperature before piping or frosting cakes for the smoothest application.
- Keep your frosting in an airtight container in the refrigerator for up to one month or freeze it for up to three months.
- When chilled, buttercream will firm up significantly; always bring it back to room temperature before using, then give it a quick mix to restore consistency.
- For whiter buttercream, use pale butter and add just a tiny drop of purple food coloring to counteract the natural yellow tint from the butter.
Common Mistakes to Avoid
- Using butter that’s too cold or too warm results in separation and graininess instead of smooth, creamy frosting.
- Not whipping the butter long enough before adding sugar creates a dense frosting that lacks the desirable light, airy quality.
- Adding powdered sugar too quickly or all at once can cause the frosting to become thick too fast and create an uneven mixture.
- Forgetting to sift the powdered sugar results in lumps and a grainy texture that diminishes the smooth appearance and feel.
- Using salted butter without adjusting the salt content can create an overly salty frosting with unbalanced flavor.
- Skipping the final gentle mixing step leaves air bubbles in the frosting that create a porous, less appetizing appearance.
- Adding cold cream or milk causes the frosting to break and become lumpy instead of smooth and creamy.
- Over-mixing after the frosting reaches the desired consistency can cause it to become greasy and separate.
- Storing frosting in an uncovered container allows it to absorb odors and dry out more quickly.
- Not bringing chilled frosting back to room temperature before piping results in a stiff frosting that tears rather than flows smoothly from the piping bag.
Creative Serving Ideas
- Swirl generously onto vanilla or chocolate cupcakes for a classic bakery-style presentation at parties or gatherings.
- Spread a thin layer between two sugar cookies as a delicate filling, then decorate the tops with sprinkles or edible glitter.
- Use it as a crumb coat under a thin initial layer of frosting to trap any errant crumbs before applying the final, thicker frosting layer.
- Pipe decorative rosettes or borders onto layered cakes for elegant wedding or anniversary celebrations.
- Mix different colors of frosting to create ombré effects on a multi-tiered cake for dramatic, eye-catching presentation.
- Dollop onto brownies or bars for a quick, easy dessert upgrade that adds richness and sweetness.
- Frost the rim of dessert martini glasses and dust with sprinkles for sophisticated party appetizers.
- Create a frosting bar where guests can decorate their own cupcakes with assorted toppings and mix-ins.
- Swirl onto sheet cakes for casual family gatherings, then cut into simple squares for easy serving.
- Pipe decorative designs onto plain cookies using colored buttercream and food-safe edible markers.
Frequently Asked Questions
Can I Make This Frosting Ahead of Time?
Yes, absolutely. Store your finished buttercream in an airtight container in the refrigerator for up to one month or in the freezer for up to three months.
Simply bring it to room temperature and mix briefly before using to restore its smooth consistency.
What’s the Difference Between American Buttercream and Swiss Meringue Buttercream?
American buttercream is simpler and uses only butter, powdered sugar, and liquid.
While Swiss meringue buttercream involves creating a meringue base first, making it less sweet and more stable in heat.
American buttercream is sweeter and easier for beginners.
Why Does My Frosting Look Separated or Grainy?
This typically happens because your butter wasn’t warm enough or you added the liquid too quickly.
Try beating the frosting on high speed for a minute to re-emulsify it, or start over with room temperature butter.
Can I Use Salted Butter Instead of Unsalted Butter?
Yes, you can, but omit or reduce the added salt in the recipe since salted butter already contains it.
Using salted butter makes it harder to control the total sodium content in your frosting.
How Long Can Frosting Sit at Room Temperature?
American buttercream can safely sit at room temperature for up to two days due to its high sugar and fat content.
It will form a slight crust over time, which is actually beneficial for piping and decorating.
Can I Color This Frosting?
Absolutely. Use gel food coloring rather than liquid food coloring, as liquid can thin the frosting.
Add just a small amount initially since colors intensify overnight.
What Flavoring Variations Can I Make?
You can add chocolate powder, cocoa, citrus zest and juice, coffee, fruit puree, melted chocolate, cookie pieces, or any extract to customize the flavor while keeping the basic technique the same.
Is This Frosting Suitable for Wedding Cakes?
Yes, American buttercream is perfectly suitable for wedding cakes, especially in cooler venues.
Its stability in warm temperatures and ease of decoration make it a popular professional choice.


