Our site contains ads and uses Amazon affiliate links. We may earn a small commission at no extra cost to you. We know ads can be distracting, and we’re sorry for any inconvenience they cause. It helps us keep the site running. Thanks for your understanding and supporting us!
📊Recipe at a Glance
- Prep Time: 15 minutes
- Cook Time: 10 minutes
- Total Time: 25 minutes (plus 1-1.5 hours cooling time)
- Servings: 12 (frosts one 2-layer 8-inch or 9-inch cake, a 9×13 sheet cake, or 12 cupcakes)
- Diet Type: Egg-Free, Vegetarian
- Cuisine: American (Classic/Heritage)
Are you tired of frosting that tastes more like a sugar bomb than a topping? You are not alone.
Most store-bought and standard buttercream frostings overpower your cake instead of complementing it. That is where ermine frosting comes in.
I discovered this old-fashioned gem while searching for something lighter. One taste and I was completely hooked.
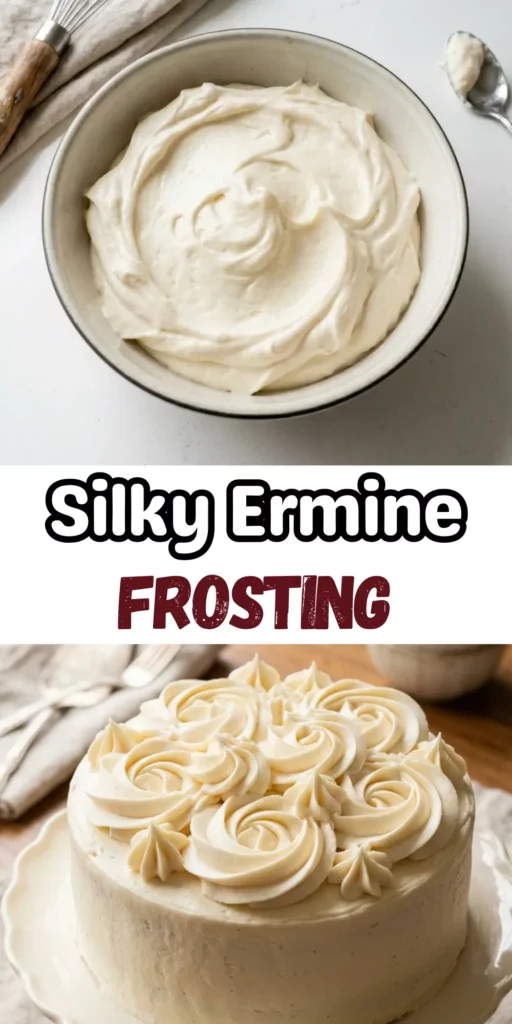
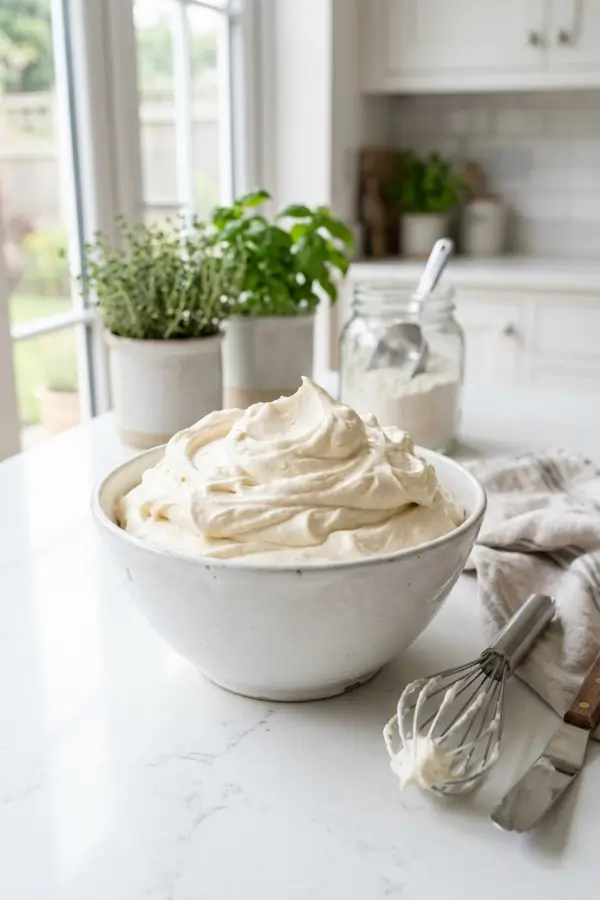
This silky, whipped-cream-like frosting is less sweet, perfectly pipeable, and egg-free. It is the kind of recipe your grandmother’s grandmother probably knew by heart.
Why This Recipe Stands Out
- Less Sweet Than Regular Buttercream: Ermine frosting uses a cooked flour base instead of powdered sugar. This gives it a balanced, lightly sweet flavor that does not overwhelm your cake.
- Luxuriously Silky Texture: The cooked milk and flour paste creates a frosting with a smooth, almost whipped-cream-like consistency. Every bite feels incredibly light and airy.
- Completely Egg-Free: Unlike Swiss Meringue or German buttercream, this recipe needs no eggs at all. It is a wonderful option for those with egg allergies.
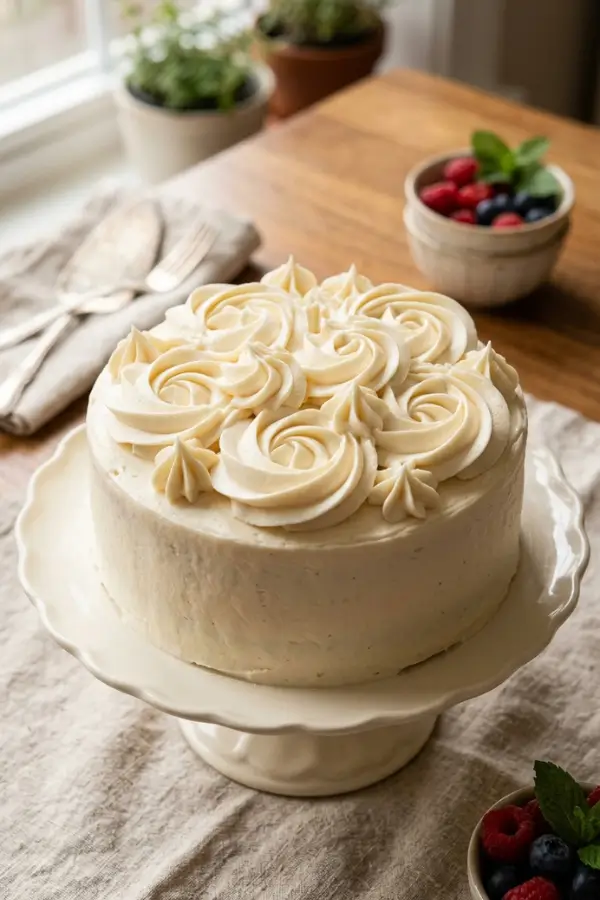
- Pipes Beautifully: Despite its light texture, ermine frosting holds its shape well. It is perfect for decorating cakes and cupcakes with clean, professional-looking swirls.
- Versatile and Customizable: You can easily flavor it with chocolate, lemon, peppermint, or coconut. The base recipe is a blank canvas for creativity.
- A True Heritage Recipe: This frosting has been around since the late 19th century. It is the original frosting traditionally paired with red velvet cake, and it never goes out of style.
Ingredients You’ll Need
Makes approximately 3 cups of frosting
For the Flour Paste (Roux):
- 5 tablespoons (40g) all-purpose flour
- 1 cup (200g) granulated sugar
- 1 cup (240ml) whole milk
- 1/4 teaspoon salt
For the Frosting:
- 1 cup (226g / 2 sticks) unsalted butter, softened to room temperature
- 1 teaspoon pure vanilla extract
Tools to Use
- Medium saucepan
- Whisk
- Rubber spatula
- Heatproof bowl
- Plastic wrap
- Stand mixer or hand-held electric mixer
- Measuring cups and spoons
- Kitchen scale (recommended)
- Piping bags and tips (optional, for decorating)
How to Make the Ermine Frosting
Step-1: Combine the Dry Ingredients
Add the flour, sugar, and salt to a medium saucepan.
Whisk them together until fully combined and no lumps remain.
This step ensures a smooth, lump-free base for your frosting.
Step-2: Cook the Flour Paste
Place the saucepan over medium heat.
Slowly pour in the whole milk while whisking constantly to prevent lumps from forming.
Keep whisking without stopping as the mixture heats up.
Cook for about 5 to 7 minutes, until the mixture thickens to a smooth, pudding-like consistency.
You will know it is ready when the whisk leaves visible lines in the paste.
Do not rush this step by cranking up the heat, as that can burn the mixture and prevent the sugar from dissolving properly.
Step-3: Cool the Mixture Completely
Remove the saucepan from the heat immediately once the paste is thick.
Pour the hot mixture into a heatproof bowl.
Press a sheet of plastic wrap directly onto the surface of the paste, ensuring no air gaps remain.
This prevents a skin from forming on top as it cools.
Allow the mixture to cool completely to room temperature, which takes about 1 to 1.5 hours.
To speed up the process, you can place it in the refrigerator, but bring it back fully to room temperature before proceeding.
This step is critical: adding the paste to the butter while it is still warm will melt the butter and ruin the frosting.
Step-4: Beat the Butter
Place the softened, room-temperature butter in the bowl of your stand mixer fitted with the paddle attachment.
Beat on medium speed for about 4 to 5 minutes, until the butter is very light, pale, and fluffy.
Scrape down the sides of the bowl occasionally during this process.
Properly whipped butter is the foundation of a light, airy ermine frosting.
Step-5: Add the Vanilla Extract
Add the pure vanilla extract to the whipped butter.
Beat for another minute until fully incorporated and fragrant.
The warm, floral scent of vanilla will already make your kitchen smell incredible at this stage.
Step-6: Combine the Paste and Butter
With the mixer running on medium speed, add the completely cooled flour paste to the butter one spoonful at a time.
Allow each addition to fully incorporate before adding the next.
Once all the paste has been added, increase the speed to medium-high.
Beat for 3 to 4 more minutes until the frosting is very light, fluffy, and smooth.
The transformation is truly magical: you will watch it go from a slightly curdled-looking mix to a gorgeous, billowy, whipped-cream-like frosting.
If your frosting looks curdled or greasy, do not panic. Simply keep beating and it will come together beautifully.
Step-7: Use or Store Your Frosting
Use the frosting immediately to frost and decorate your cake or cupcakes.
Spread it on with an offset spatula or pipe it using your favorite piping tip.
The frosting is now ready to use and at its absolute best consistency right after making.
Related Recipes You’ll Love to Try
- German Chocolate Cake Frosting: Coconut Pecan Classic for Special Occasions
- Best Peanut Butter Frosting (Creamy, Fluffy & Easy)
- Foolproof Silky Cream Cheese Frosting for Cakes and Cupcakes
- Easy Whipped Cream Frosting Recipe That Holds Its Shape All Day
Nutritional Information
Per serving (based on 12 servings, approximately 2 tablespoons each)
- Calories: ~200-228 kcal
- Protein: ~1g
- Fat: ~16g (Saturated Fat: ~10g)
- Carbohydrates: ~17-21g
- Sodium: ~30-50mg
Note: Nutritional values are estimates and may vary based on specific ingredient brands and portion sizes.
Tips for Success
- Cool the Paste Completely: This is the most important rule. The flour paste must be at full room temperature before it touches the butter. Even a slightly warm paste will melt the butter and cause a greasy, runny mess.
- Use Room-Temperature Butter: Your butter should be soft and pliable but not melted or greasy. If you press your finger into it, it should leave an indent easily. Cold butter will not whip properly.
- Whisk Constantly During Cooking: Do not walk away from the stove while cooking the flour paste. Constant whisking prevents lumps and ensures even thickening without burning the bottom.
- Do Not Rush the Butter Whipping: Give the butter a full 4 to 5 minutes of beating before adding the paste. Properly aerated butter is what makes the frosting light and fluffy.
- Add the Paste Gradually: Add the cooled paste one spoonful at a time to the running mixer. Adding it all at once can shock the butter and lead to a lumpy frosting.
- Keep It Away From Heat: Like most butter-based frostings, ermine frosting does not hold up well in warm temperatures above 75°F (24°C). Keep your cake in a cool environment and avoid outdoor summer use.
- Make It Ahead: You can make ermine frosting up to one week in advance. Store it in an airtight container in the refrigerator, then let it come to room temperature and re-whip before using.
Common Mistakes to Avoid
- Adding Warm Paste to the Butter: This is the number-one mistake. A warm paste will melt the butter immediately and leave you with a greasy, liquid mess. Always wait for it to cool fully.
- Cooking the Paste Over High Heat: High heat causes the sugar to burn and the milk to scorch before it thickens properly. Always use medium heat and be patient.
- Skipping the Plastic Wrap: Not pressing plastic wrap directly onto the surface of the hot paste allows a thick, dry skin to form. That skin will create lumps in your finished frosting.
- Using Cold Butter: Cold butter will not whip into a fluffy, airy base. It will stay dense and lumpy and refuse to incorporate the paste smoothly.
- Over-Whipping the Final Frosting: While you do need to beat the frosting well, over-whipping can cause the butter to soften too much and make the frosting too loose. If this happens, refrigerate for 15 minutes, then re-whip briefly.
- Skipping the Flour Paste Step: You cannot simply mix flour into butter and call it done. The flour must be cooked with the milk and sugar to remove the raw flour taste and develop the correct, stable, pudding-like texture.
- Not Re-Whipping After Refrigerating: Ermine frosting firms up significantly in the fridge. Always bring it to room temperature and beat it again with your mixer before using it on a cold cake.
Creative Serving Ideas
- Classic Red Velvet Cake: Ermine frosting is the original, traditional pairing for red velvet cake. The subtle sweetness beautifully complements the mild cocoa notes of the cake without competing with them.
- Fluffy Vanilla Cupcakes: Pipe tall, elegant swirls of ermine frosting onto vanilla cupcakes. The light, airy texture makes each bite feel indulgent yet balanced.
- Rich Chocolate Cake Topping: Spread a thick layer of ermine frosting between the layers and over the top of a deep chocolate cake. The contrast of rich cake and light frosting is absolutely stunning.
- Coconut Layer Cake Filling: Use ermine frosting as a filling between layers of a coconut cake. Add a splash of coconut extract and a handful of toasted coconut flakes to the frosting for an extra tropical twist.
- Brownies and Blondies Topper: Spread a thin, elegant layer of ermine frosting over your brownies or blondies. It is a sophisticated and less sweet alternative to a standard sugar glaze.
- Chocolate Ermine Variation: Stir in 1/4 cup of good-quality cocoa powder after combining the paste and butter for a chocolate ermine frosting. Use this on chocolate cupcakes or a layered chocolate birthday cake.
- Celebration Cake Decorator: Use a piping bag fitted with a star or petal tip to pipe beautiful rosettes, ruffles, and borders. Ermine frosting takes gel food coloring extremely well, making it ideal for colorful celebration cakes.
Frequently Asked Questions
What is Ermine Frosting Made of?
Ermine frosting is made from a cooked paste of flour, sugar, and whole milk, then whipped together with softened butter and vanilla extract.
It contains no eggs, making it unique among buttercream-style frostings.
The result is a light, silky, and lightly sweet frosting that is very different from standard American buttercream.
Why is it Called Ermine Frosting?
The name is believed to refer to the silky-smooth, luxurious texture of the finished frosting, which resembles the soft, white fur of an ermine, a species of weasel.
It is also historically known as boiled milk frosting, flour frosting, heritage frosting, and roux frosting.
Regardless of the name, the recipe has been cherished in American kitchens since the late 1800s.
Is Ermine Frosting the Same as Boiled Milk Frosting?
Yes, ermine frosting and boiled milk frosting are the exact same recipe with different names.
Other common names include flour frosting, flour buttercream, heritage frosting, and roux frosting.
All of these names refer to the same method of cooking flour and milk into a thick paste before whipping it with butter.
What Does Ermine Frosting Taste Like?
Ermine frosting has a light, creamy flavor that is far less sweet than standard American buttercream.
Many people compare its flavor and texture to whipped cream or even a mild cream cheese frosting.
The vanilla adds a warm, aromatic note that makes it taste both classic and elegant.
Can I Make Ermine Frosting in Advance?
Yes, you can make ermine frosting up to one week ahead of time and store it in an airtight container in the refrigerator.
You can also freeze it for up to two months in an airtight container.
Before using, always bring it to full room temperature and re-whip it with your mixer to restore its light, fluffy texture.
Why Did My Ermine Frosting Turn Out Runny?
The most common cause of runny ermine frosting is adding the flour paste to the butter before it has fully cooled to room temperature.
Even slightly warm paste will begin to melt the butter and cause the frosting to collapse.
If this happens, refrigerate the mixture for 20 to 30 minutes, then re-whip it and it should come back together.
Can I Use Ermine Frosting Under Fondant?
Ermine frosting is generally not recommended as a base under fondant because its very soft, airy texture does not provide a firm enough surface.
However, it works wonderfully as a filling between cake layers beneath a firmer outer coating.
For fondant-covered cakes, a stiffer American buttercream crumb coat is a better outer layer choice.
How do I Store a Cake Frosted with Ermine Frosting?
A cake frosted with ermine frosting can be stored at room temperature (below 75°F / 24°C) for up to two days.
For longer storage, keep the frosted cake in the refrigerator, covered loosely.
Allow it to sit at room temperature for about 30 minutes before serving so the frosting softens back to its best creamy texture.


