Our site contains ads and uses Amazon affiliate links. We may earn a small commission at no extra cost to you. We know ads can be distracting, and we’re sorry for any inconvenience they cause. It helps us keep the site running. Thanks for your understanding and supporting us!
Most recipes for mini peanut butter cup cookies get one critical moment wrong: they either overbake the cookie shell until it turns crispy and crumbly, or they press the candy in too late after the cookie has already set firm.
Both mistakes kill the texture that makes this cookie iconic. The timing window between underdone and overdone is narrow, and it is controlled by temperature, not by color.
This recipe explains the science behind every decision, from why freezing the Reese’s cups beforehand matters, to how brown sugar controls spread inside a mini muffin tin, to exactly what “done” looks like before the cookies brown.
Why the Mini Muffin Tin Changes Everything
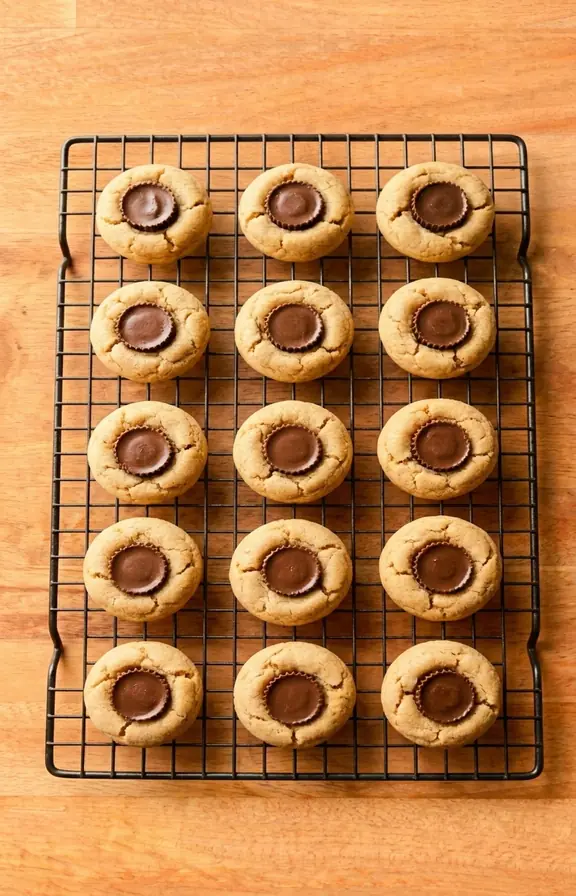
A flat baking sheet lets cookie dough spread outward in every direction. A mini muffin tin forces the dough upward, containing the spread and building walls instead of a pancake.
That contained rise is what creates the cup shape that holds the peanut butter candy in place. Without the tin, you press a candy into a flat cookie and it slides off the moment someone picks it up.
The tin also controls bake time more precisely. The metal walls transfer heat evenly around the dough, so the edges set at the same rate as the bottom.
This means you can pull these cookies out while the center still looks underdone and trust that the residual heat will finish the job.
The Freezing Step: Why Your Peanut Butter Cups Must Be Cold
Milk chocolate has a melting point of around 94°F, which is lower than average body temperature. The surface of a freshly baked cookie pulled from a 350°F oven is still close to 200°F.
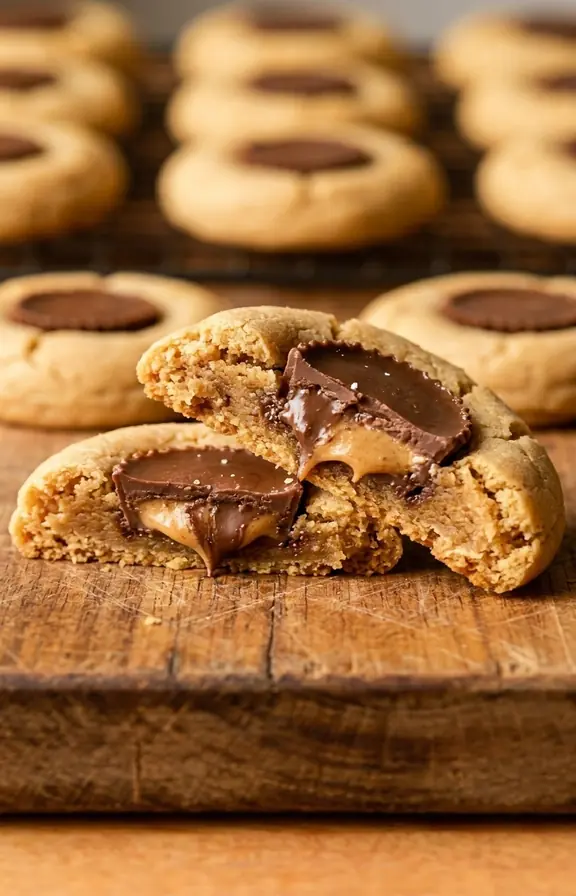
If you press a room-temperature Reese’s cup into a cookie at that temperature, the thin chocolate shell collapses and the filling spreads into the cookie before it can set. You end up with a greasy, formless center instead of a defined cup sitting cleanly inside the cookie.
Freezing the cups for at least 30 minutes before baking raises the thermal threshold they need to cross before melting. When the frozen candy meets the hot cookie, the outer chocolate softens slowly and creates that signature glossy, slightly melted look without losing its shape.
According to food science research on chocolate composition, the cocoa butter crystal structure in milk chocolate is particularly sensitive to temperature changes, which is why even small differences in candy temperature during pressing produce dramatically different results.
Brown Sugar vs White Sugar: How the Ratio Controls Spread in a Tin
Sugar ratio is the single most overlooked variable in peanut butter cup cookie recipes. Most published recipes use equal parts white and brown sugar. That is a mistake for this specific application.
White granulated sugar promotes spread and crispiness because it melts quickly and produces a thin, snappy structure.
Brown sugar contains molasses, which is hygroscopic, meaning it absorbs and holds moisture. A higher proportion of brown sugar produces a softer, chewier cookie with less lateral spread.
In a mini muffin tin where the walls are already controlling horizontal spread, you want a dough that stays thick and builds upward rather than one that runs into the walls and compresses into a dense disk.
This recipe uses a 2:1 ratio of brown to white sugar to keep the cookie fudgy and give it enough structure to cup around the candy without crumbling when you bite in.
The King Arthur Baking resource on sugar behavior in cookie dough explains how different sugars create fundamentally different textures even when the amounts are identical.
Peanut Butter Type Matters More Than You Think
Natural peanut butter with separated oil on top will ruin this recipe. The unstabilized oil migrates into the dough during baking and produces a greasy, loose texture that cannot hold the cup shape.
Use commercial no-stir peanut butter such as Jif or Skippy. These products contain added stabilizers that keep the fat emulsified and evenly distributed throughout the dough. The result is a cookie that holds its shape in the tin and has a consistent texture from center to edge.
Creamy peanut butter produces a smoother cookie wall. Crunchy peanut butter adds texture and small pockets of toasted peanut flavor, but it can create thin spots in the cookie cup wall if the pieces are large.
Both work, but creamy is more reliable for first-time bakers. If you enjoy peanut butter in other baked forms, the fudgy chocolate peanut butter brownie recipe on this site uses the same commercial peanut butter principle and is worth bookmarking for your next bake day.
Pan Prep: The Step That Determines Whether Your Cookies Release Clean
Mini muffin tins have tapered walls with curved corners, which makes cookie release tricky if the pan is not properly prepared. A thin coat of butter and flour works. Nonstick cooking spray also works but can leave a greasy residue on the outside edge of the cookie.
The best approach is a generous coat of butter applied with a pastry brush, making sure to cover the bottom and all sides of each cup including the top rim.
The rim matters because dough pushed into the cup will spread slightly onto the flat surface between cups. If that contact point sticks, it tears the top edge of the cookie when you lift it out.
Do not use paper liners. The cookie dough needs direct contact with the metal to build its cup shape against the wall. Paper liners act as a barrier that prevents the dough from gripping the sides, which results in flat, disk-shaped cookies rather than cups.
How to Get the Candy Centered Every Single Time
Pressing the candy dead center is harder than it looks. The cookie surface is soft and the candy tends to tilt toward whichever side you first make contact with.
Unwrap all candies before the cookies go in the oven and line them up flat-side-down on a plate in the freezer. When the cookies come out, work from one end of the pan to the other in a single pass.
Place the candy flat-side-down on the center of the cookie, then press straight down with two fingers simultaneously on opposite sides of the candy. This distributes the pressure evenly and keeps the candy level as it sinks into the dough.
If a candy goes in crooked, do not try to adjust it once it is partially set. Let the cookie cool completely, then carefully lift the candy out with a butter knife and reposition it. The cookie will show a slight mark but the candy will sit centered.
For more ideas on building visually clean chocolate and peanut butter desserts, the silky peanut butter mousse filling for cakes and cups uses similar piping and positioning techniques that translate well to cookie decorating.
Storage, Gifting, and Make-Ahead Options
These cookies store well at room temperature in an airtight container for up to five days. The cookie cups actually improve slightly on day two as the chocolate sets fully and the cookie softens from the residual moisture in the candy.
For gifting, stack cookies in a single layer separated by parchment paper. Do not double-stack without a barrier because the candy on top of one cookie will dent the cookie below it under pressure.
For make-ahead baking, you can freeze the fully assembled and cooled cookies for up to two months. Thaw at room temperature for 30 minutes before serving.
The chocolate may develop a slight white bloom during freezing, which is cocoa butter migrating to the surface. It does not affect flavor and disappears once the cookie warms back to room temperature.
Frequently Asked Questions
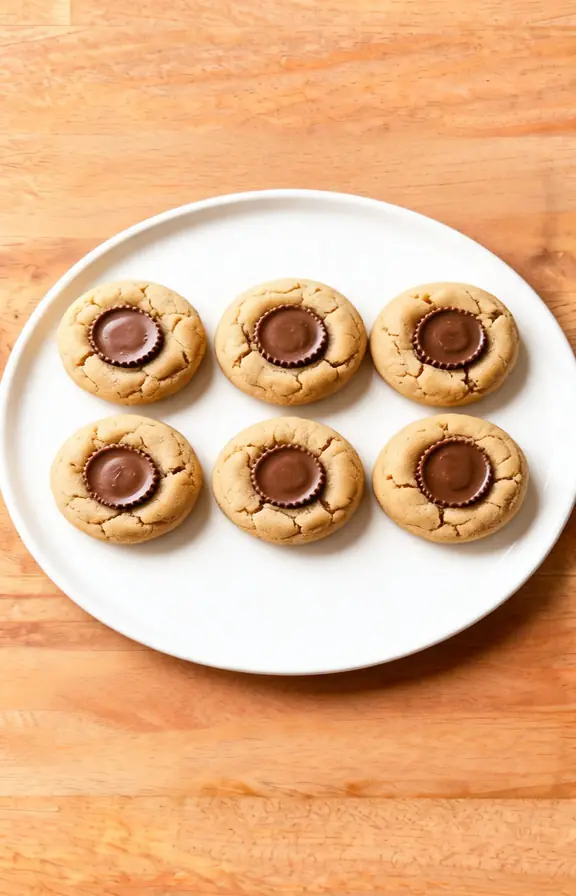
Mini Peanut Butter Cup Cookies
Soft, fudgy peanut butter cookie cups baked in a mini muffin tin and finished with a frozen Reese’s cup pressed into each center. Comes together in under 30 minutes with one bowl and no mixer required.
- 24-cup mini muffin tin (you will bake in two batches)
- Pastry brush (for greasing the tin)
- Large mixing bowl
- Cookie scoop or tablespoon measure
- Kitchen scale (optional but helpful for even sizing)
- Wire cooling rack
- Butter knife or small offset spatula (for releasing cookies)
- 1/2 cup (113g) unsalted butter, softened to room temperature
- 3/4 cup (150g) packed brown sugar
- 1/4 cup (50g) granulated white sugar
- 1/2 cup (125g) creamy commercial peanut butter (Jif or Skippy)
- 1 large egg, room temperature
- 1 teaspoon pure vanilla extract
- 1 1/2 cups (190g) all-purpose flour
- 1 teaspoon baking soda
- 1/4 teaspoon fine sea salt
- 36 mini Reese’s peanut butter cups, unwrapped and frozen at least 30 minutes before baking
- Freeze the candy and prep the tin Unwrap all 36 mini peanut butter cups and place them flat-side-down on a small plate or tray. Freeze for at least 30 minutes before baking. Preheat your oven to 350°F (175°C). Brush each cup of a 24-cup mini muffin tin generously with softened butter, covering the bottom, sides, and the rim of each cup. Do not use paper liners.
- Make the dough In a large bowl, beat the softened butter, brown sugar, and white sugar together until smooth and fluffy, about 2 minutes by hand or with a handheld mixer. Add the peanut butter, egg, and vanilla extract and beat until fully combined. Add the flour, baking soda, and salt. Mix until a soft, cohesive dough forms. Do not overmix once the flour is added.
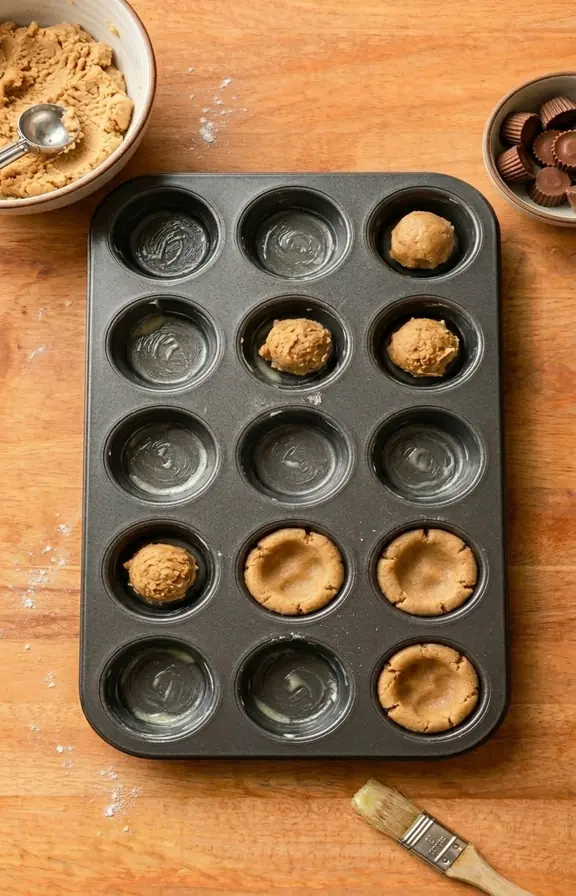
- Portion and press into the tin Scoop approximately 1 tablespoon of dough and roll it into a smooth ball between your palms. Place one ball into each greased muffin cup. Press gently with two fingers to flatten it slightly into the cup but do not press all the way to the bottom. The dough will spread and fill the cup during baking. Fill all 24 cups for the first batch.
- Bake until pale and just set Bake at 350°F for 8 minutes. The cookies should look pale gold on the edges with matte, slightly puffed centers. They will look underdone. This is correct. Do not bake until the tops turn golden brown or the cookies will be dry once cooled. Remove the pan from the oven and work immediately.
- Press in the frozen candy Retrieve the frozen peanut butter cups from the freezer. Working quickly from one end of the pan to the other, place one cup flat-side-down in the center of each hot cookie and press straight down with two fingers on opposite sides until the top of the candy is level with or just below the top of the cookie. The dough will crack slightly around the edges and rise up around the candy. This is correct.
- Chill and release Place the pan in the refrigerator for 15 to 20 minutes to allow the cookies to set fully and the chocolate to firm back up. Once set, run a thin butter knife around the edge of each cookie and lift it gently out of the cup. Transfer to a wire cooling rack. Repeat with the remaining dough and candy for the second batch of 12.
Nutritional values are estimates calculated using standard USDA food composition data. Actual values will vary based on specific peanut butter brand, candy size, and exact dough portion weight per cookie.


