Our site contains ads and uses Amazon affiliate links. We may earn a small commission at no extra cost to you. We know ads can be distracting, and we’re sorry for any inconvenience they cause. It helps us keep the site running. Thanks for your understanding and supporting us!
📊Recipe at a Glance
- Prep Time: 15 minutes
- Cook Time: 0 minutes
- Total Time: 2 hours 15 minutes (including chilling)
- Servings: 8-10 servings
- Diet Type: Vegetarian
- Cuisine: American
There’s something irresistibly dreamy about peanut butter mousse filling.
The moment your spoon glides through its cloud-like texture, you know you’re in for a treat.
This recipe transforms simple ingredients into a luxurious filling that’s perfect for cakes, pies, or even enjoyed straight from the bowl.
The rich peanut butter flavor combined with pillowy whipped cream creates pure magic.
The best part? You probably have most of these ingredients sitting in your pantry right now, ready to be transformed into dessert heaven.
Why This Recipe Stands Out
- No-Bake Simplicity: This mousse requires zero oven time, making it perfect for hot summer days or when you need a quick dessert solution.
- Versatile Application: Use it as a cake filling, pie topping, cupcake frosting, or parfait layer with endless creative possibilities.
- Rich Yet Light: The mousse achieves the perfect balance between indulgent peanut butter richness and airy, cloud-like texture.
- Stable Structure: Unlike some mousses that deflate quickly, this filling holds its shape beautifully for hours.
- Customizable Sweetness: Easy to adjust sugar levels to match your personal preference without compromising texture.
- Make-Ahead Friendly: Prepare up to two days in advance, making party planning stress-free.
Ingredients You’ll Need
For the Mousse Base:
- 1 cup creamy peanut butter (not natural style)
- 8 oz cream cheese, softened to room temperature
- 1 cup powdered sugar
- 1 teaspoon pure vanilla extract
- ¼ teaspoon salt
For the Whipped Cream:
- 2 cups heavy whipping cream, cold
- ¼ cup powdered sugar
- 1 teaspoon vanilla extract
Tools to Use
- Electric mixer or stand mixer
- Large mixing bowls
- Medium mixing bowl
- Rubber spatula
- Measuring cups and spoons
- Whisk
How to Make the Peanut Butter Mousse Filling
Step-1: Prepare the Peanut Butter Base
Start by placing the softened cream cheese in a large mixing bowl.
Beat it with an electric mixer on medium speed for about 1-2 minutes until it’s smooth and fluffy.
Add the peanut butter to the cream cheese and continue beating until both ingredients are completely combined.
The mixture should look creamy with no visible streaks.
Scrape down the sides of the bowl with a rubber spatula to ensure everything is incorporated.
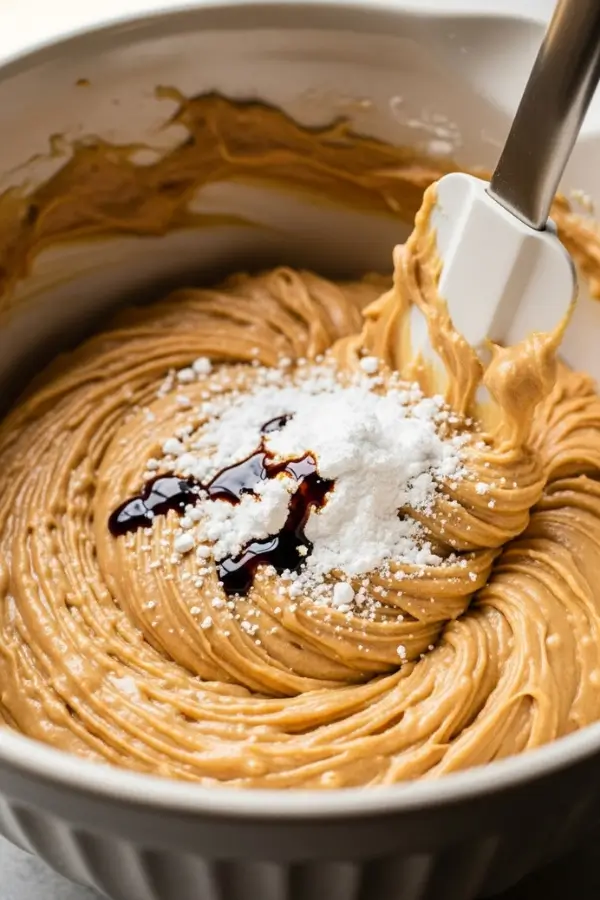
Step-2: Sweeten the Base
Add 1 cup of powdered sugar, vanilla extract, and salt to the peanut butter mixture.
Beat on low speed initially to prevent a sugar cloud from forming in your kitchen.
Once the sugar is moistened, increase to medium speed and beat for 2-3 minutes.
The mixture should become lighter in color and noticeably fluffier.
Taste and adjust sweetness if desired, then set this bowl aside.
Step-3: Whip the Heavy Cream
Pour the cold heavy cream into a separate clean, cold mixing bowl.
Using clean beaters, start whipping on medium speed until the cream begins to thicken.
Add ¼ cup powdered sugar and vanilla extract to the cream.
Increase speed to medium-high and continue whipping until stiff peaks form.
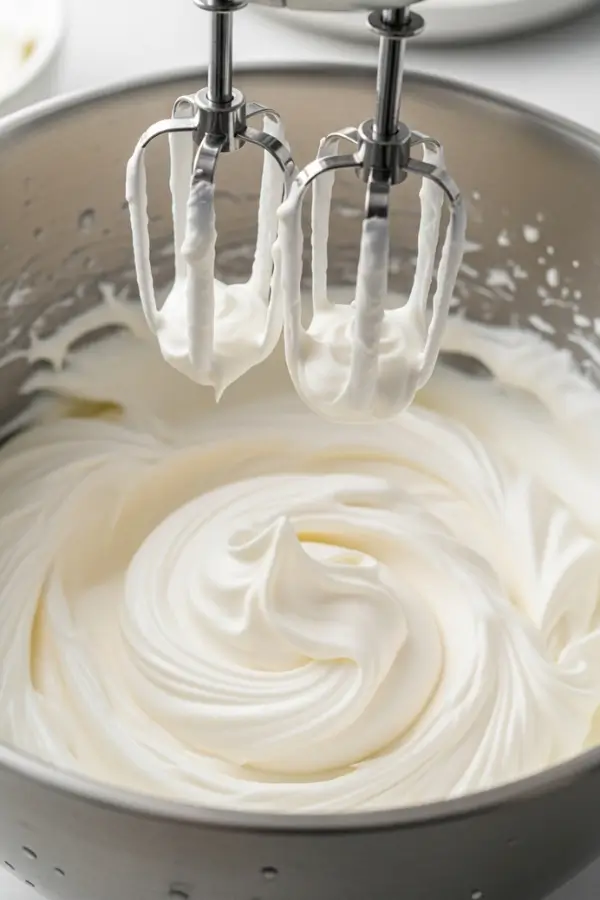
The cream should hold its shape firmly when you lift the beaters.
Be careful not to overwhip, or you’ll end up with butter instead of whipped cream.
Step-4: Fold the Mixtures Together
Add about one-third of the whipped cream to the peanut butter mixture.
Gently fold it in using a rubber spatula with a sweeping motion from the bottom up.
This first addition lightens the dense peanut butter base, making it easier to incorporate the rest.
Add the remaining whipped cream in two more additions, folding gently after each.
Continue folding until no white streaks remain, but avoid overmixing.
The final mousse should be uniformly tan and incredibly fluffy.
Step-5: Chill and Set
Transfer the mousse to your desired serving dish or storage container.
Smooth the top with a spatula for an even finish.
Cover tightly with plastic wrap, pressing it directly onto the surface to prevent a skin from forming.
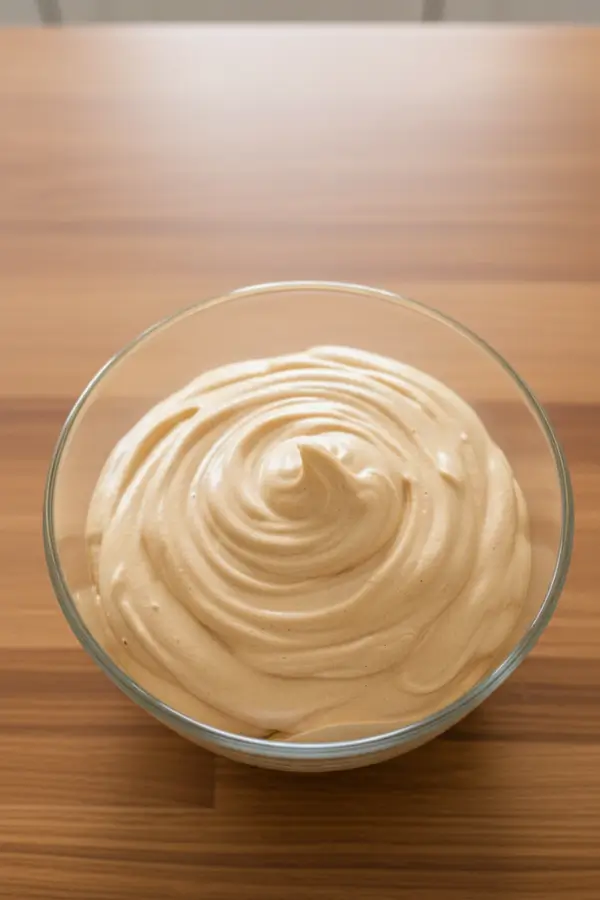
Refrigerate for at least 2 hours to allow the mousse to set properly.
The chilling time lets the flavors meld and the texture to firm up perfectly.
For best results, let it chill for 4 hours or overnight.
Related Recipes You’ll Love to Try
- Light & Creamy White Chocolate Mousse: Feels Fancy but Takes Minutes
- Marbled Red Velvet Cheesecake Brownies: Rich, Swirled & Irresistible
- Chocolate Mousse: A Silky, Cloud-Like Dessert That Melts in Your Mouth
- Triple Chocolate Trifle Mousse: Rich, Creamy & Over-the-Top
Nutritional Information
Per Serving (based on 10 servings):
- Calories: 385
- Protein: 7g
- Total Fat: 32g
- Saturated Fat: 14g
- Carbohydrates: 20g
- Fiber: 1g
- Sugar: 16g
- Sodium: 220mg
Note: Nutritional values are approximate and may vary based on specific brands and ingredients used.
Tips for Success
- Room Temperature Matters: Ensure cream cheese is completely softened to avoid lumps in your mousse. Leave it out for at least an hour before starting.
- Use Regular Peanut Butter: Natural peanut butter with separated oil won’t create the proper texture. Stick with regular creamy varieties like Jif or Skippy.
- Keep Cream Cold: Cold heavy cream whips better and faster. Place your bowl and beaters in the freezer for 10 minutes before whipping.
- Don’t Overbeat: Stop whipping the cream the moment stiff peaks form. Overwhipped cream becomes grainy and won’t fold smoothly.
- Gentle Folding Technique: Use a light hand when folding to maintain the airiness. Cut down through the center, sweep along the bottom, and bring up the side.
- Taste as You Go: Before adding the whipped cream, taste the peanut butter base and adjust sweetness to your preference.
- Prevent Skin Formation: Always press plastic wrap directly onto the mousse surface before refrigerating.
- Plan Ahead: This mousse tastes even better after sitting overnight as flavors develop and meld together.
Common Mistakes to Avoid
- Using Cold Cream Cheese: Cold cream cheese creates lumps that are nearly impossible to smooth out, ruining the silky texture.
- Overmixing After Adding Whipped Cream: Excessive stirring deflates the whipped cream, resulting in a dense, heavy mousse instead of a light one.
- Skipping the Chilling Time: Serving immediately results in a mousse that’s too soft and won’t hold its shape properly.
- Using Natural Peanut Butter: The separated oils in natural peanut butter create an unstable, grainy texture that won’t set correctly.
- Overwhipping the Heavy Cream: Cream beaten past stiff peaks becomes grainy and butter-like, making the mousse texture unpleasant.
- Adding Ingredients Too Quickly: Dumping all the whipped cream at once makes it difficult to fold evenly, leaving streaks throughout.
- Not Scraping the Bowl: Unmixed pockets of cream cheese or peanut butter create inconsistent texture and flavor throughout the mousse.
- Using Low-Fat Ingredients: Reduced-fat cream cheese or light whipped topping won’t provide the rich, stable texture this recipe requires.
Creative Serving Ideas
- Classic Pie Filling: Spread the mousse into a graham cracker, chocolate cookie, or pretzel crust for an instant no-bake pie that feeds a crowd.
- Layer Cake Enhancement: Use between cake layers for a professional bakery-style dessert. It pairs beautifully with chocolate, vanilla, or banana cake.
- Parfait Perfection: Layer the mousse with crushed cookies, fresh berries, and chocolate sauce in clear glasses for an elegant presentation.
- Cupcake Topping: Pipe the mousse onto cooled cupcakes using a large star tip for a stunning alternative to traditional frosting.
- Chocolate-Dipped Treats: Fill chocolate cups or phyllo shells with mousse and top with chopped peanuts or chocolate shavings.
- Ice Cream Sandwich Filling: Spread between chocolate chip cookies or brownies for an upgraded ice cream sandwich experience.
- Fruit Dip: Serve in a bowl surrounded by apple slices, banana chunks, and strawberries for a fun dessert board.
- Trifle Component: Layer with chocolate cake cubes, sliced bananas, and whipped cream for a show-stopping trifle.
- Éclair Filling: Pipe into homemade or store-bought éclairs for a peanut butter twist on the French classic.
- Stuffed French Toast: Use as a filling between thick slices of French toast, then top with maple syrup and sliced bananas.
Frequently Asked Questions
Can I Make This Mousse Ahead of Time?
Yes, this mousse actually improves when made in advance.
Prepare it up to 2 days before needed and store covered in the refrigerator.
The flavors meld beautifully, and the texture remains perfectly light and fluffy.
Can I Freeze Peanut Butter Mousse Filling?
Freezing is possible but may slightly alter the texture upon thawing.
If you choose to freeze, store in an airtight container for up to 1 month.
Thaw overnight in the refrigerator and gently stir before using if needed.
What’s the Best Peanut Butter to Use?
Regular creamy peanut butter like Jif, Skippy, or Peter Pan works best.
Avoid natural or organic varieties where the oil separates on top.
The stabilizers in regular peanut butter help create the proper mousse texture.
Can I Use Crunchy Peanut Butter Instead?
You can, but it will change the texture from smooth to slightly chunky.
The peanut pieces will add a pleasant crunch but won’t be evenly distributed.
For a smoother presentation, stick with creamy peanut butter.
How Do I Know When the Whipped Cream Is Ready?
Stiff peaks form when you lift the beaters and the cream stands straight up.
The peaks should hold their shape without drooping or collapsing.
Stop immediately at this stage to avoid overwhipping into butter.
Can I Use Cool Whip Instead of Heavy Cream?
While possible, homemade whipped cream provides superior flavor and texture.
If using Cool Whip, fold in 2 cups of thawed whipped topping gently.
The mousse will be slightly less rich but still delicious.
Why Is My Mousse Too Runny?
This usually happens when the whipped cream wasn’t beaten to stiff peaks.
Under-whipped cream lacks the structure needed to support the mousse.
Ensure your cream is very cold and beaten until it holds firm peaks.
How Long Does the Mousse Last in the Refrigerator?
Properly stored, the mousse stays fresh for 3-4 days.
Keep it covered tightly to prevent absorbing refrigerator odors.
The texture may soften slightly after day three but remains delicious.
Can I Make This Dairy-Free?
Yes, substitute dairy-free cream cheese and coconut cream for the dairy ingredients.
Use full-fat coconut cream chilled overnight, then whip only the thick part.
The flavor will be slightly different but still wonderfully creamy.
What If I Don’t Have Powdered Sugar?
You can make your own by blending granulated sugar in a blender until fine.
Add 1 tablespoon of cornstarch per cup of sugar to prevent clumping.
The texture will be nearly identical to store-bought powdered sugar.


