Our site contains ads and uses Amazon affiliate links. We may earn a small commission at no extra cost to you. We know ads can be distracting, and we’re sorry for any inconvenience they cause. It helps us keep the site running. Thanks for your understanding and supporting us!
Most pistachio entremet recipes online are written for professional pastry kitchens. They call for silicone insert molds, glucose syrup, feuilletine flakes, and a three-day freeze-and-glaze schedule.
Most home bakers either give up halfway through or end up with a collapsed cake that does not look anything like the photo.
This recipe keeps all the flavor of a classic pistachio praline entremet and removes every step that requires specialty equipment or specialty ingredients. You need a springform pan, a food processor, a hand mixer, and a thermometer. Everything else is a standard supermarket ingredient.
This recipe walks through every decision that matters:
- how to make a proper pistachio praline paste at home in 10 minutes with no candy thermometer,
- why a biscuit base works better than a baked sponge for a home refrigerator-set mousse cake,
- the exact gelatin ratio that keeps the mousse sliceable and light rather than rubbery,
- and how to get clean, professional-looking slices without a hot knife or freezing the cake solid.
Why This Version Works Better for Home Bakers
The word entremet comes from the French tradition of multi-layered composed desserts. At its core, an entremet is simply a mousse-based cake with distinct layers that each contribute a different texture.
You do not need a silicone mold or a mirror glaze to achieve that. You need a well-built mousse, a stable base, and a clean finish.
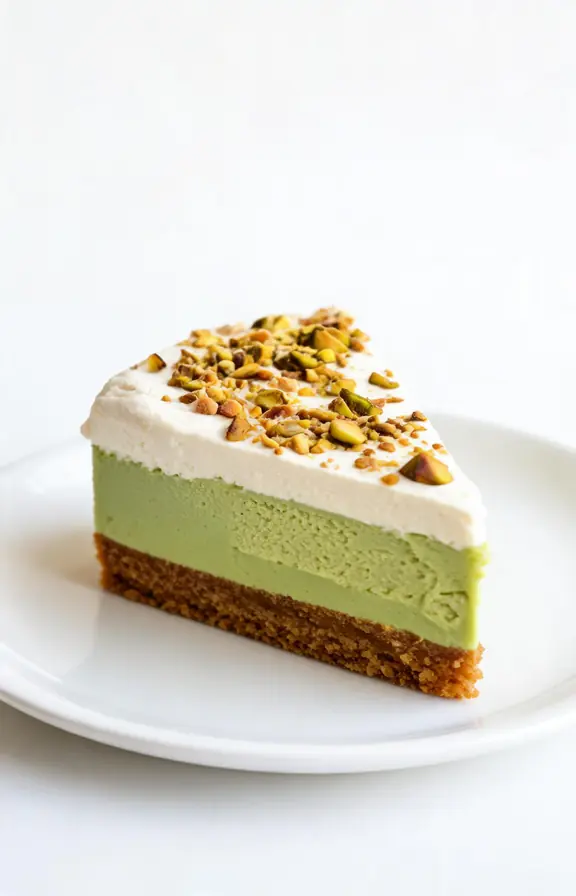
This recipe delivers three distinct layers that each do a specific job. The biscuit-praline base gives you crunch and a deep caramel-nut flavor that anchors the whole cake.
The pistachio mousse is the main body, light and creamy with a genuine pistachio flavor from homemade praline paste. The whipped cream topping with crushed caramelized pistachios adds freshness, visual contrast, and a second hit of crunch at the top that mirrors the base.
The result looks impressive, tastes exactly like a pistachio praline entremet should, and requires nothing more than what any home kitchen already has.
How to Make Pistachio Praline Paste in 10 Minutes
Pistachio praline paste is the single ingredient that makes this mousse taste like something from a proper French patisserie rather than a standard pistachio dessert.
It is caramelized sugar blended with roasted pistachios until the natural oils in the nuts release and the whole mixture becomes a smooth, spreadable paste.
The 1:1 ratio by weight is the standard: equal parts pistachios and sugar. Use a dry caramel method, which means no water in the pan. Melt the sugar directly in a heavy-bottomed saucepan over medium heat, stirring constantly in small batches until it turns deep amber.
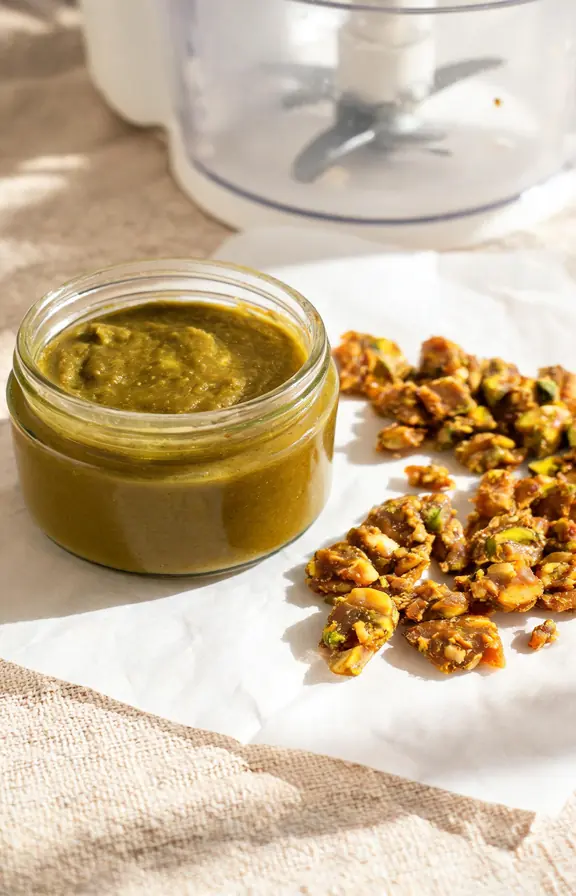
Add roasted pistachios, stir to coat, and pour immediately onto a parchment-lined tray.
Cool completely until brittle, about 20 minutes, then break into pieces and process in a food processor until the mixture transforms from powder into a smooth, glossy paste. This takes 3 to 5 minutes of continuous blending.
The paste stores well in an airtight jar at room temperature for two weeks. Make it first, before anything else, and let it cool while you prepare the base.
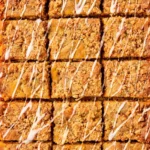
The Biscuit-Praline Base: Why It Beats a Baked Sponge for This Recipe
A traditional entremet uses a baked dacquoise or joconde sponge as its base. Both require oven time, cooling time, and precise baking. For a home refrigerator-set mousse cake, a no-bake biscuit base is a better choice for three reasons.
First, it is structurally more stable at refrigerator temperature than a baked sponge, which can absorb moisture from the mousse above it and turn soggy within hours. A butter-bound biscuit base stays firm because the fat in the butter sets solid when chilled and creates a barrier between the base and the mousse layer.
Second, crushing digestive biscuits or graham crackers and mixing them with melted butter and pistachio praline paste takes 5 minutes and requires no skill. There is nothing to overbake or underbake.
Third, the biscuit-praline base delivers crunch, buttery richness, and caramel-nut flavor in the same layer. A plain biscuit base with no praline paste tastes bland against a well-made pistachio mousse.
Mixing 3 tablespoons of your pistachio praline paste directly into the base crumb mixture makes every bite from crust to top taste like it was designed as one cohesive dessert.
Press the base mixture firmly into the bottom of a 20cm springform pan using the flat base of a glass. The layer should be about 1cm thick and fully compact with no loose crumbs. Refrigerate for 20 minutes before adding the mousse.
Pistachio Mousse: Getting the Gelatin Ratio Right for a Refrigerator-Set Cake
The single most important technical decision in this recipe is the gelatin ratio. Too little and the mousse will not hold a slice. Too much and it tastes like pistachio-flavored jelly rather than a light, airy mousse.
For a mousse that sets firmly enough to slice cleanly at refrigerator temperature without freezing, use 8g of powdered gelatin per 500ml of total mousse volume.
This is slightly more than the freeze-and-slice version of an entremet would use because refrigerator-set mousse does not have the support of being partially frozen when cut. The extra gelatin compensates for the softer serving temperature.
Always bloom powdered gelatin in cold water first. Use 5 parts water to 1 part gelatin by weight and let it sit for 5 minutes until it absorbs the water and becomes a solid, spongy mass.
Then dissolve it in a small amount of warm liquid (not boiling) before adding it to the mousse base. Boiling water destroys gelatin’s setting power.
The mousse base for this recipe uses a simple method: warm milk, pistachio praline paste, sugar, and egg yolks cooked to 82°C to make a light creme anglaise, then cooled completely before folding in whipped cream.
The result is a mousse that is genuinely light on the palate but holds a clean edge when sliced. The same whipping technique that gives you a stable, fold-ready cream for mousse is the same skill behind a perfectly stable whipped cream frosting that holds its shape all day.
How to Get Clean Slices from a Refrigerator-Set Mousse Cake
Frozen entremets are easy to slice because the cake is solid all the way through and a hot knife glides through without resistance. A refrigerator-set mousse cake is softer and requires a different approach.
Use a long, thin-bladed knife that has been run under hot water for 10 seconds and dried completely. The thin blade and warmth reduce drag through the mousse. Cut in one clean downward press, not a sawing motion. Wipe and rewarm the blade between every slice.
Chill the cake for a minimum of 4 hours, but overnight is better. A cake chilled overnight firms up more evenly from edge to center and slices much more cleanly than one that has only just set. If you are making this for a special occasion, build it the night before and slice it cold directly from the refrigerator.
Run a thin offset spatula or butter knife around the inside edge of the springform ring before releasing the clasp. This breaks any adhesion between the mousse and the pan wall and prevents the sides from tearing when you open the pan.
The same patience and build-ahead approach that makes this mousse cake work well is what makes no-bake refrigerator desserts like a classic banoffee pie with stovetop toffee and fresh banana layers so reliable for entertaining.
The Whipped Cream Topping: Keeping It Stable and Light
The whipped cream topping serves two purposes. It adds a visual layer that contrasts with the pale green mousse beneath it, and it introduces a lighter, fresher flavor that balances the richness of the pistachio praline base and mousse.
Use cold heavy cream with at least 35% fat content. Whip to stiff peaks, not soft peaks. A soft-peak cream topping will weep liquid after 30 minutes at room temperature and will not hold the crushed caramelized pistachios you spread across the surface.
To stabilize the cream for longer holding time, add one tablespoon of icing sugar and half a teaspoon of vanilla extract per 200ml of cream before whipping. This lightly sweetens the cream and helps it hold its structure for up to 6 hours in the refrigerator without separating.
Spread the cream over the fully set mousse layer using an offset spatula. Work from the center outward in smooth strokes. Scatter crushed caramelized pistachios over the surface immediately after spreading, before the cream surface sets.
Press them lightly so they adhere without sinking. The contrast between the smooth cream and the crunchy pistachio topping is what makes this cake look finished and intentional rather than homemade and casual.
Frequently Asked Questions
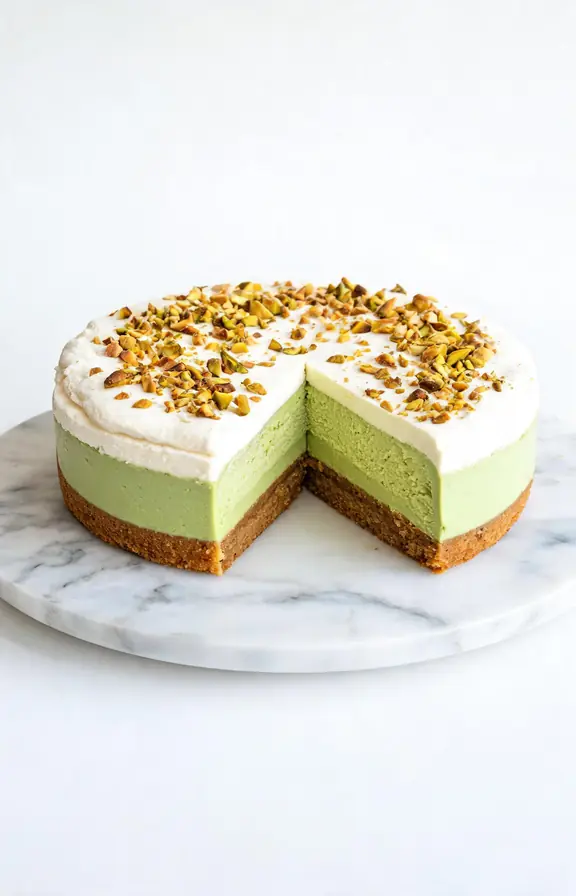
Pistachio Praline Entremet (Simplified)
Three-layer pistachio mousse cake built in a standard springform pan. Buttery biscuit-praline base, light gelatin-set pistachio mousse from homemade praline paste, and stabilized whipped cream with crushed caramelized pistachios on top. No specialty molds or mirror glaze. Ready in one day.
- 20cm (8 inch) springform pan
- Food processor (for praline paste)
- Heavy-bottomed saucepan
- Hand mixer or stand mixer
- Digital instant-read thermometer
- Fine mesh sieve
- Offset spatula
- Kitchen scale
- Parchment paper
- 150g raw shelled pistachios, lightly roasted at 160°C for 8 minutes
- 150g granulated sugar
- Pinch of fine sea salt
- 200g digestive biscuits or graham crackers, crushed to fine crumbs
- 80g unsalted butter, melted
- 3 tablespoons pistachio praline paste (from above)
- Pinch of fine sea salt
- 250ml whole milk
- 80g pistachio praline paste (from above)
- 3 egg yolks
- 60g granulated sugar
- 8g powdered gelatin (bloomed in 40ml cold water)
- 350ml cold heavy cream, whipped to stiff peaks
- 200ml cold heavy cream
- 1 tablespoon icing sugar
- ½ teaspoon vanilla extract
- 50g caramelized pistachios, roughly crushed (reserved praline from above)
- Make the pistachio praline paste Roast pistachios at 160°C for 8 minutes until fragrant. Set aside. In a heavy-bottomed saucepan over medium heat, melt the sugar in small batches without adding water, stirring constantly with a wooden spoon. Once fully melted and deep amber in color, add the roasted pistachios and stir quickly to coat. Pour immediately onto a parchment-lined tray. Reserve a small handful of the praline pieces before they cool for the topping. Allow the rest to cool completely until brittle, about 20 minutes. Break into pieces and process in a food processor, stopping to scrape the bowl every 30 seconds, until a smooth, glossy paste forms. This takes 3 to 5 minutes. Add a pinch of salt in the final 30 seconds. Set aside.
- Build the biscuit-praline base Line the base of a 20cm springform pan with parchment paper. Crush the biscuits into fine crumbs using a food processor or a zip-lock bag and rolling pin. Transfer to a bowl. Add melted butter, pistachio praline paste, and a pinch of salt. Mix until the crumbs look like wet sand and hold together when squeezed. Press firmly into the base of the prepared pan in an even layer about 1cm thick. Use the flat base of a glass to compact it fully. Refrigerate for 20 minutes while you make the mousse.
- Bloom the gelatin Sprinkle the powdered gelatin over 40ml of cold water in a small bowl. Stir once and leave for 5 minutes until the gelatin has absorbed the water and become a firm, spongy mass. Do not heat it yet.
- Make the pistachio creme anglaise base Whisk egg yolks and sugar together in a medium bowl until pale and slightly thick. Heat milk and pistachio praline paste together in a saucepan over medium heat, whisking until the paste is fully incorporated and the mixture is steaming but not boiling. Pour the hot milk mixture slowly into the egg yolk mixture while whisking constantly to temper the eggs. Return the mixture to the saucepan and cook over medium-low heat, stirring constantly with a silicone spatula, until it reaches 82°C and coats the back of a spoon. Remove from heat immediately. Add the bloomed gelatin and stir until fully dissolved. Strain through a fine sieve into a clean bowl. Cool to room temperature, stirring every few minutes to prevent a skin from forming. This takes about 25 to 30 minutes. Do not rush this step. Adding the gelatin base to the whipped cream while it is still warm will deflate the cream and ruin the mousse.
- Whip the cream and fold the mousse Once the creme anglaise base has cooled to room temperature, whip the cold heavy cream to stiff peaks in a separate chilled bowl. Add one-third of the whipped cream to the cooled pistachio base and fold gently to lighten it. Add the remaining cream in two additions, folding carefully each time to keep as much air as possible. The finished mousse should be pale green, airy, and hold a soft shape when a spoon is dragged through it.
- Fill and chill Remove the chilled biscuit base from the refrigerator. Pour the pistachio mousse over the base and smooth the surface with an offset spatula. Tap the pan gently on the counter twice to release any air bubbles. Cover with plastic film without touching the mousse surface and refrigerate for a minimum of 4 hours, or overnight for best results.
- Add the whipped cream topping Once the mousse is fully set and firm to the touch, run a thin knife or offset spatula around the inside edge of the springform ring before releasing the clasp. Place the cake on a serving plate or cake board. Whip the cold heavy cream with icing sugar and vanilla extract to stiff peaks. Spread evenly over the top of the set mousse layer using an offset spatula. Crush the reserved caramelized praline pieces roughly and scatter generously over the cream surface. Press lightly so the pieces adhere. Serve immediately or refrigerate for up to 4 more hours before serving.
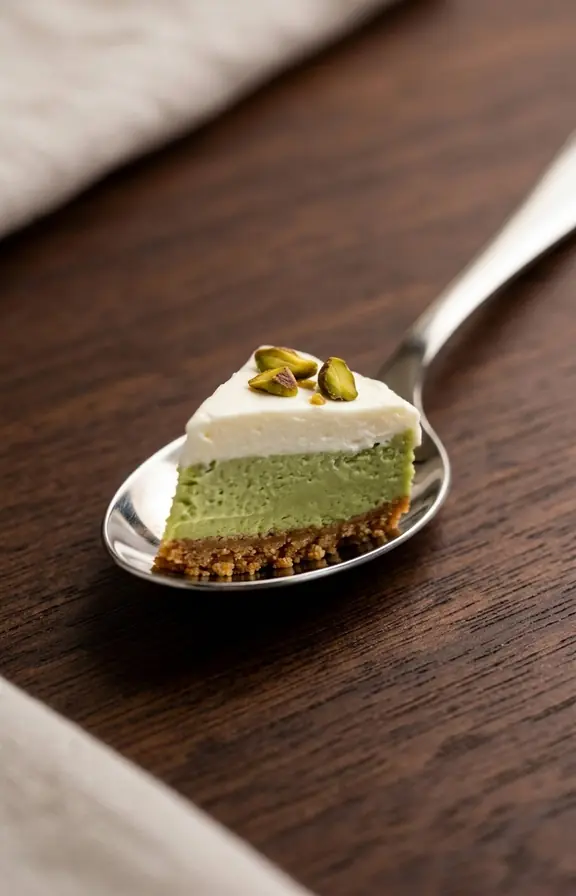
- Slice and serve Run a long thin-bladed knife under hot water for 10 seconds and dry completely. Cut in one clean downward press. Wipe and rewarm the blade between each slice. Serve cold directly from the refrigerator for the cleanest slices. Each slice should show three distinct layers: the dark biscuit-praline base, the pale green pistachio mousse, and the white cream topping with caramelized pistachios.
Nutritional values are estimates calculated using standard USDA food composition data. Actual values will vary based on the brand of biscuits used for the base, the fat content of the heavy cream, and exact slice size after portioning.