Our site contains ads and uses Amazon affiliate links. We may earn a small commission at no extra cost to you. We know ads can be distracting, and we’re sorry for any inconvenience they cause. It helps us keep the site running. Thanks for your understanding and supporting us!
Every gluten-free pie crust disaster follows the same pattern. The dough cracks when you roll it, tears when you transfer it, or turns into a sandy, crumbling mess by the time the pie reaches the table.
The problem is not the absence of gluten. The problem is that most recipes treat gluten-free flour like a direct swap for wheat flour, and it is not.
Gluten-free starches behave differently under heat and pressure, and the techniques that save a gluten-based crust actively work against a gluten-free one.
This recipe fixes that. It is built around the actual science of starch gelatinization and fat distribution in gluten-free doughs, not around adapting a wheat recipe until it barely works.
Why Gluten-Free Pie Dough Behaves Differently (And What to Do About It)
Gluten in wheat flour forms a stretchy protein network when hydrated. That network traps fat pockets during mixing, and those fat pockets steam during baking to create flaky layers.
Gluten-free flour blends rely on starches and binding agents to mimic that network. The key difference is that starches absorb more water than wheat flour does, and they absorb it slowly.
If you do not give the dough a rest after mixing, those starches stay dry and gritty at their centers, and the fat pockets collapse rather than steam.
This is why chilling the dough is not optional in gluten-free pie crust. It is the step where the actual structure forms.
According to food science research on gluten-free dough hydrocolloids, xanthan gum modifies dough rheology and helps the starch network retain structure during baking, which is exactly what prevents the crumbling and shrinkage that plagues most homemade gluten-free crusts.
The Double Chill Method: Why It Prevents Every Common Crack and Crumble
Most gluten-free pie crust recipes call for one chill after mixing. This recipe uses two, and the reason is specific to how gluten-free starches hydrate.
The first chill, 30 minutes after mixing, allows starches to fully absorb the ice water. Dough that goes into the pan still partially dry will crack immediately on contact with the pie dish. After the first chill, the dough becomes pliable and holds together when pressed.
The second chill, 15 minutes after shaping in the pan, relaxes the dough and firms the butter back up. Butter softens during shaping from the heat of your hands.
If you bake right after shaping, that soft butter melts before it can steam, and you lose the flakiness entirely. The second chill gives you back those fat pockets.
Xanthan Gum vs. Psyllium Husk: Which Binder Works for Pie Crust
This is the question every gluten-free baker faces, and the answer for pie crust specifically is xanthan gum. Psyllium husk works beautifully in bread, where the dough needs to trap gas from yeast fermentation.
But in pie crust, psyllium husk adds too much chewiness and can make the baked crust feel leathery rather than flaky.
Xanthan gum gives you clean binding without altering texture. A small amount goes a long way. Use three-quarters of a teaspoon per 1.5 cups of flour blend. More than that and the crust becomes gummy and elastic, which is the opposite of what you want in a short pastry.
If your flour blend already contains xanthan gum, do not add more. Doubling the xanthan gum is one of the most reliable ways to make a gluten-free crust that handles like putty and bakes into something dense and tough. Check the ingredients label on your blend before mixing.
- Xanthan gum: Best for pie crust and pastry. Provides binding without chewiness. Use 3/4 tsp per 1.5 cups flour.
- Psyllium husk: Best for yeasted breads and pizza dough. Creates chewiness in pastry.
- Guar gum: A 1:1 substitute for xanthan gum if you have a sensitivity to it.
- Egg: Always include one egg in gluten-free pie dough. It adds protein binding that no gum can fully replace.
How to Roll and Transfer Without Tearing
Rolling gluten-free pie dough directly on a floured surface is the most reliable way to end up with a torn, stuck crust. Gluten-free dough grabs surfaces differently than wheat dough because it has no gluten network to create internal cohesion.
Roll between two sheets of parchment paper instead. Place the chilled dough on one sheet, cover with the second, and roll to your target thickness. The paper keeps the dough from sticking and lets you peel it away cleanly once the crust is the right size.
To transfer, peel off the top sheet of parchment. Slide your hand under the bottom sheet and flip the entire crust into the pie dish. Peel the parchment off from the top. Gently press the crust into the dish edges.
Any small cracks can be patched immediately with a damp finger, because unlike wheat dough, gluten-free pastry patches cleanly with no visible seam after baking.
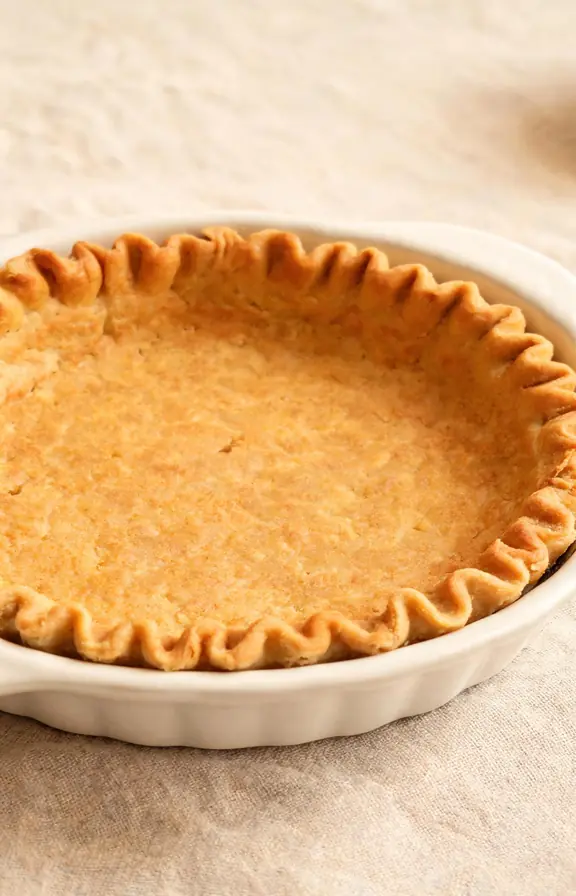
If you want a perfectly even fluted edge like you see in a bakery-style pie, this technique works every time. Press the dough half an inch above the rim of the dish.
Then flute by pressing the index finger of one hand against the thumb and index finger of the other hand at 45-degree angles around the perimeter. The double chill has firmed the dough enough that it holds the crimp cleanly.
Getting the right baking surface under your pie dish matters too. Placing the dish on a heavy preheated sheet pan during blind baking conducts more even heat to the base and reduces the soggy bottom problem that affects so many custard and fruit pies.
If you want to explore how different baking surfaces affect pastry bases, the comparison in our guide to building a crisp base for layered no-bake pies shows the same principle applied to chilled pie desserts.
Blind Baking: The Step That Separates a Soggy Base from a Crisp Shell
Blind baking is more important in gluten-free pie crusts than in wheat crusts because gluten-free starches are more porous and absorb moisture from fillings faster. A wheat crust can sometimes get away with no blind baking in a firm fruit pie. A gluten-free crust almost never can.
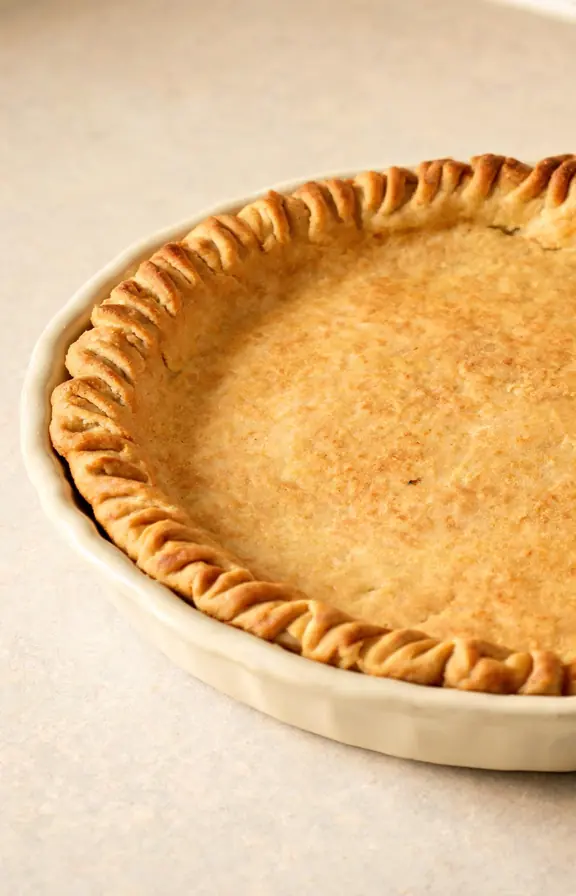
Line the cold crust with parchment and fill with pie weights or dried beans. Bake at 375°F for 12 minutes, then remove the weights and parchment and bake for another 5 to 6 minutes until the base looks dry and barely golden.
Brush immediately with a thin coat of beaten egg white, then return to the oven for 2 minutes. That egg white layer creates a moisture barrier that keeps custard and fruit fillings from saturating the shell.
A warm crust softens under any refrigerated filling and loses its structure. Always cool the shell on a wire rack for at least 30 minutes before adding anything cold.
Gluten-Free Pie Crust for Sweet vs. Savory Pies
The base recipe below works for both sweet and savory fillings with one adjustment: the sugar. For sweet pies, keep the one teaspoon of sugar in the recipe.
Sugar does more than sweeten the crust. It helps it brown at lower temperatures and contributes a subtle color contrast that makes a sweet pie look finished.
For savory pies like quiches, pot pies, or vegetable galettes, omit the sugar entirely and add an extra quarter teaspoon of fine sea salt. The additional salt sharpens the flavor of the crust and keeps the shell from tasting bland next to a well-seasoned filling.
For a galette, where the crust folds loosely around the filling rather than pressing into a dish, increase the cold butter by one tablespoon. The extra fat makes the dough more pliable and less likely to split at the fold points during baking.
The edges of a galette receive more direct heat than the sides of a pan-pressed crust, and a slightly fattier dough holds up better under that higher surface temperature.
The same cold-fat principle that makes this crust flaky is what makes a well-constructed biscuit rise tall and stay tender.
If you are building a full dessert spread and want to understand how cold butter behaves differently in a leavened dough, the breakdown in our technique guide for tall, layered buttermilk biscuits explains the mechanics in detail.
Make-Ahead, Storage, and Freezing This Crust
Gluten-free pie crust dough keeps in the refrigerator for up to 3 days, wrapped tightly in plastic wrap.
The longer rest actually improves the texture because the starches continue to hydrate. Dough made the day before baking typically rolls out more easily than dough baked the same day.
For freezing, shape the dough into a flat disk, double wrap in plastic, and seal in a freezer bag. It freezes well for up to 3 months.
To use it, thaw overnight in the refrigerator. Do not thaw at room temperature because the butter softens unevenly and the fat distribution that creates flakiness breaks down.
You can also freeze the crust already pressed into the pie dish. Line the frozen shell with parchment and go directly from freezer to oven for blind baking.
The frozen crust actually blind-bakes better than a room-temperature one because the fat stays firm longer, which means more steam and more flake.
Frequently Asked Questions
Gluten Free Pie Crust Recipe
Flaky, tender gluten-free pie crust with cold butter and a double-chill method that prevents cracking and crumbling. Works for sweet and savory pies. Dairy-free adaptable and freezer-friendly.
- 9-inch pie dish (ceramic or glass preferred over metal for even baking)
- Food processor or pastry cutter
- Two sheets of parchment paper (for rolling)
- Kitchen scale (for accurate flour measurement)
- Plastic wrap
- Pie weights or dried beans
- Pastry brush (for egg white seal)
- Wire cooling rack
- 180g (1.5 cups) gluten-free all-purpose flour blend (with tapioca starch in the blend)
- 3/4 teaspoon xanthan gum (omit if your blend already contains it)
- 1 teaspoon granulated sugar (omit for savory crusts)
- 1/2 teaspoon fine sea salt
- 115g (8 tablespoons) cold unsalted butter, cut into 1/2-inch cubes
- 1 large egg, cold
- 2 to 3 tablespoons ice water, measured without the ice
- 1 teaspoon apple cider vinegar (helps tenderize the starch)
- 1 large egg white (for the moisture barrier seal after blind baking)
- Mix the dry ingredients Whisk together the gluten-free flour blend, xanthan gum (if using), sugar, and salt in a large bowl or the bowl of a food processor. Take 30 seconds to make sure the xanthan gum is evenly distributed before adding any fat. Clumps of xanthan gum that hit the butter before dispersing will create gummy spots in the finished crust.
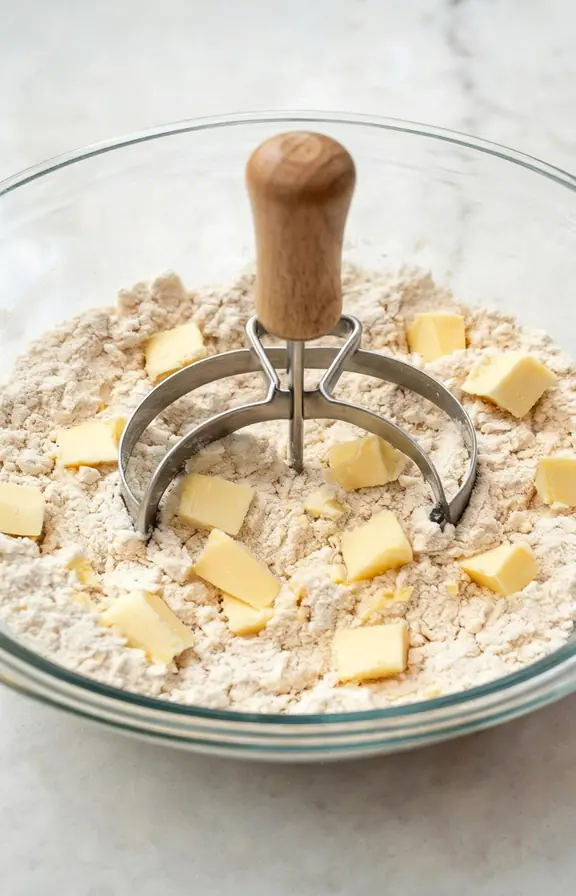
- Cut in the cold butter Add the cold butter cubes to the flour mixture. Use a pastry cutter or pulse the food processor 8 to 10 times until the butter breaks down to pea-sized pieces with some slightly larger chunks remaining. Those larger butter chunks are not a mistake. They are the fat pockets that will steam during baking and create the flaky layers. Do not process until the mixture looks like fine sand.
- Add the wet ingredients Whisk together the cold egg, 2 tablespoons of ice water, and the apple cider vinegar in a small bowl. Drizzle this mixture over the flour and butter. Pulse or mix just until the dough starts to clump. It will look shaggy and rough, not smooth. Add the third tablespoon of water only if the dough does not come together when pressed between your fingers. Gluten-free dough should feel slightly stickier than wheat pastry dough at this stage.
- First chill Turn the dough out and press it into a flat disk about one inch thick. Wrap tightly in plastic wrap. Refrigerate for at least 30 minutes or up to overnight. This rest period is where the starches fully hydrate and the xanthan gum activates. Skipping or shortening this chill is the single most common cause of cracking during rolling. The dough will feel noticeably firmer and more cohesive after the rest.
- Roll and transfer Let the dough sit at room temperature for 3 to 4 minutes. Place it between two sheets of parchment paper. Roll from the center outward to a circle about 12 inches in diameter for a 9-inch pie dish. Peel off the top parchment. Slide your hand under the bottom sheet and flip the crust into the pie dish. Peel away the parchment from the top. Gently press the crust against the dish edges and up the sides. Patch any small cracks with a damp finger. Trim the overhang to half an inch and crimp as desired.
- Second chill Place the shaped crust in the refrigerator for 15 minutes. This step firms the butter back up after the heat from your hands has softened it during shaping. A cold crust going into a hot oven gives you more oven spring and cleaner flake than a room-temperature crust does. Do not skip this step, even if the crust looks fine at room temperature.
- Blind bake the crust Preheat the oven to 375°F (190°C). Line the cold crust with parchment paper and fill with pie weights or dried beans. Bake for 12 minutes, then carefully lift out the parchment and weights. Return the crust to the oven for 5 to 6 more minutes until the base looks dry and barely golden at the edges. Remove from the oven and immediately brush the inside surface with beaten egg white. Return to the oven for exactly 2 minutes. This egg white layer is the moisture barrier that prevents soggy bottoms.
- Cool before filling Transfer the pie dish to a wire rack and cool completely before adding any filling, at least 30 minutes. A warm gluten-free crust will soften rapidly under any moisture-heavy filling and lose its structure. The crust continues to firm as it cools. For no-bake fillings or refrigerated cream pies, the shell should feel completely firm and room temperature before you pour anything in.
Nutritional values are estimates calculated using standard USDA data. Actual values will vary based on the specific gluten-free flour blend used, butter brand, and final crust thickness after rolling.


