Our site contains ads and uses Amazon affiliate links. We may earn a small commission at no extra cost to you. We know ads can be distracting, and we’re sorry for any inconvenience they cause. It helps us keep the site running. Thanks for your understanding and supporting us!
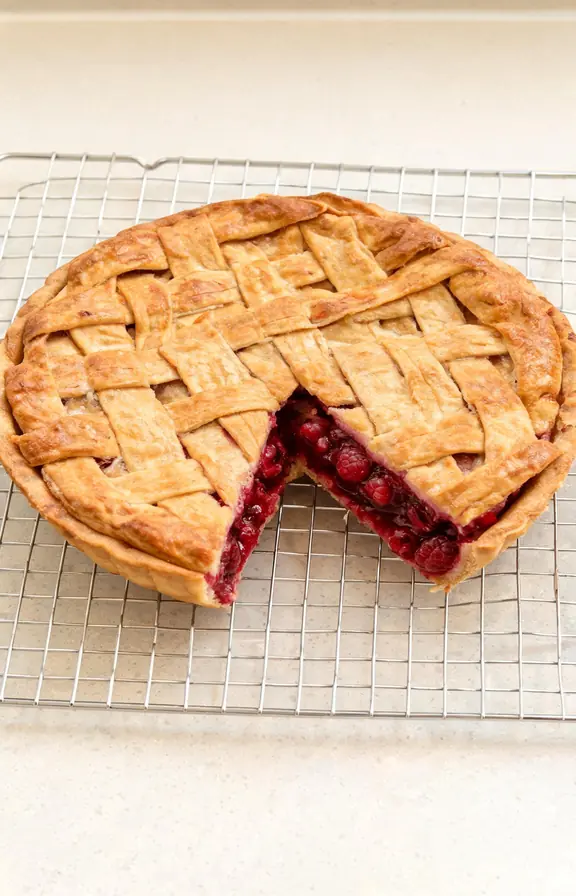
Raspberry pie has a reputation problem. Ask around and most home bakers will tell you it always comes out soupy, no matter how long they bake it.
That reputation is not really about skill. It is about raspberries themselves, which release far more liquid than blueberries or blackberries once they hit sugar and heat.
This recipe works with that liquid instead of fighting it. Every step below exists to answer one question: where does the water go, and how do we control it before the oven ever gets involved?
Why Most Raspberry Pie Recipes Turn Out Runny
Raspberries are roughly 86 percent water by weight, according to USDA nutrient data. That is more moisture per cup than blueberries, cherries, or apples carry into a pie.
Raspberries are also naturally low in pectin compared to fruits like apples or citrus. Pectin is the substance that helps a filling gel on its own as it cools.
Without much natural pectin, a raspberry filling depends almost entirely on added starch to set. If that starch is not calibrated to the exact amount of liquid in the pie, the filling stays loose no matter how golden the crust looks.
Sugar makes the problem worse before it helps. Sugar is hygroscopic, meaning it pulls moisture out of the berries through a process called maceration, which is exactly the step most recipes skip or rush.
The Macerate, Drain, and Reduce Method Explained
This is the technique that separates this recipe from the standard toss-and-bake approach used almost everywhere else.
Start by tossing your raspberries with sugar and a pinch of salt, then let them sit for 30 minutes. During this time the sugar draws liquid out of the fruit cells through osmosis.
Pour the raspberries into a fine mesh strainer set over a saucepan. Let gravity do the work for a few minutes rather than pressing the berries, which would rupture more cells and release even more liquid than you want.
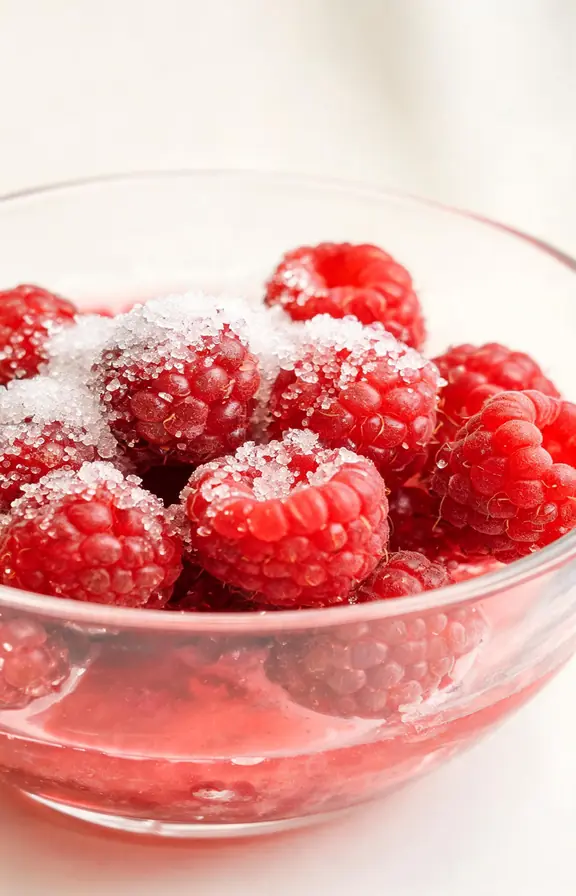
Simmer the collected juice alone, uncovered, until it reduces by about half and turns syrupy. This concentrates the raspberry flavor while cooking off a significant portion of the excess water before it ever touches your crust.
Whisk your cornstarch and tapioca starch into the warm reduced syrup off the heat, then fold the thickened syrup back into the drained berries. You now have a filling with a known, controlled amount of liquid instead of an unpredictable one.
Cornstarch vs Tapioca for Raspberry Pie: Choosing the Right Thickener
Cornstarch alone gives a glossy, clear filling, but it needs a full rolling boil to fully activate. If your oven runs cool or your bake time is even slightly short, cornstarch-only fillings are the most likely to stay loose.
Tapioca starch sets firmer and holds up better if you plan to refrigerate leftover slices, but too much of it on its own can leave a faintly gluey texture that masks the raspberry flavor.
This recipe uses both together specifically because raspberries carry so much water. The blend activates fast enough to catch the initial rush of juice while still holding a clean set after the pie has fully cooled.
Fresh vs Frozen Raspberries: Adjusting the Recipe
Fresh raspberries work beautifully in this method and hold their shape a little better through the maceration and drain steps.
Frozen raspberries release noticeably more liquid because ice crystals rupture the cell walls as they form. Do not thaw them before macerating. Add them to the sugar straight from the freezer and extend the drain time to a full 10 minutes.
If you are using frozen berries, increase the tapioca starch by one extra tablespoon to account for the additional water they release compared to fresh fruit.
Building a Lattice Top That Doesn’t Leak
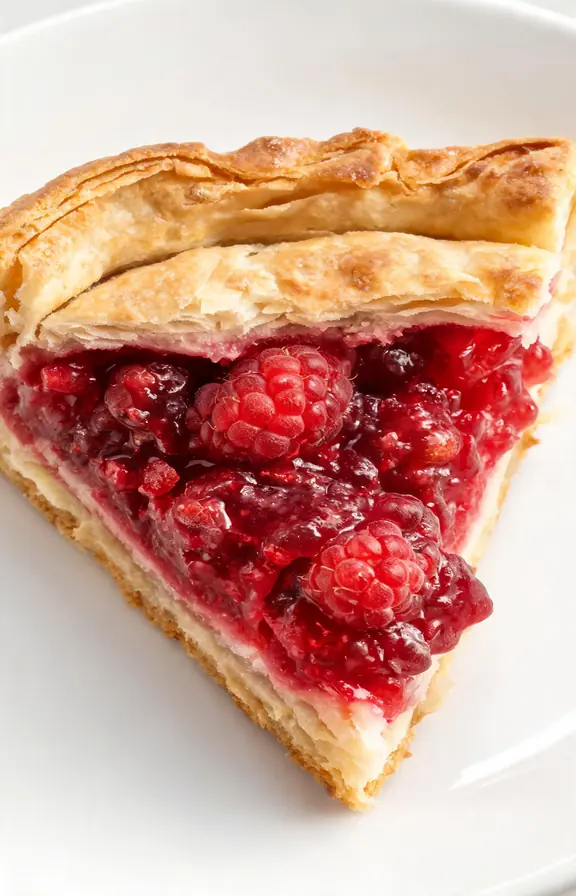
A lattice top does more than look appealing. The open weave lets excess steam escape during baking, which supports everything the macerate-and-reduce method is already doing to control moisture.
Roll your second disc of dough to about an eighth of an inch thick and cut even one-inch strips with a pizza cutter for cleaner edges than a knife typically gives.
Weave the strips directly over the filled pie rather than assembling the lattice separately on parchment. This keeps the strips from stretching or tearing when you transfer them.
Chill the fully assembled pie for 15 minutes before baking. Cold butter in the dough holds its structure better in a hot oven, which keeps the lattice from slumping or fusing into a solid sheet.
Storing, Freezing, and Reheating Raspberry Pie
Let the baked pie cool at room temperature for at least 3 hours before slicing. This is not optional. The starches continue setting as the filling drops in temperature, and cutting too early releases juice that never fully thickened.
Store leftover pie loosely covered in the refrigerator for up to 4 days. The tapioca in the filling helps it hold its set even after chilling and slicing again.
To freeze, wrap the fully cooled, unsliced pie tightly in two layers of plastic wrap, then foil. Freeze for up to 3 months and thaw overnight in the refrigerator before serving.
To reheat individual slices, warm them in a 325°F oven for about 12 minutes rather than the microwave, which can turn the starch-set filling watery again as it heats unevenly.
Frequently Asked Questions
Raspberry Pie Recipe
A double crust raspberry pie with a thick, jammy filling that slices clean thanks to a macerate, drain, and reduce method. No gelatin, no gummy filling, just a controlled cornstarch and tapioca thickener built for raspberries’ high water content.
- 9-inch pie plate
- Fine mesh strainer
- Small saucepan (for reducing juice)
- Large mixing bowl
- Kitchen scale or measuring cups
- Pastry brush (for egg wash)
- Pizza cutter (for lattice strips)
- Pie crust shield or foil strips
- 2 disks all-butter double pie crust, chilled (homemade or store-bought)
- 1 large egg
- 1 tablespoon whole milk
- 1 tablespoon coarse sugar, for topping
- 5 cups (about 24 oz) fresh raspberries, or frozen and unthawed
- 3/4 cup (150g) granulated sugar
- 1/4 teaspoon fine sea salt
- 2 tablespoons (16g) cornstarch
- 1 tablespoon (8g) tapioca starch, plus 1 extra tablespoon if using frozen berries
- 1 tablespoon fresh lemon juice
- 1 tablespoon unsalted butter, cut into small pieces
- Macerate the raspberries In a large bowl, gently toss the raspberries with the granulated sugar and salt. Let sit at room temperature for 30 minutes, stirring once halfway through, until a visible pool of juice collects at the bottom of the bowl. Do not skip this step, since it is what allows the excess liquid to be removed before baking.
- Drain and reduce the juice Pour the macerated raspberries into a fine mesh strainer set over a small saucepan. Let the juice drip through for 5 minutes without pressing the berries, or 10 minutes if using frozen fruit. Set the drained berries aside. Simmer the collected juice over medium heat for 6 to 8 minutes, until reduced by roughly half and syrupy.
- Thicken and combine the filling Remove the reduced juice from the heat. Whisk in the cornstarch and tapioca starch until fully dissolved with no lumps. Fold this thickened syrup back into the drained raspberries along with the lemon juice, stirring gently to coat the berries without crushing them.
- Line the pie plate Preheat the oven to 425°F. Roll out one disk of chilled pie dough and fit it into a 9-inch pie plate, leaving the overhang untrimmed for now. Refrigerate while you finish the filling and roll the second disk.
- Fill and dot with butter Pour the finished raspberry filling into the chilled crust and spread it evenly. Dot the surface with the small pieces of unsalted butter to add richness and help prevent bubbles from forming as it bakes.
- Weave the lattice top Roll the second dough disk to about an eighth of an inch thick and cut into 1-inch strips with a pizza cutter. Weave the strips directly over the filled pie, then trim and crimp the edges. Chill the assembled pie for 15 minutes before baking.
- Egg wash and bake Whisk the egg and milk together and brush over the lattice. Sprinkle with coarse sugar. Place the pie on a baking sheet and bake at 425°F for 15 minutes, then reduce the oven to 375°F and bake for another 35 to 40 minutes, until the crust is deep golden and the filling bubbles slowly through the lattice. Tent with foil if the edges brown too quickly.
- Cool completely before slicing Transfer the pie to a wire rack and cool at room temperature for at least 3 hours before slicing. The filling continues to set as it cools, and cutting too early will release liquid that never finished thickening.
Nutritional values are estimates calculated using standard USDA food composition data. Actual values will vary based on the specific pie crust used, ripeness of the raspberries, and exact slice size after baking. Water content figures referenced in this article are drawn from the USDA FoodData Central public nutrient database.