Our site contains ads and uses Amazon affiliate links. We may earn a small commission at no extra cost to you. We know ads can be distracting, and we’re sorry for any inconvenience they cause. It helps us keep the site running. Thanks for your understanding and supporting us!
Most Southern Buttermilk Pie recipes hand you a list of six ingredients and a bake time.
What they never tell you is why the filling splits, why the top never cracks the way it should, or why your pie looks set in the oven but collapses into a puddle when you slice it.
This article covers the mechanics behind every step: the butter temperature that makes or breaks the custard, the dish material that controls your bottom crust, the exact jiggle that signals doneness, and why that gorgeous crackled top forms at all.
Once you understand what is happening inside the pie as it bakes, you will never overbake or underbake one again.
What Southern Buttermilk Pie Actually Is (And How It Differs from Chess Pie)
Buttermilk pie belongs to a group of Southern “desperation pies” built from pantry staples when fresh fruit was out of season or too expensive.
It traces its roots to England and traveled to the American South with early settlers, where it became a fixture on holiday tables alongside pecan and sweet potato pie.
The confusion with chess pie comes up constantly. Both are custard-style pies with simple ingredient lists. The difference is specific: chess pie uses cornmeal in the filling, which gives it a slightly denser, grittier set.
Buttermilk pie uses a small amount of flour instead, and the lactic acid in the buttermilk gives the custard a distinct, gentle tang that chess pie does not have.
That tang is the entire personality of this pie. It keeps the sweetness from tipping into cloying, and it is what makes people reach for a second slice even after a big holiday meal.
If you enjoy old-fashioned Southern baking, you will notice a similar technique in our guide to making tall, flaky Southern buttermilk biscuits from scratch, where cold butter and minimal mixing are the keys to the right texture.
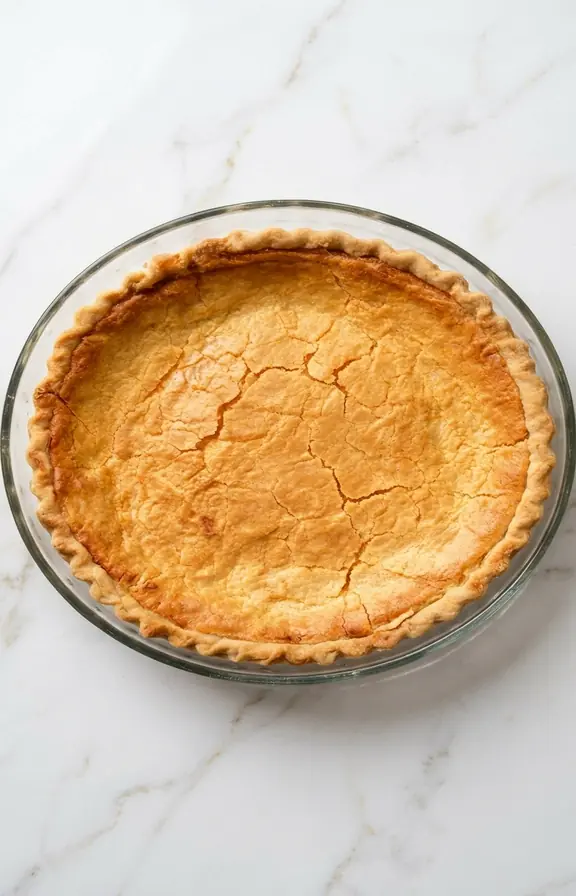
Why the Crackled Top Forms (The Science Nobody Talks About)
That signature crackled, lightly browned top is not an accident. It is the result of two reactions happening at the pie’s surface as it bakes.
First, the sugar near the surface caramelizes slightly at oven temperature, forming the golden color and faint crispness you see on a well-baked pie.
Second, as the custard sets and loses moisture during baking, the surface layer pulls slightly tighter than the interior, creating those delicate cracks.
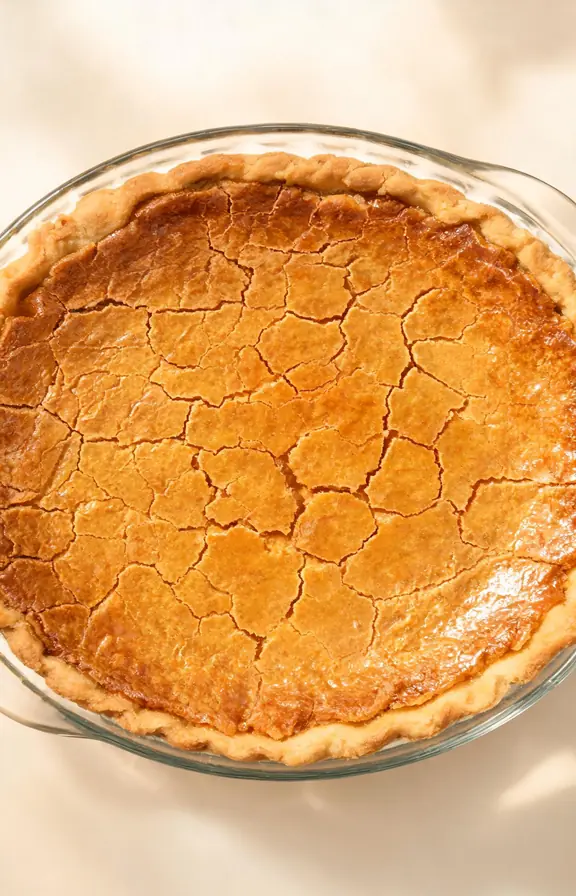
This is the same visual cue that appears on a properly baked crème brûlée or chess pie. If your top comes out completely smooth and pale with no crackle at all, the oven temperature was too low or the baking time was too short.
If the top is deeply brown all the way across with visible bubbling at the edges, the oven was too hot or the pie baked too long. The sweet spot is a uniformly golden surface with hairline cracks that run across most of the filling.
Pie Dish Material: The Difference Between a Crisp Bottom and a Soggy One
This comparison does not appear in any major competitor recipe, and it changes the result significantly depending on what you have in your cabinet.
A glass pie dish conducts heat slowly and evenly, which is ideal for custard pies. You can also watch the bottom crust brown through the dish, which removes all the guesswork about whether it is done underneath.
Glass is the best all-around choice for buttermilk pie and produces a consistently set, evenly browned result.
A ceramic pie dish holds heat longer than glass and distributes it more gently. Custard pies baked in ceramic tend to have a slightly creamier, silkier interior texture because the gentler heat sets the eggs more slowly. The tradeoff is a slower-browning bottom crust.
A metal pie plate heats up the fastest of the three. This can produce an overly dark bottom crust before the custard center fully sets. If metal is your only option, place the pie on a middle rack rather than a lower rack and watch it carefully in the final 10 minutes.
For this recipe, glass or ceramic is strongly recommended. Place the dish on a rimmed baking sheet to catch any drips and to make transferring it in and out of the oven easier.
The Jiggle Test: How to Know When Your Buttermilk Pie Is Actually Done
The jiggle test is the only reliable doneness check for any custard pie, but most recipes describe it vaguely. Here is the precise version.
At around 45 minutes, open the oven and give the dish a gentle shake. Three things can happen. If the entire pie surface moves in a liquid wave from edge to center, it needs significantly more time.
If only the outer 2 to 3 inches is set and the center still wobbles in a loose circle, it needs another 5 to 10 minutes. If only a 2-inch center circle wobbles slowly and the rest of the surface is set and matte-looking, the pie is done.
That 2-inch wobble is intentional. The residual heat from the filling will continue cooking the center as the pie cools on the rack.
Pulling it too early gives you a runny, unsliceable result. Pulling it too late gives you a rubbery, overcooked texture that lacks the silky quality this pie is known for.
An instant-read thermometer inserted into the center of the filling should read between 170°F and 175°F at this stage. Above 180°F and the eggs have overcooked.
Room Temperature vs. Cold: The Right Way to Serve Buttermilk Pie
Unlike most pies, buttermilk pie genuinely changes character depending on how cold it is when you serve it, and the difference matters more than most people realize.
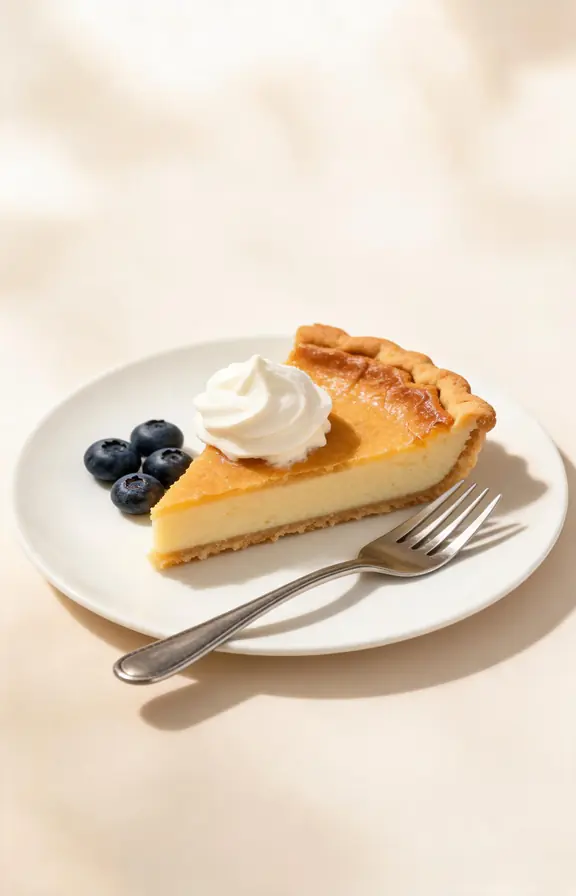
Served at room temperature, the filling is softer, silkier, and the vanilla and buttermilk flavors are more pronounced. The texture is closest to a very smooth panna cotta.
Served cold from the refrigerator, the custard firms up considerably and slices with clean, precise edges.
The tang from the buttermilk becomes slightly sharper, and the overall flavor profile leans more toward a classic cold custard dessert. It is easier to plate beautifully when cold.
Neither is wrong. But if this is your first time making this pie, serve it cold so you can evaluate the texture and flavor more clearly before deciding which temperature you prefer going forward.
For a topping that holds its shape at both temperatures, our stabilized whipped cream frosting that holds all day is the ideal companion for a slice of buttermilk pie, especially for gatherings where the pie will sit out for more than an hour.
Make-Ahead, Storage, and Freezing
Buttermilk pie is one of the best make-ahead desserts in Southern baking. It actually improves after a night in the refrigerator because the custard firms up and the flavors have time to meld.
Bake the pie the day before you need it, cool it completely on a wire rack for at least 2 hours, then cover tightly with plastic wrap and refrigerate. It keeps for up to 4 days in the refrigerator with no loss of quality.
To freeze, cool the pie completely, wrap it tightly in two layers of plastic wrap, and then in a layer of foil. Freeze for up to 2 months. Thaw overnight in the refrigerator.
The texture after thawing is slightly less silky than fresh, but still very good. Do not attempt to re-warm a frozen buttermilk pie in a hot oven as this will cause the custard to weep liquid.
Frequently Asked Questions
Southern Buttermilk Pie
Silky, tangy custard filling with a crackled caramel top, baked in a single flaky pie crust. One-bowl filling, pantry staples only. Serves perfectly chilled or at room temperature.
- 9-inch glass or ceramic pie dish (recommended over metal)
- Large mixing bowl
- Whisk
- Rimmed baking sheet (to place under the pie dish)
- Instant-read thermometer (optional but helpful)
- Wire cooling rack
- Pie crust shield or foil strips
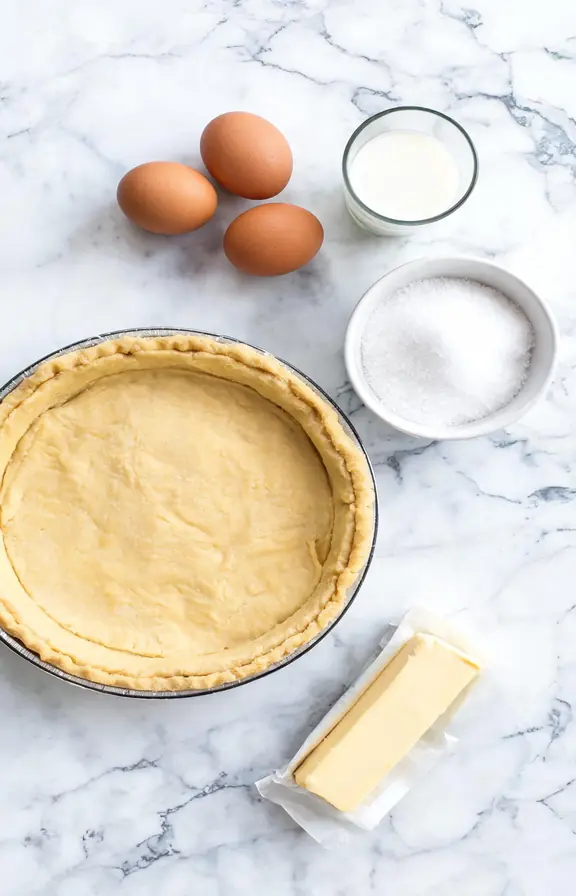
- 1 unbaked 9-inch pie crust (store-bought or homemade)
- 3 large eggs, room temperature
- 1 1/2 cups (300g) granulated sugar
- 3 tablespoons (24g) all-purpose flour
- 1/2 teaspoon fine sea salt
- 1/2 cup (113g) unsalted butter, melted and cooled to room temperature
- 1 cup (240ml) full-fat cultured buttermilk, room temperature
- 2 teaspoons pure vanilla extract
- 1/4 teaspoon freshly grated nutmeg
- 1 teaspoon fresh lemon juice (optional, brightens the tang)
- Prepare the crust Place the unbaked pie crust into a 9-inch glass or ceramic pie dish and crimp the edges as desired. Refrigerate for at least 15 minutes while you prepare the filling. Preheat your oven to 325°F (163°C) with a rack positioned in the lower third. Place a rimmed baking sheet on the rack to preheat alongside the oven.
- Melt and cool the butter Melt the butter in a small saucepan or in the microwave. Pour it into a small bowl and allow it to cool for 10 to 15 minutes. It should feel warm but not hot when you touch the bowl. This step is critical: adding hot butter to the eggs will partially scramble them and break the custard before it even goes in the oven.
- Build the filling In a large mixing bowl, whisk together the eggs until the yolks and whites are fully combined. Add the sugar, flour, and salt and whisk until smooth with no visible lumps of flour remaining. Pour in the cooled melted butter while whisking steadily. Add the buttermilk, vanilla extract, nutmeg, and lemon juice if using. Whisk until the filling is completely uniform in color and texture. Do not beat air into it aggressively; you want a smooth, dense custard base, not a foamy one.
- Fill and protect the crust Remove the chilled pie crust from the refrigerator. Pour the filling slowly into the crust; it will come close to the top. Fit a pie crust shield or strips of foil around the crimped edges to prevent overbrowning during the long bake time. Place the pie dish on the preheated baking sheet in the oven.
- Bake low and slow Bake at 325°F for 45 to 55 minutes. Begin checking at the 45-minute mark. The pie is done when the outer edges are fully set and matte-looking and only a 2-inch circle in the center wobbles slowly when the dish is gently shaken. If using a thermometer, the center should read 170°F to 175°F. Remove the foil shield for the final 10 minutes to allow the top to develop its crackled golden color.
- Cool completely before slicing Transfer the pie to a wire cooling rack and allow it to cool at room temperature for a minimum of 2 hours. The custard continues to set as it cools. Slicing too early will cause the center to run. For the cleanest slices, refrigerate the fully cooled pie for at least 1 hour before cutting. Run a thin knife under warm water and wipe it dry between each slice for perfect, clean edges.
Nutritional values are estimates calculated using standard USDA food composition data. Actual values will vary based on the specific pie crust used, buttermilk fat content, and exact serving size.


