Our site contains ads and uses Amazon affiliate links. We may earn a small commission at no extra cost to you. We know ads can be distracting, and we’re sorry for any inconvenience they cause. It helps us keep the site running. Thanks for your understanding and supporting us!
Most terrazzo cheesecake recipes online are no-bake desserts with no real setting agent, which means they rely purely on chilling and hope. That works fine for a shallow dish, but it falls apart the moment you try to slice tall, clean wedges.
The second problem is timing. Bakers pour warm filling directly over jelly cubes, and the color bleeds through the whole cake within an hour.
This recipe fixes both issues. It walks through:
- why a small amount of bloomed gelatin gives you bakery-clean slices,
- how to size and time your jelly cubes so the colors stay separate,
- the exact cream texture that keeps cubes suspended instead of sunk,
- how to freeze leftovers without turning the mosaic mushy.
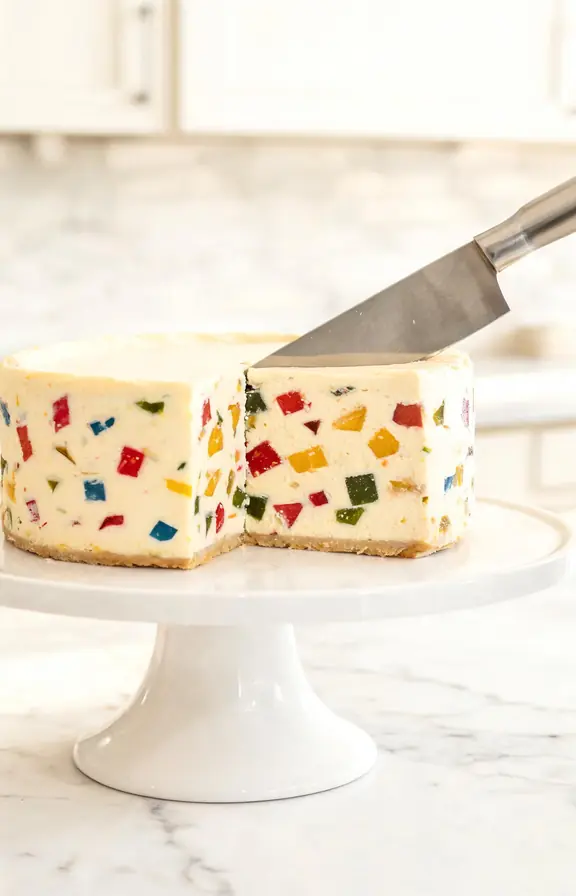
Why Terrazzo Cheesecake Needs a Different Setting Method Than Classic No-Bake Cheesecake
A standard no-bake cheesecake only has to hold itself up. A terrazzo cheesecake has to hold up while also suspending dozens of dense jelly cubes throughout the filling.
Whipped cream alone is not strong enough for that job. Left unsupported, the cubes drift downward as the filling chills, and you end up with a cake that looks striped instead of marbled.
A small amount of bloomed, unflavored gelatin folded into the cream cheese base solves this. It thickens the filling just enough to trap the cubes in place before gravity can pull them down.
The Gelatin Science Behind Slice-Ready Terrazzo Cheesecake
Gelatin is made of long protein chains dissolved in warm liquid. As the mixture cools, those chains stop moving freely and lock into a three-dimensional network that traps liquid and anything suspended in it.
This is exactly what you want happening around your jelly cubes. The network forms fast enough to hold the cubes in place, but it stays soft enough to slice cleanly with a knife.
Getting the Jelly Cube Ratio Right
Too few cubes and the terrazzo look disappears into a plain cheesecake. Too many and the filling can not hold them all in suspension, so extras sink.
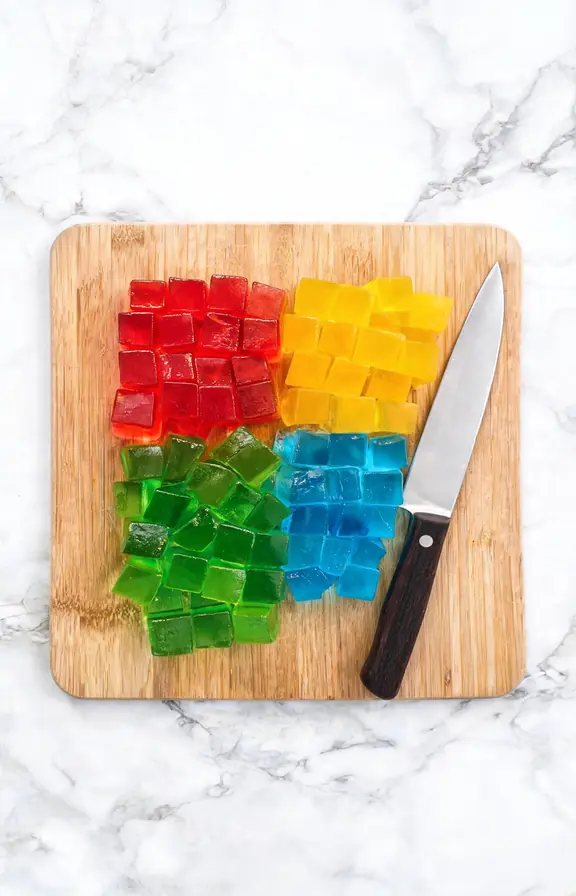
The ratio in this recipe uses four 3-ounce boxes of different flavored gelatin, each set in its own shallow pan, then cut into half-inch cubes. That yields enough color density for a proper mosaic without overloading the filling.
- Cube size: half-inch is ideal. Larger cubes sink faster than the filling can support.
- Color count: 3 to 5 colors reads as a true terrazzo pattern. Fewer looks patchy.
- Fold timing: fold in half the cubes gently before pouring, then scatter the rest over the top so the mosaic shows on both the surface and the cut sides.
Building the Mosaic: Layering and Color Placement Technique
The mosaic pattern comes from how you fold, not from how many colors you use. Overmixing turns distinct cubes into a blurry, single-tone filling.
Fold with a wide rubber spatula using a gentle over-and-under motion. Stop as soon as the cubes are evenly distributed. Ten to twelve folds is usually enough.
Reserve a third of your cubes to scatter across the top surface after pouring. Press them in lightly so they sit just under the surface. This gives you visible color on top and inside every slice.
Springform Pan vs Loose-Bottom Tart Pan: Which Gives Cleaner Terrazzo Slices
This comparison rarely shows up in other terrazzo cheesecake recipes, and it genuinely changes your presentation.
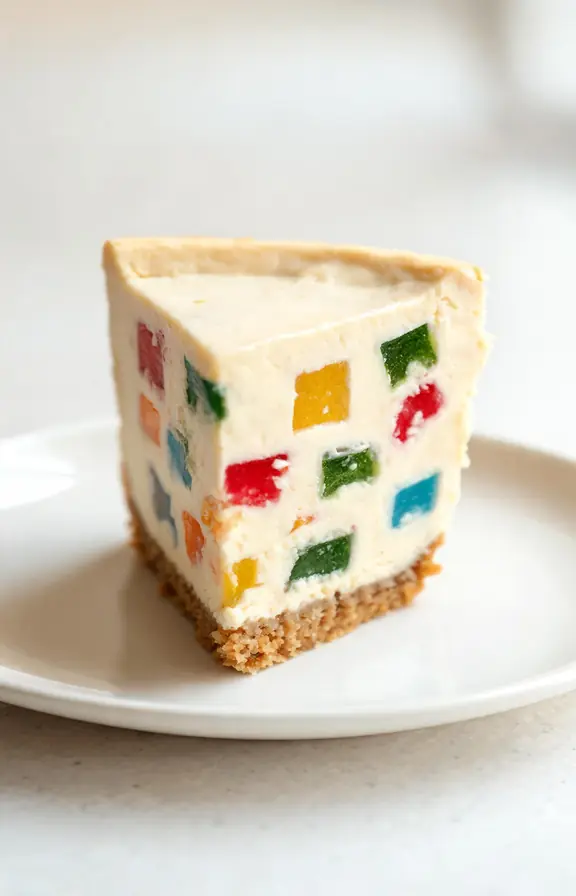
A 9-inch springform pan gives you tall, dramatic slices with a full cross-section of mosaic on every cut side. It is the better choice if you want a showpiece centerpiece dessert.
A loose-bottom tart pan produces a shorter, wider cake with a higher crust-to-filling ratio. It slices into smaller wedges, which works well for large gatherings where you want more, smaller portions.
For the tallest, most photogenic terrazzo pattern, a springform pan is recommended for this recipe.
How to Freeze and Store Terrazzo Cheesecake
This cheesecake freezes well as a whole cake, but individual slices freeze unevenly because the cut faces expose the jelly cubes to air.
To freeze, chill the cake fully first, then wrap the entire uncut cake tightly in plastic wrap followed by foil. Freeze for up to one month.
Thaw overnight in the refrigerator before slicing. Slicing while still partially frozen gives the cleanest mosaic cross-section and prevents the jelly cubes from smearing.
Frequently Asked Questions
Terrazzo Cheesecake
A no-bake cheesecake with colorful jelly cubes suspended throughout a stabilized cream cheese filling. Slices clean, freezes well, and looks like edible mosaic tile.
- 9-inch springform pan
- 4 shallow 8×8 pans (for setting jelly)
- Stand mixer or hand mixer
- Rubber spatula
- Small saucepan or microwave-safe bowl (for gelatin)
- Kitchen scale
- Sharp knife (for cutting cubes and slicing)
- 4 boxes (3 oz each) different flavored gelatin, such as strawberry, lemon, lime, and blue raspberry
- 4 cups (960ml) boiling water, divided
- 2 cups (480ml) cold water, divided
- 2 cups (200g) graham cracker crumbs
- 1/3 cup (75g) unsalted butter, melted
- 2 tablespoons (25g) granulated sugar
- 24 oz (680g) full-fat block cream cheese, room temperature
- 1 cup (200g) granulated sugar
- 1 tablespoon (15ml) pure vanilla extract
- 2 teaspoons (6g) unflavored gelatin
- 3 tablespoons (45ml) cold water, for blooming
- 1 1/2 cups (360ml) cold heavy whipping cream
- Make the jelly cubes In four separate bowls, dissolve each flavor of gelatin in 1 cup of boiling water, stirring for 2 minutes until fully dissolved. Stir 1/2 cup cold water into each bowl. Pour each color into its own shallow 8×8 pan. Refrigerate for at least 3 hours, or until completely firm with no wobble in the center. Cut each pan of set jelly into half-inch cubes and keep chilled until ready to use.
- Make the crust Combine the graham cracker crumbs, melted butter, and sugar in a bowl. Stir until the mixture looks like wet sand. Press firmly into the bottom of a 9-inch springform pan using the back of a spoon. Refrigerate for at least 30 minutes to firm up while you prepare the filling.
- Bloom and melt the gelatin Sprinkle the unflavored gelatin over the cold water in a small bowl. Let sit for 5 minutes until it swells and looks solid. Microwave for 10 to 15 seconds, or warm gently in a saucepan, until fully melted and smooth. Set aside to cool slightly, but do not let it firm up again.
- Beat the cream cheese base In a large bowl, beat the cream cheese and sugar on medium speed for 2 to 3 minutes until completely smooth and lump-free. Add the vanilla extract and mix until combined. With the mixer running on low, slowly pour in the melted gelatin and beat until fully incorporated.
- Whip the cream In a separate cold bowl, whip the heavy cream until it holds soft peaks. Do not whip to stiff peaks, since softer cream folds more easily and holds the jelly cubes in suspension better than an overly firm cream.
- Fold everything together Fold the whipped cream into the cream cheese mixture in two additions, using a wide rubber spatula and a gentle over-and-under motion. Gently fold in two-thirds of the jelly cubes, stopping as soon as they are evenly distributed.
- Assemble and chill Pour the filling over the chilled crust and smooth the top with an offset spatula. Scatter the remaining jelly cubes over the surface and press them in lightly. Cover and refrigerate for at least 6 hours, or overnight for the cleanest slices.
- Slice and serve Run a thin knife around the edge of the pan before releasing the springform ring. Dip a sharp knife in hot water and wipe dry between each cut for clean, mosaic-clear slices.
Nutritional values are estimates calculated using standard USDA food composition data. Actual values will vary based on the specific gelatin brands, cream cheese fat content, and slice size used.