Our site contains ads and uses Amazon affiliate links. We may earn a small commission at no extra cost to you. We know ads can be distracting, and we’re sorry for any inconvenience they cause. It helps us keep the site running. Thanks for your understanding and supporting us!
📊Recipe at a Glance
- Prep Time: 20 minutes
- Cook Time: 8-9 minutes
- Total Time: 1 hour 30 minutes (including cooling and chilling)
- Servings: 10 sandwich cookies
- Diet Type: Vegetarian
- Cuisine: Italian-Inspired
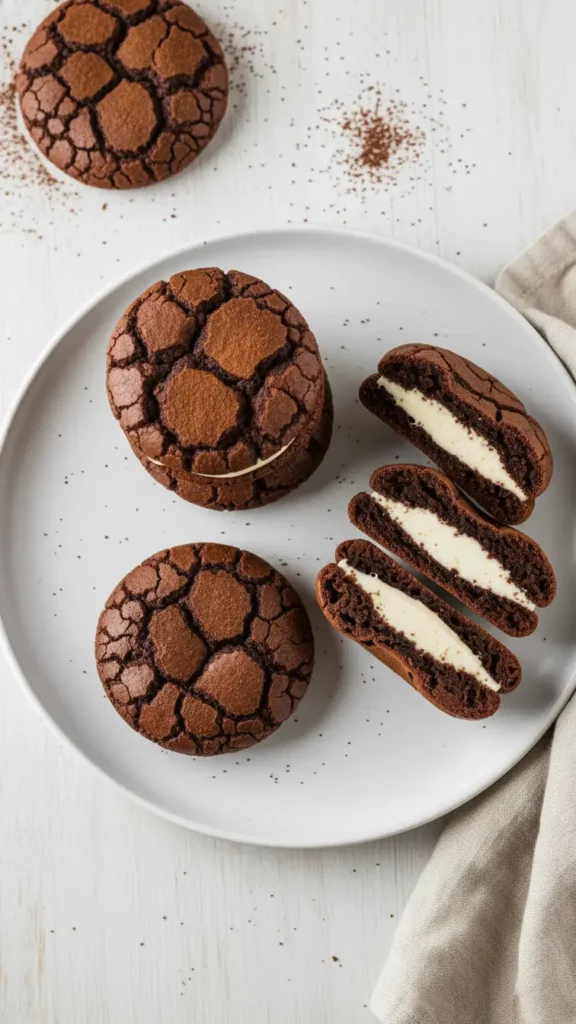
Tiramisu brownie crinkle cookies bring you the best of two desserts in one irresistible bite.
You get the rich chocolate of a brownie mixed with the smooth espresso flavor of tiramisu.
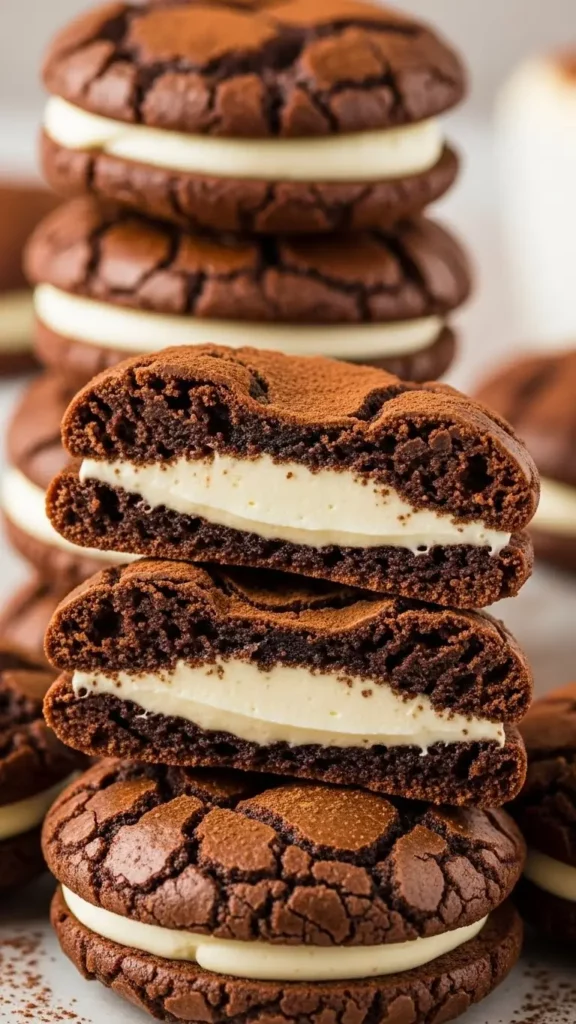
The cookies bake up with those beautiful crinkles you love, giving you a soft, fudgy center every time.
You’ll enjoy how simple they are to make and how impressive they look on a holiday tray or dessert table.
A dusting of cocoa on top ties everything together. These cookies let you enjoy bold flavor without extra effort, and each bite feels like a little taste of something special.
Why This Recipe Stands Out
- The combination of melted dark chocolate and cocoa powder creates an intensely chocolatey flavor that rivals any brownie.
- Browned butter infused with espresso and ground coffee adds a deep, complex coffee flavor without overwhelming the chocolate.
- The signature shiny, crackled cookie tops come from whisking eggs with both caster sugar and light brown sugar.
- Flaked sea salt sprinkled on top before baking balances the sweetness and enhances the chocolate flavor.
- The creamy tiramisu mascarpone filling provides a luxurious contrast to the fudgy cookie.
- Timing and temperature control ensure perfect results every single time.
- No chilling required for the cookie dough, so you can bake fresh cookies in minutes.
- These cookies stay moist and delicious for up to 5 days when stored properly.
Ingredients You’ll Need
For the Brownie Cookies
- 200g dark chocolate (65-70% cocoa solids)
- 125g unsalted butter, diced
- 20g ground coffee (ground finely for espresso)
- 25ml espresso or very strong coffee
- 150g caster sugar
- 100g light brown sugar
- 2 large eggs
- 130g plain flour
- 3 tbsp cocoa powder
- 1 tsp baking powder
- 1/2 tsp fine sea salt
- Flaked sea salt for topping
For the Mascarpone Cream Filling
- 100g mascarpone, cold (straight from the fridge)
- 165g double cream, cold
- 2 tsp vanilla bean paste
- 65g icing sugar
Tools to Use
- 2 large baking sheets
- Parchment paper
- Small saucepan
- Fine mesh sieve
- Heat-proof bowl
- Medium mixing bowl
- Stand mixer or electric hand mixer
- Whisk attachment for mixer
- 2 tablespoon ice cream scoop
- Piping bag with plain round tip (optional)
- Spatula
- Wire cooling rack
- Measuring cups and spoons
- Kitchen scale (highly recommended)
How to Make Tiramisu Brownie Crinkle Cookies
Step-1: Prepare Your Workspace and Preheat
Begin by preheating your oven to 180C (160C fan) or 350F.
Line two large baking sheets with parchment paper and set them aside. Weigh out all your ingredients before you start.
This preparation is essential because timing is critical in this recipe.
When everything is ready and measured, you will be able to work quickly and efficiently.
Step-2: Brown the Butter with Coffee
Place the diced unsalted butter into a small saucepan over medium heat. Watch carefully as it melts.
The butter will first melt completely, then begin to splutter, and finally foam.
When the milk solids sink to the bottom and turn a nutty brown color, immediately remove the pan from the heat.
This nutty aroma is your signal that the butter is perfectly browned.
Pour the browned butter into a bowl with the ground coffee and set aside for exactly 10 minutes.
This resting period allows the coffee grounds to infuse the warm butter.
Step-3: Combine Coffee Butter and Espresso
After 10 minutes have passed, pour the strong espresso or very strong brewed coffee into the coffee-infused butter.
Stir gently to combine. This creates a fragrant coffee-butter mixture that is the soul of your cookies’ flavor.
Step-4: Strain the Coffee Mixture
Pour the coffee butter mixture through a very fine mesh sieve into a heat-proof bowl.
Using the back of a spoon or spatula, press down gently on the coffee grounds to extract as much of the flavorful butter as possible.
You want to capture every drop of that precious coffee-infused butter. Discard the wet grounds.
Step-5: Melt Chocolate into Coffee Butter
Set the heat-proof bowl containing the strained coffee butter over a saucepan of simmering water, creating a double boiler setup.
Make sure the bottom of the bowl does not touch the water.
Add the dark chocolate to the bowl and stir occasionally until it is completely melted.
The chocolate should combine smoothly with the butter.
Once fully melted, remove the bowl from the heat and set it aside to cool for just a few minutes.
Do not let it cool too much, as the temperature matters for the final texture.
Step-6: Whisk Eggs and Sugars
In the bowl of a stand mixer fitted with the whisk attachment, or using an electric hand mixer, combine your eggs and both sugars (caster and light brown sugar).
Whisk on medium-high speed for exactly 5 minutes.
You will notice the mixture becomes lighter in color, thicker, and more voluminous.
This crucial step incorporates air into the batter, which is responsible for creating those beautiful shiny, crackled cookie tops.
Step-7: Combine Dry Ingredients
While the eggs are whisking, mix together your dry ingredients in a separate medium bowl.
Add the plain flour, cocoa powder, baking powder, and fine sea salt.
If your cocoa powder has lumps, sieve it to ensure a smooth batter.
Set this mixture aside until needed.
Step-8: Add Chocolate Mixture to Eggs
Once your eggs and sugars have whisked for exactly 5 minutes, pour the slightly cooled chocolate mixture into the mixer bowl.
Mix on medium speed for about 30 seconds just until combined.
Do not overmix at this stage.
Step-9: Fold in Dry Ingredients
Add the dry ingredients to the chocolate egg mixture and mix very briefly, just until combined.
The batter should look smooth with no streaks of flour remaining.
Use your spatula to give one final mix, scraping the bottom and sides of the bowl to ensure everything is evenly incorporated.
This is important for uniform cookies.
Step-10: Scoop Cookies onto Trays
Using a 2 tablespoon sized ice cream scoop, form cookies on your prepared baking sheets.
Make sure to leave plenty of space between each cookie, at least 3 inches apart, as they will spread considerably during baking.
This spacing is crucial for even cooking and that signature crinkled appearance.
Step-11: Add Salt and Bake
Sprinkle each cookie with a tiny pinch of flaked sea salt before placing the trays into the preheated oven.
Bake for 8-9 minutes. The cookies should look like they have a wonderful crinkled, shiny top and are slightly domed in the center.
Do not overbake them.
Step-12: Cool the Cookies
Remove the cookies from the oven and let them sit on the baking trays for at least 20-30 minutes.
They will be very soft when they come out, and they will collapse slightly as they cool.
This collapse is exactly what you want, as it creates that perfect fudgy center.
Only after they have cooled completely should you transfer them to a wire rack or an airtight container.
Step-13: Prepare the Mascarpone Cream Filling
Once your cookies are completely cooled, prepare the tiramisu mascarpone filling.
Add the cold mascarpone, cold double cream, vanilla bean paste, and icing sugar to your mixer bowl.
Start whisking on low speed to break up the mascarpone slightly, then raise to medium speed.
This entire process should take no more than 30 seconds.
The key to success is that both the mascarpone and cream must be cold straight from the fridge.
If they warm up, the mascarpone may split and the filling will not hold together.
Step-14: Whisk Filling to Soft Peaks
Continue whisking until the mixture forms soft peaks.
If you are planning to pipe the filling onto cookies, whisk to a slightly looser consistency that is just beginning to form peaks, as it will thicken slightly as you pipe.
If you prefer to use a spoon to fill your cookies, you can whisk until you achieve full soft peaks.
Step-15: Assemble Sandwich Cookies
Using a piping bag fitted with a plain round tip or simply using a spoon, pipe.
Or place a generous round of the mascarpone cream filling onto the flat side of half of your cooled cookies.
Take another cookie and press it gently on top, pressing until the filling almost reaches the edges.
This creates your beautiful sandwich cookie.
Step-16: Chill and Serve
Refrigerate the assembled cookies for at least one hour to allow the filling to firm up slightly.
If you are not serving immediately, keep the cookies in a sealed container in the refrigerator.
Allow them to come to room temperature for a few minutes before serving to bring out the best flavors.
Related Recipes You’ll Love to Try
- Snowy Holiday Showstopper: No-Bake White Christmas Wreath
- Gnome Mini Cheesecakes: Meet the Cutest Holiday Treat Ever
- Easy Strawberry Chocolate Pine Cones: Magical Winter Dessert
- No-Bake Eggnog Cheesecake with Gingersnap Crust
Nutritional Information
Per serving (approximately one sandwich cookie):
- Calories: 280-320
- Protein: 4g
- Fat: 16g
- Carbohydrates: 34g
- Sodium: 85mg
Note: Nutritional values are estimates based on standard ingredients and may vary depending on specific brands used and exact portion sizes.
Tips for Success
- Use a kitchen scale for measuring ingredients instead of cups and spoons, as weight measurements ensure consistent results every single time.
- Keep your mascarpone and double cream cold straight from the fridge to prevent the filling from splitting or becoming grainy.
- Time the whisking of eggs and sugar exactly as specified to create those signature shiny, crackled tops on your cookies.
- Do not skip the browned butter step, as it adds a nutty depth that transforms the cookies into something special.
- Space your cookies at least 3 inches apart on the baking sheets so they can spread evenly without touching.
- Invest in a reliable oven thermometer to ensure your oven is at the correct temperature for perfect baking.
- Bake all your cookies at once rather than in batches, as the dough will begin to set at room temperature and won’t spread properly.
- Preheat your oven fully before baking to ensure the cookies spread and crinkle beautifully.
- If your chocolate mixture is too hot when added to the eggs, it will cook the eggs too much and the cookies will be dense.
- Do not overmix the batter after adding the dry ingredients, as this can make the cookies tough instead of tender.
Common Mistakes to Avoid
- Allowing the chocolate and butter mixture to cool too long before adding to the eggs will result in flat, dense cookies without shine or crinkles.
- Adding the chocolate mixture when it is too hot will cook the eggs and prevent proper spreading, creating dull-looking cookies without the desired crackled top.
- Not whisking the eggs and sugar for the full 5 minutes will prevent the formation of those beautiful shiny, crackled tops.
- Placing cookies too close together on the baking sheet will cause them to merge as they spread, destroying the individual cookie shape.
- Baking cookies in separate batches instead of all together means later batches will sit at room temperature and won’t spread or crinkle properly.
- Using room temperature mascarpone and cream for the filling will cause the mixture to split and become grainy instead of creamy.
- Overmixing the filling will make it too thick and difficult to work with, or it may cause the mascarpone to break down.
- Overbaking the cookies will result in hard, crispy cookies instead of soft, chewy ones with fudgy centers.
- Skipping the flaked sea salt topping will diminish the complexity of flavors and the contrast with the chocolate.
- Assembling the cookies while they are still warm will soften the filling and make the cookies difficult to stack.
Creative Serving Ideas
- Dust the finished sandwich cookies lightly with cocoa powder and a tiny amount of powdered sugar for an elegant, bakery-style presentation.
- Serve with a strong espresso or cappuccino for an afternoon tea break that feels like a special occasion.
- Pair with vanilla ice cream or gelato for a dessert that combines hot and cold, creamy and crunchy textures.
- Arrange on a beautiful platter with fresh berries for a sophisticated dessert spread at dinner parties.
- Package in decorative boxes or bags tied with ribbons to create impressive homemade gifts for coffee lovers.
- Serve at room temperature for the softest, most indulgent eating experience that showcases the fudgy cookie texture.
- Create a tiramisu-themed dessert board by serving alongside ladyfinger cookies, mascarpone dollops, and fresh mint.
- Offer as petit fours at the end of a dinner party for an elegant touch that guests will remember.
- Stack three cookies high and tie with twine for an Instagram-worthy dessert centerpiece.
- Serve slightly chilled from the refrigerator for a filling that is firmer and more pronounced in flavor.
Frequently Asked Questions
Can I Make These Cookies Ahead of Time?
Yes, you can bake the cookies up to 3 days ahead and store them in an airtight container at room temperature.
Assemble with the filling no more than 1-2 hours before serving, then refrigerate until you are ready to eat them.
Can I Use Different Types of Chocolate?
It is best to use dark chocolate with 65-70% cocoa solids as specified, as this percentage provides the right balance of chocolate flavor and sweetness.
Using milk chocolate will make the cookies too sweet, while very dark chocolate above 85% will be too bitter.
What If I Do Not Like Coffee?
You can reduce the ground coffee and espresso by half or omit them entirely, though this will significantly alter the flavor profile.
Consider adding a tablespoon of instant vanilla pudding powder or an extra teaspoon of vanilla bean paste to compensate for the lost depth of flavor.
Can I Freeze These Cookies?
Yes, you can freeze the baked unfilled cookies for up to one month in an airtight container.
Thaw at room temperature for a few hours before filling and serving.
How Long Will These Cookies Stay Fresh?
These cookies are best enjoyed within the first 3 days but will keep for up to 5 days in an airtight container stored in the refrigerator.
The filling will keep them moist, though the cookies will gradually firm up over time.
Can I Use a Hand Mixer Instead of a Stand Mixer?
Absolutely. An electric hand mixer works just as well as a stand mixer.
Just make sure to whisk for the full 5 minutes to incorporate enough air into the batter.
What If My Filling Becomes Too Thick?
If your filling has become too thick to pipe or spread, let it sit at room temperature for just a few minutes to soften slightly.
You can also whisk it briefly on low speed to loosen it up a bit.
Can I Make This Recipe without the Salt Topping?
While you can make them without the salt, the flaked sea salt adds a beautiful contrast and brings out the chocolate flavor in an unexpected way. It is highly recommended to include it.


