Our site contains ads and uses Amazon affiliate links. We may earn a small commission at no extra cost to you. We know ads can be distracting, and we’re sorry for any inconvenience they cause. It helps us keep the site running. Thanks for your understanding and supporting us!
📊Recipe at a Glance
- Prep Time: 15 minutes
- Cook Time: 5 minutes
- Total Time: 20 minutes
- Servings: 12 to 16 servings
- Diet Type: Vegetarian
- Cuisine: American
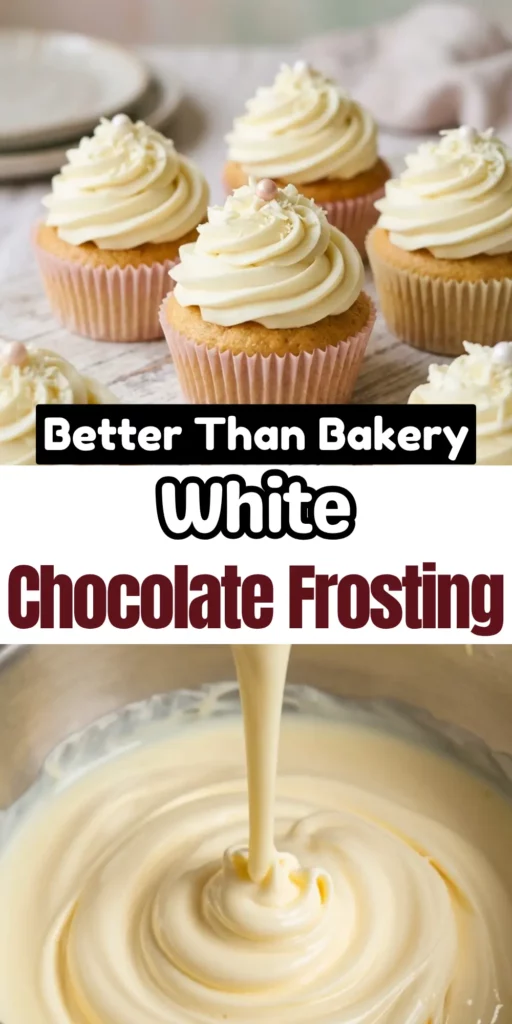
Most frostings look gorgeous in photos but disappoint at the first bite.
They are either too sweet, too greasy, or completely lacking in real flavor. Sound familiar?
The problem is most recipes rely on sugar alone to carry the taste. This white chocolate frosting fixes all of that.
Real melted white chocolate gives it a deep, buttery richness that powdered sugar simply cannot replicate.
It pipes beautifully, spreads smoothly, and tastes like it came straight from a professional bakery.
Once you try this recipe, every other frosting will feel like a compromise.
Why This Recipe Stands Out
- Real White Chocolate Flavor: This recipe uses actual white chocolate bars, not chips, for a deeply rich and authentic taste.
- Perfectly Balanced Sweetness: The ratio of butter to chocolate to sugar is carefully calibrated so it is never tooth-achingly sweet.
- Silky, Smooth Texture: Melting the chocolate properly gives you a frosting that glides effortlessly onto any cake or cupcake.
- Incredibly Versatile: It pairs beautifully with vanilla, lemon, raspberry, chocolate, and red velvet cakes.
- Ready in 20 Minutes: No chilling, no complicated steps, and no special skills required.
- Pipes Like a Dream: It holds its shape beautifully for decorative swirls and rosettes.
- Easy to Customize: Add gel food coloring, a pinch of salt, or a splash of vanilla to make it completely your own.
Ingredients You’ll Need
- 6 oz (170g) white chocolate baking bars, roughly chopped (such as Baker’s or Ghirardelli)
- 1 cup (226g) unsalted butter, softened to room temperature
- 3 to 4 cups (360 to 480g) powdered sugar, sifted
- 3 to 4 tablespoons heavy cream or heavy whipping cream
- 1 teaspoon pure vanilla extract
- 1 pinch of salt
Tools to Use
- Microwave-safe bowl or double boiler setup
- Stand mixer or hand mixer
- Paddle attachment
- Rubber spatula
- Sifter or fine mesh strainer
- Measuring cups and spoons
- Piping bag and piping tips (optional)
- Offset spatula
How to Make the White Chocolate Frosting
Step-1: Melt the White Chocolate
Add the chopped white chocolate to a microwave-safe bowl.
Microwave it in 30-second increments at 50% power, stirring well after each interval.
Continue until the chocolate is completely smooth and silky.
Do not rush this step or the chocolate will burn and seize.
Set the melted chocolate aside and let it cool at room temperature for at least 10 to 15 minutes.
The chocolate must not be hot when added to the butter, or it will melt everything and ruin the texture.
Step-2: Beat the Butter
Place the softened butter in your stand mixer bowl fitted with the paddle attachment.
Beat the butter on medium speed for about 2 minutes.
It should look pale, creamy, and fluffy before you move to the next step.
Properly beaten butter is the secret to a light and airy frosting.

Step-3: Add the Powdered Sugar
Turn the mixer down to its lowest speed.
Gradually add the sifted powdered sugar, about half a cup at a time.
Mix slowly to prevent a powdery sugar cloud from erupting in your kitchen.
Scrape down the sides of the bowl with your rubber spatula as needed.
Once all the sugar is added, increase the speed to medium and beat for one more minute.
Step-4: Add Vanilla and Salt
Add the vanilla extract and a small pinch of salt to the bowl.
Mix on medium speed for about 30 seconds.
The salt balances the sweetness and deepens the overall flavor beautifully.
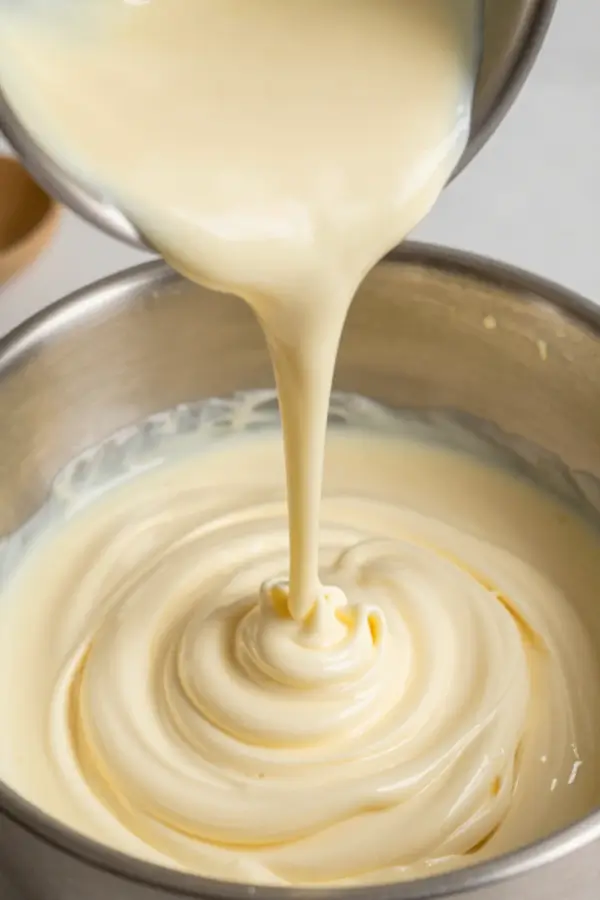
Step-5: Pour in the Cooled White Chocolate
Reduce the mixer speed to low.
Slowly pour in the cooled, melted white chocolate in a steady stream.
Do not add it all at once or the frosting may become lumpy.
Once added, increase the speed to medium and mix for one full minute.
Stop the mixer and scrape down the sides of the bowl thoroughly.
Step-6: Adjust the Consistency
Add the heavy cream one tablespoon at a time.
Mix on medium speed after each addition.
For a stiffer frosting suitable for piping, use less cream.
For a softer, spreadable frosting, add one or two extra tablespoons.
Beat on medium-high speed for a final 30 seconds to bring everything together into a cloud-like, glossy finish.
Your frosting is now ready to use immediately.
Related Recipes You’ll Love to Try
- Easy Cool Whip Cream Cheese Frosting: Beats Buttercream Every Time
- Rich & Egg-Free Cookie Dough Frosting That Tastes Just Like Raw Dough
- Best Fluffy Strawberry Buttercream Frosting with Fresh Strawberries
- Best Sugar Cookie Frosting for Perfect Cookies Every Time
Nutritional Information
Estimated per serving (based on 14 servings)
| Nutrient | Amount |
|---|---|
| Calories | 280 kcal |
| Protein | 1g |
| Fat | 18g |
| Carbohydrates | 30g |
| Sodium | 20mg |
Note: Nutritional values are estimates and will vary depending on specific brands used.
Tips for Success
- Always Use White Chocolate Bars, Not Chips: Chips contain stabilizers that prevent smooth melting and can leave your frosting grainy and uneven.
- Let Your Butter Come to Room Temperature Naturally: It should be soft enough to press a finger into, but not greasy or melting.
- Cool the Chocolate Completely Before Adding It: Hot chocolate will melt the butter and turn your frosting into a soupy, runny mess.
- Sift Your Powdered Sugar: This removes lumps and guarantees a silky, smooth final texture every single time.
- Use Heavy Cream, Not Milk, for the Creamiest Results: The higher fat content creates a richer, more luxurious mouthfeel.
- Beat The Butter Long Enough: A full two minutes of beating is what gives the frosting its light and fluffy character.
- Add Cream Gradually: You can always add more liquid, but you cannot take it out once it is in the bowl.
- Make It Ahead of Time: This frosting stores beautifully in the refrigerator for up to one week in an airtight container. Bring it back to room temperature and re-whip before using.
Common Mistakes to Avoid
- Using White Chocolate Chips Instead of Bars: Chips are formulated to hold their shape and do not melt into the smooth consistency this frosting requires.
- Adding Hot Melted Chocolate to the Butter: This is the number one reason frostings fail. Always let your melted chocolate cool for at least 10 to 15 minutes first.
- Over-Whipping the Frosting: Too much air creates a frosting full of bubbles that is difficult to spread smoothly on a cake.
- Skipping the Sifting Step: Unsifted powdered sugar almost always creates lumps that are nearly impossible to remove later.
- Using Cold Butter Straight from the Fridge: Cold butter does not cream properly and can cause the chocolate to harden into tiny chunks inside the frosting.
- Adding Too Much Cream Too Fast: This can make the frosting too loose and runny to pipe or spread neatly.
- Frosting a Warm Cake: Always make sure your cake is completely cooled before applying the frosting, or it will slide right off.
- Not Scraping the Bowl: Unmixed bits of butter or sugar hiding at the bottom of the bowl will create an inconsistent frosting texture.
Creative Serving Ideas
- Classic Birthday Cake Topping: Pile generous swirls on a white or yellow vanilla cake for a showstopping celebration centerpiece.
- Lemon Cake Pairing: Spread a thick layer onto a tangy lemon cake for a gorgeous sweet-tart contrast that is absolutely irresistible.
- Raspberry Cupcakes: Pipe tall rosettes onto raspberry or strawberry cupcakes to balance the fruit tartness with creamy white chocolate richness.
- Red Velvet Cake: Replace traditional cream cheese frosting with this white chocolate version for an elevated and sophisticated twist.
- Chocolate Cake Filling: Use it as a decadent filling between dark chocolate cake layers for a stunning flavor contrast.
- Cookie Sandwich Filling: Spread a generous layer between two soft sugar cookies for an indulgent, bakery-style treat.
- Cupcake Filling: Hollow out the center of a baked cupcake and pipe this frosting inside before topping with more frosting on the outside.
- Drip Cake Accent: Thin a small portion with extra cream and drizzle it over a frosted cake for an elegant, professional-looking drip effect.
Frequently Asked Questions
Can I Use White Chocolate Chips Instead of a Baking Bar?
It is not recommended to use white chocolate chips as a substitute.
Chips contain stabilizers that prevent them from melting into the smooth, silky texture this frosting needs.
Always use quality white chocolate baking bars like Baker’s or Ghirardelli for the best results.
Why Did My Frosting Turn Out Lumpy?
Lumpy frosting is almost always caused by adding hot melted chocolate to cold or room-temperature butter.
The temperature difference causes the chocolate to seize and harden into small chunks.
Always allow your melted chocolate to cool for at least 10 to 15 minutes before adding it to the frosting.
How do I Store White Chocolate Frosting?
Store the frosting in an airtight container in the refrigerator for up to one week.
You can also freeze it for up to three months in a freezer-safe bag or container.
When ready to use, let it return to room temperature and re-whip it briefly before applying.
Can I Color This Frosting?
Yes, you can absolutely add color to this frosting.
Use gel food coloring rather than liquid food coloring for the best results.
Liquid coloring in large amounts can thin out the frosting and change its consistency.
Is This Frosting Too Sweet?
This recipe is designed to be pleasantly sweet without being overwhelming.
If you find it too sweet, simply add a small pinch of extra salt and mix it in completely.
You can also reduce the powdered sugar by half a cup and increase the heavy cream slightly to compensate.
How Much Frosting does This Recipe Make?
This recipe makes approximately 2.5 to 3 cups of frosting.
That is enough to generously frost 12 to 16 cupcakes or cover a 9×13 inch sheet cake.
For a two-layer round cake, simply increase the recipe by half for full coverage.
Can I Make This Frosting Without a Stand Mixer?
Yes, a hand mixer works perfectly well for this recipe.
The process and technique remain exactly the same as with a stand mixer.
Just make sure to scrape down the sides of the bowl frequently for an even mix.


