Our site contains ads and uses Amazon affiliate links. We may earn a small commission at no extra cost to you. We know ads can be distracting, and we’re sorry for any inconvenience they cause. It helps us keep the site running. Thanks for your understanding and supporting us!
Most cast iron berry cobbler recipes skip the most important step: preheating the skillet before the batter ever touches it.
That single omission is the difference between a pale, cake-like cobbler and one with a deeply caramelized base that holds its shape when you scoop it.
This recipe uses a hot skillet technique borrowed from Southern cast iron baking.
The cast iron heats in the oven first, butter melts directly in the pan, and cold batter hits a 400-plus degree surface the moment it goes in. The result is a crisp, lacy-edged base that forms in the first two minutes of baking.
Mixed berries go on top, not mixed in. The juice sinks through the batter during baking, swirling the filling and topping into a single layer you scoop rather than slice. Ready in 30 minutes from start to table.
Why Cast Iron Changes Everything for Berry Cobbler
A standard ceramic or glass baking dish heats from the outside in. The batter sits in a cold vessel and warms gradually as the oven’s air temperature rises around it. The bottom of a cobbler made this way is soft and pale, identical to the top.
Cast iron preheated in the oven works differently. The metal holds heat at the surface level. When cold batter hits a 425°F cast iron pan, the base of the batter sears on contact.
This creates an entirely different textural zone at the bottom of the cobbler: slightly chewy, lightly caramelized, and structurally distinct from the soft, pillowy top.
If you enjoy berry desserts that use the same fruit-first logic in a different format, our mixed berry crumble with brown sugar oat topping shows how to manage berry moisture in a baking dish setting without the hot-pan technique.
The Berry Filling: Why You Macerate First
Mixed berries release an unpredictable amount of juice depending on variety, ripeness, and whether they are fresh or frozen. A blueberry releases far less juice than a blackberry. A frozen raspberry releases more than a fresh one.
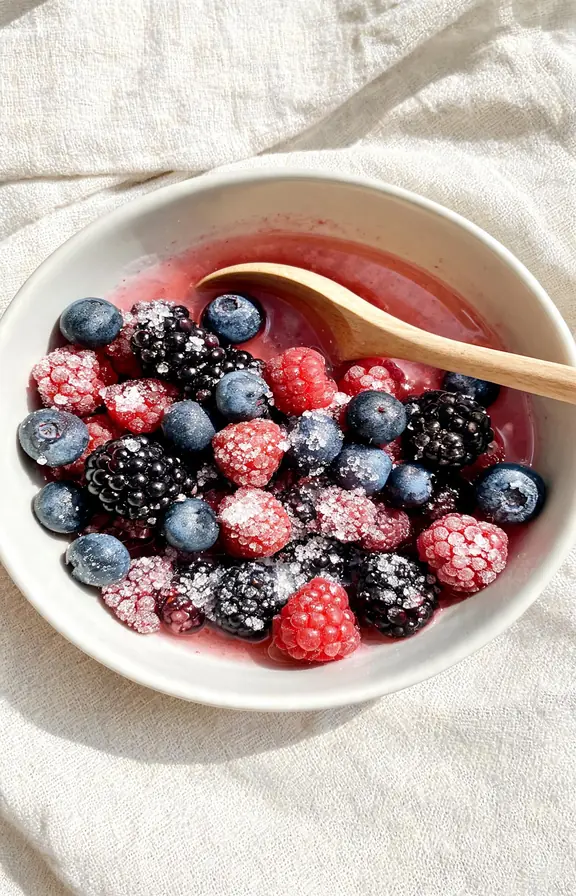
Macerating the berries before baking solves this. Toss the berries with sugar and a tablespoon of lemon juice and let them sit for five minutes while the oven heats and you mix the batter.
The sugar draws juice out of the fruit in a controlled way. That pooled juice is what sinks into the batter during baking and creates the signature swirled interior of a classic cobbler.
Do not thicken the berry filling with cornstarch for this recipe. Unlike a crumble or crisp where the filling needs to set into a scoopable layer, cobbler filling is meant to be loose and syrupy.
The batter absorbs the excess juice as it bakes. Adding cornstarch turns the filling stiff and prevents it from integrating with the batter layer beneath it.
For a blueberry-forward version that leans into the fruit rather than the batter, our no-mixer blueberry muffins ready in under 30 minutes use the same maceration logic to concentrate blueberry flavor before baking.
Choosing Your Berry Mix: What Ratio Works in a Skillet
The ideal mix for a 10-inch cast iron cobbler is roughly two parts blueberry to one part blackberry and one part raspberry.
Blueberries have enough structure to hold their shape through baking. Blackberries add tartness and color. Raspberries break down into the syrup that flavors the batter.
Strawberries work if quartered small and limited to no more than one quarter of your total berry volume.
They are high in water and low in structural pectin, which means they collapse into the batter rather than holding any shape. In small quantities that is fine. In large quantities the filling turns watery.
Frozen berries are a reliable substitute year-round. Add them directly from frozen.
Thawed frozen berries have already released their juice and turn to mush quickly in the oven. If using frozen, increase the maceration time to eight minutes and expect slightly more liquid in the final cobbler.
According to the USDA FoodData Central database, mixed berries provide a meaningful source of vitamin C and dietary fiber per serving, making this cobbler one of the more nutritionally grounded skillet desserts you can bake.
The Batter: What Makes It Different from a Crumble or Crisp
Cobbler topping is a pourable, milk-based batter, not a dry rubbed mixture. That distinction matters because the batter behaves like a thin cake: it rises around the fruit rather than sitting on top of it.
The key ratio is one cup of flour to one cup of milk to one cup of sugar, with melted butter mixed in. This produces a thin batter that spreads easily and rises enough in the oven to encapsulate the berry filling without drowning it.
Do not overmix. Stir until the flour just disappears. Overmixed cobbler batter develops gluten, which makes the finished texture dense and chewy in the wrong way. A few lumps in the batter are fine and actually preferred.
If you want to understand how a dry topping approach compares, our fresh peach crumble with a golden buttery oat topping uses the cold butter rubbing method rather than a poured batter, giving you a completely different textural outcome from the same style of fruit dessert.
How to Serve, Store, and Reheat Cast Iron Berry Cobbler
Let the cobbler rest in the skillet for at least 10 minutes before serving. The batter continues to set as it cools and becomes significantly easier to scoop cleanly. Directly from the oven it will look loose and almost underdone in the center. That is normal.
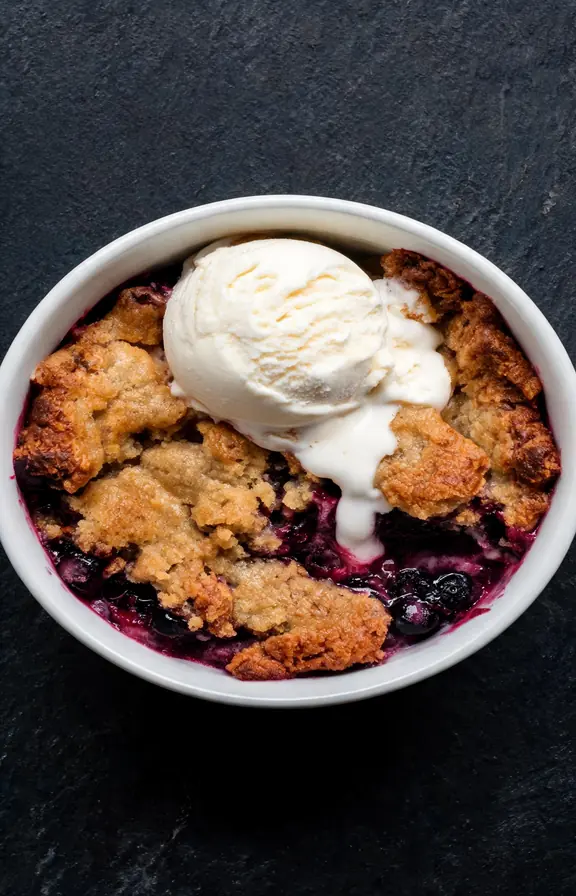
Serve with vanilla ice cream directly in the skillet at the table, or scoop individual portions into bowls. The cold ice cream against the warm cobbler is the standard for good reason: the temperature contrast makes both components taste sharper and more distinct.
Cover and store leftovers at room temperature for up to two days or refrigerated for up to four days. The cobbler will absorb any remaining berry juice as it sits, which deepens the flavor.
Reheat individual portions in a 350°F oven for 8 minutes to restore the edge texture. Microwave reheating softens the crust entirely but the flavor is unaffected.
Cast iron holds residual heat for a long time after baking. If you are serving directly from the skillet, use a trivet and warn guests that the handle stays hot for 20 minutes after it leaves the oven.
Frequently Asked Questions
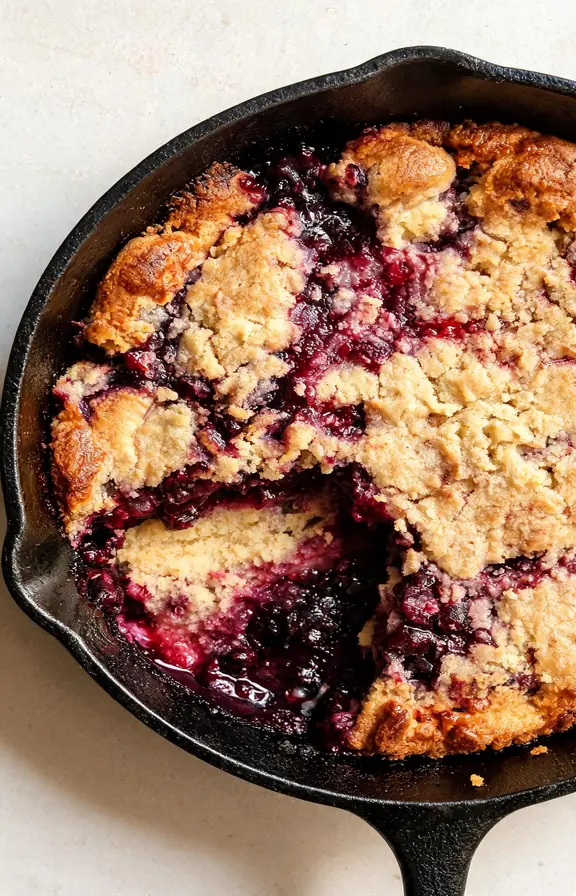
Cast Iron Berry Cobbler
Mixed berry cobbler made in a preheated cast iron skillet. Ready in 30 minutes, no mixer needed, with a caramelized base layer only cast iron can produce.
- 10-inch cast iron skillet
- Large mixing bowl
- Medium mixing bowl
- Whisk
- Measuring cups and spoons
- Oven mitts (the skillet handle stays hot for 20 minutes)
- 3 cups (about 420g) mixed berries (blueberries, blackberries, raspberries)
- 3 tablespoons (38g) granulated sugar
- 1 tablespoon (15ml) fresh lemon juice
- 1/4 teaspoon fine sea salt
- 1 cup (125g) all-purpose flour
- 1 cup (200g) granulated sugar
- 1 cup (240ml) whole milk
- 1 teaspoon baking powder
- 1/4 teaspoon fine sea salt
- 1/2 teaspoon pure vanilla extract
- 6 tablespoons (85g) unsalted butter, for the skillet
- Preheat oven and skillet Place your 10-inch cast iron skillet on the center rack. Preheat the oven to 425°F (220°C) with the skillet inside. Allow the skillet to heat for the full 15 minutes while you prepare the batter and berries. This step is not optional.
- Macerate the berries In a medium bowl, combine the mixed berries, 3 tablespoons sugar, lemon juice, and 1/4 teaspoon salt. Stir gently and set aside. Let the mixture sit for at least 5 minutes while the oven heats. The sugar will draw out juice from the berries. This loose, syrupy mixture is exactly what you want.
- Mix the batter In a large bowl, whisk together the flour, 1 cup sugar, baking powder, and 1/4 teaspoon salt. Pour in the milk and vanilla extract. Whisk until the flour just disappears. A few small lumps are fine. Do not overmix. The batter will be thin, similar to pancake batter. Set near the oven.
- Butter the hot skillet and pour the batter Using oven mitts, carefully pull the hot skillet from the oven. Add the butter directly to the skillet. It will melt almost instantly. Swirl the skillet to coat the base and sides. Immediately pour the batter into the center of the hot buttered skillet. Do not stir. The batter will begin to set at the edges within seconds.
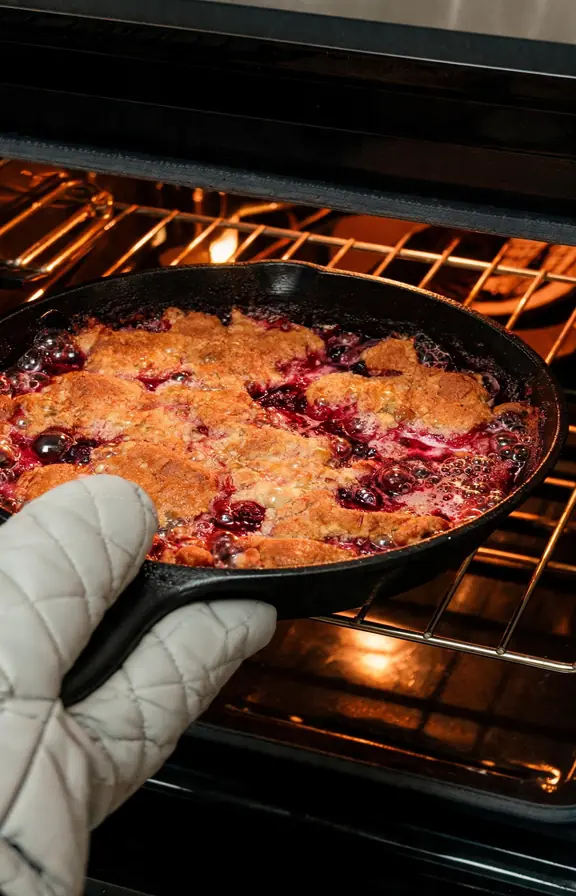
- Add the berries and bake Spoon the macerated berry mixture evenly over the batter. Include all the juice from the bowl. Do not stir. Slide the skillet back into the oven. Bake at 425°F for 20 to 22 minutes, until the top is golden brown, the edges against the skillet wall are deeply caramelized, and the berry filling is actively bubbling through the center.
- Rest and serve Remove the skillet from the oven and place on a trivet. The handle will remain very hot. Allow the cobbler to rest for 10 minutes before scooping. The batter continues to set during this time. Serve warm directly from the skillet with vanilla ice cream or cold heavy cream poured over each portion.
Nutritional values are estimates calculated using standard USDA food data. Actual values may vary based on specific berry varieties used, whether fresh or frozen fruit is substituted, butter amount absorbed during baking, and individual serving size.